
We're sorry
There was an error adding this product to your cart. Please close this window and try again.

In the fun video below, Bernard Shondell shows you how to capture the sweet taste of the season with an easy (and edible!) cookie tree that looks just like our 2015 Season’s Treatings Keepsake Ornament. Made with stacked sugar cookies, this Christmas cookie tree makes a festive centerpiece or homemade food gift.
Inspired? Create and share by tagging @hallmarkstores.
Delicious, versatile and fit for nearly any dessert occasion, it’s no secret that cookies are pretty awesome. And whe...
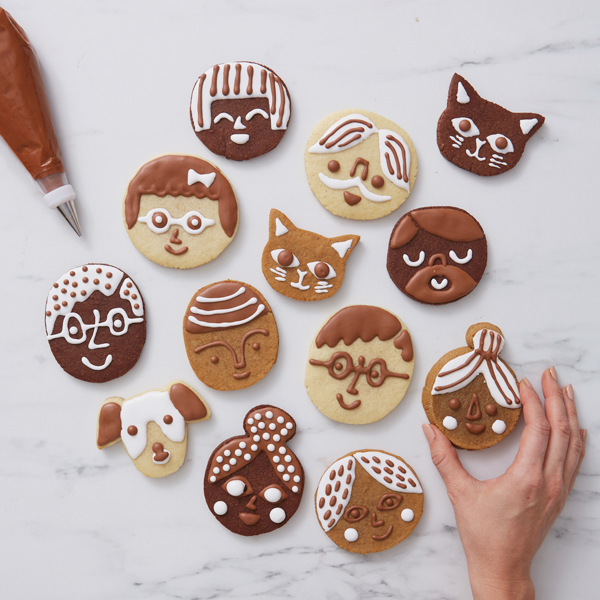
Bakers gonna bake, y'all. And if you're one of them, you already know homemade Christmas cookies are the best gifts y...

When Hallmark needs recipes for baked goods, we go straight to Bernard Shondell. These crispy, cocoa-y cookies are...

Festive Christmas cookies are a personal (and tasty!) way to spread holiday cheer to neighbors and friends and to ...

Don’t these remind you of a walk in a snowy winter woodland? Lemon icing and sprigs of rosemary and thyme make the...
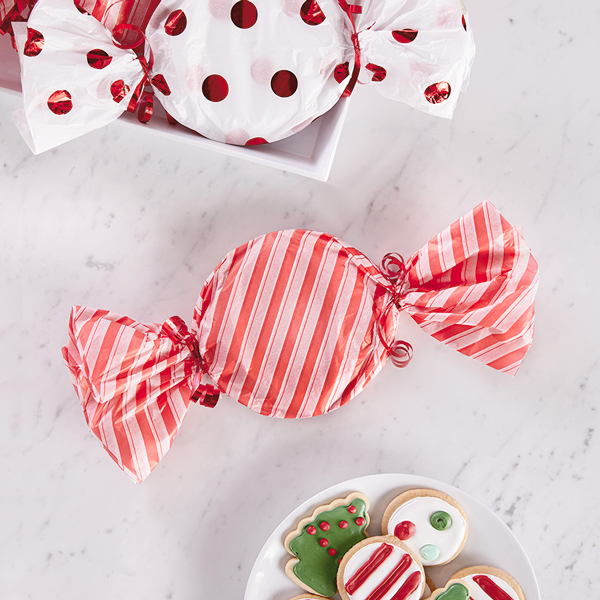
It’s a cookie covered with…candy! Stir up some super-simple mints in holiday-bright colors to turn sugar cookies i...
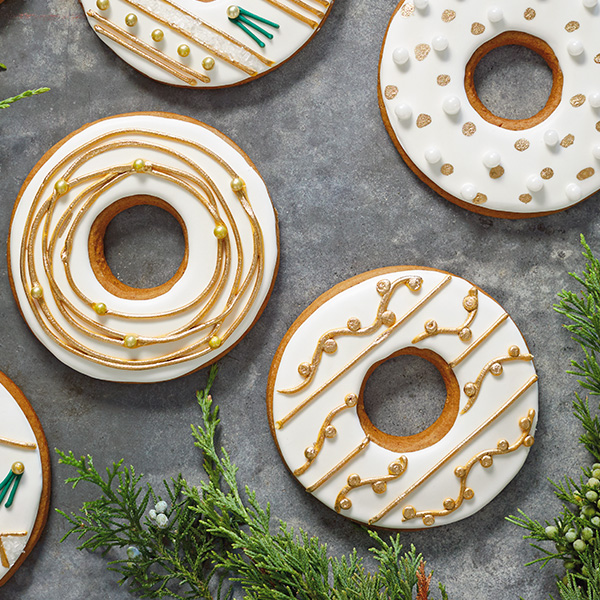
No fancy decorating skills needed! We used a dusting of edible gold metallic powder and gold nonpareils to give th...
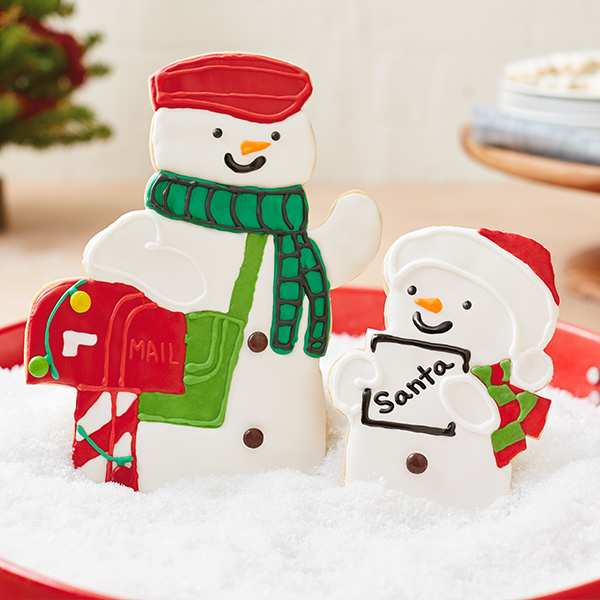
Make a show-stopping snowman duo based on Hallmark’s 2018 singing snowmen—it’s as cute as the real thing!
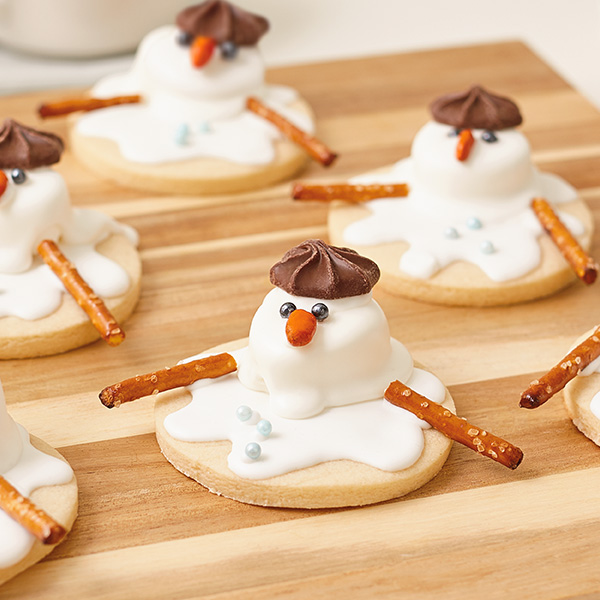
Looking for a quick, fun treat for a kids’ holiday party? These melted snowman cookies are adorable, and fun to ma...
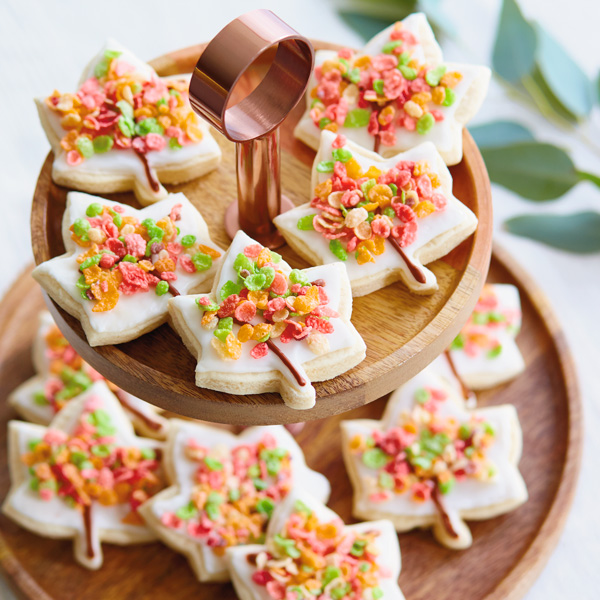
Autumn Leaves Tree Cookies bring all the fun and color of fall leaves to delicious sugar cookies. Start this kid-f...
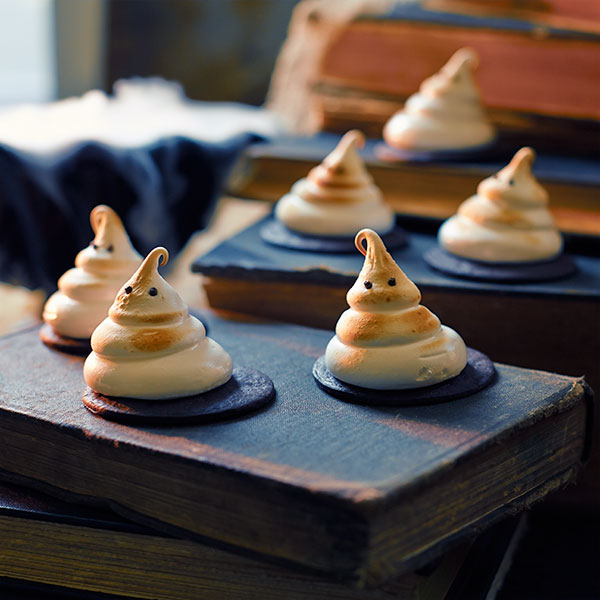
These shape-shifting meringue cookies only look tricky. In fact, our Ghost Meringue Cookies are an easy way to mak...
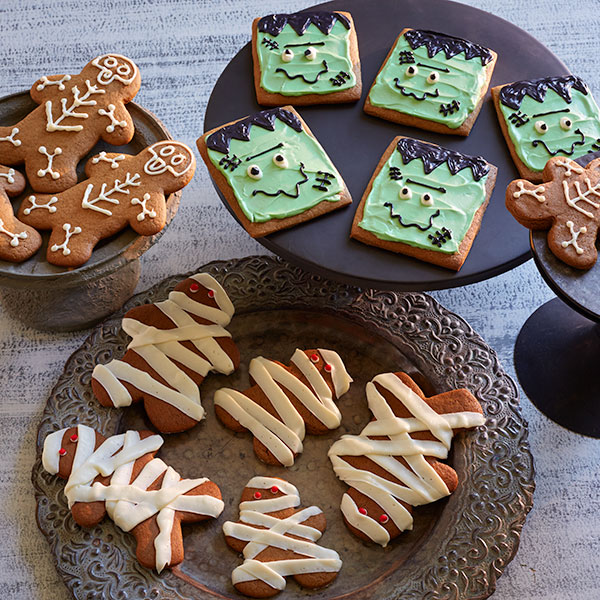
Gingerbread cookie dough from the grocery store can make all three of these monster-themed Halloween cookies. Our ...

Em's Rolled Sugar Cookie recipe will become your go-to recipe for all of your sugar cookies. The dough is easy to ...

Who wouldn’t love some sweet cookie treats? Hallmark cookie expert Bernard Shondell shares his chocolate chip coo...

Bake up some smiles with a DIY cookie bouquet. Hallmark cookie expert Bernard Shondell shares his chocolate chip c...
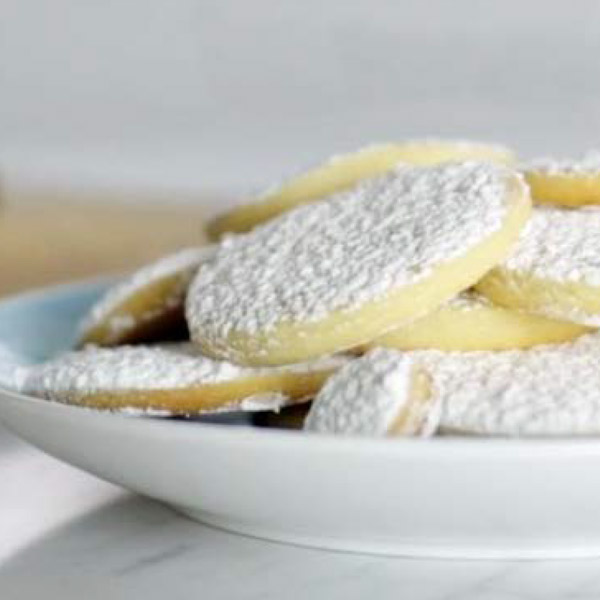
Got a minute? Watch our short (and sweet!) video to learn how to make these easy Snowball Shortbread Cookies. Topp...
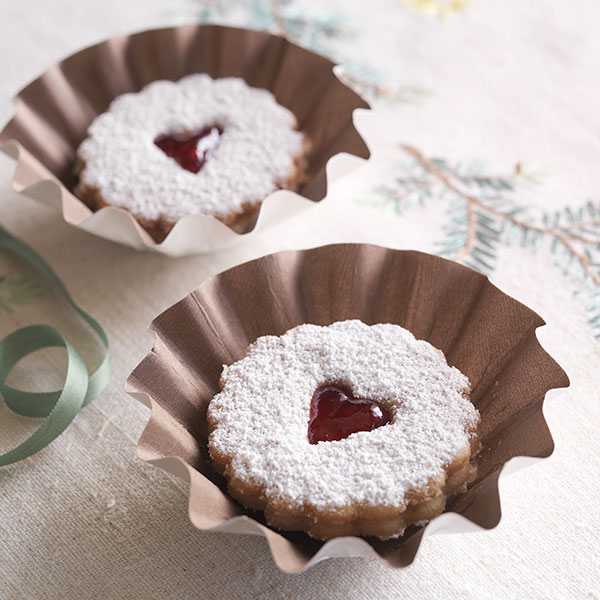
Linzer cookies are fruit tarts in cookie form. Our Raspberry Linzer Cookie recipe features a raspberry jam filling...
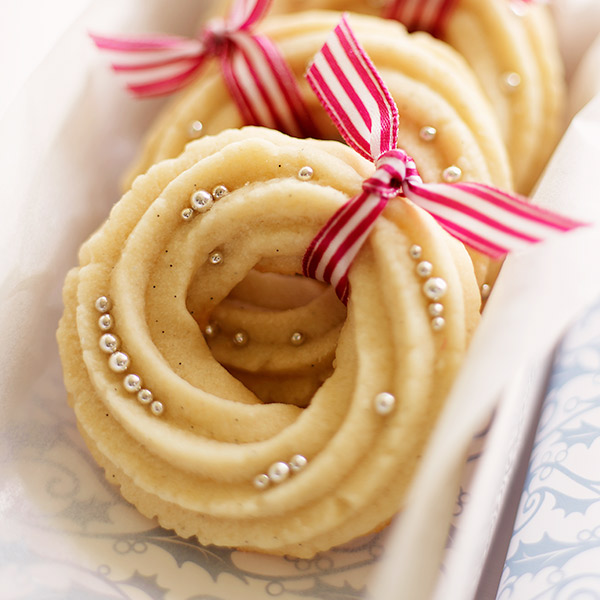
Find a simple recipe for Danish Butter Cookies plus instructions on how to shape and decorate them as Christmas wr...

The kipfel could be considered the forefather of the croissant. But those with a sweet tooth will pass on the roll...
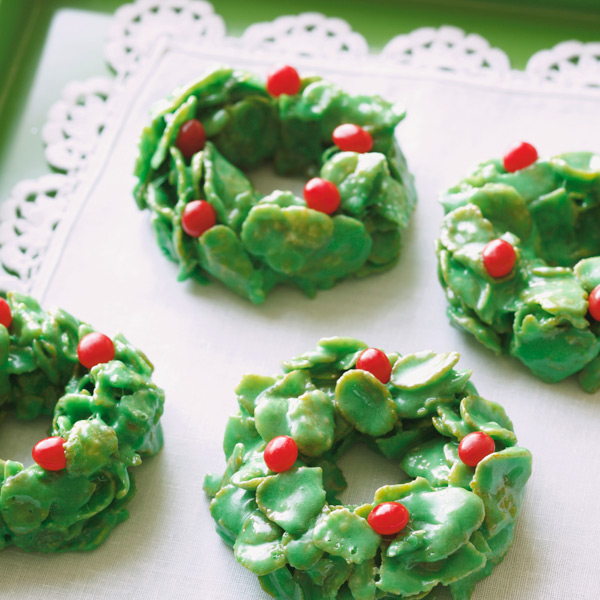
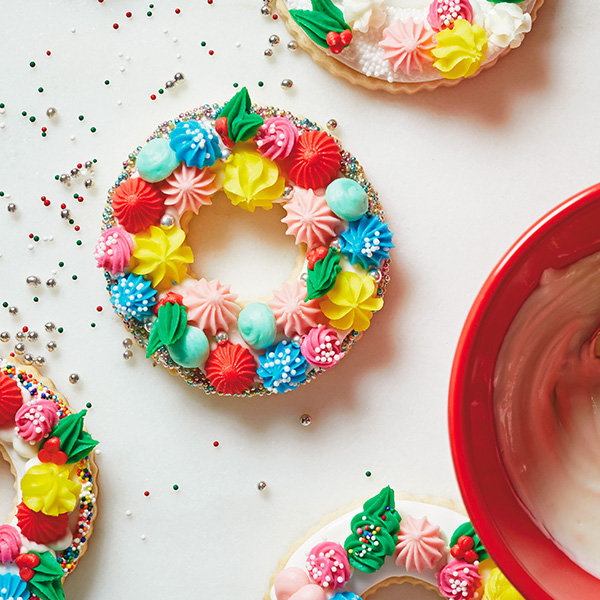
This retro Christmas Wreath Cookie recipe is making a comeback—and it's an easy one for the kids to make, too. Com...