We're sorry
There was an error adding this product to your cart. Please close this window and try again.
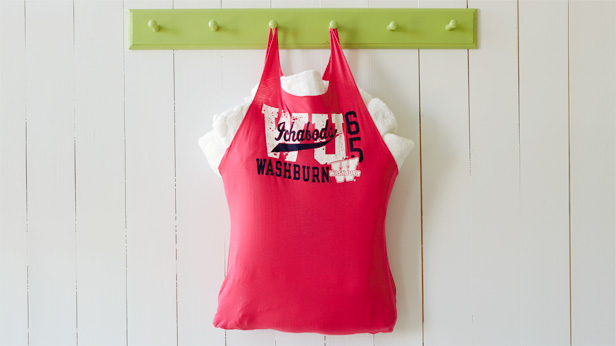
Craft a handy T-shirt tote bag to send the grad off in style

Looking for an awesome high school graduation gift that won’t take up much space in a packed dorm room? (And one that might actually get used once in a while?) Pass along your good wishes in this handy tote, which can be made from one of the zillion T-shirts your grad brought home in high school—or even from a new shirt bearing the logo of the college he or she will soon be attending. Ready to transform some tees? Get the step-by-step instructions for this handy T-shirt tote bag below and check out the rest of our fun T-shirt craft ideas for grads.
T-shirt tote bag
Crafter level: Easy
Time needed: 15 – 20 minutes
What you’ll need
How to make it
1. Lay shirt on table, right side up, and smooth out any wrinkles.
NOTE: If you’re using a tank top instead of a T-shirt, skip steps 2 and 3.
2. Cut off the arms of the T-shirt along the seams.
3. Cut around the neckline of the T-shirt to make the opening of the tote bag larger, cutting out the ribbing or outside seam.

Continue for no-sew version:
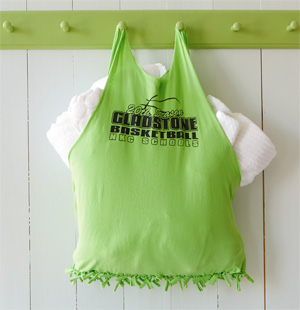
4. Cut fringe along the bottom of the shirt 2- to 3-inches long and between 1/2 to 1-inch wide (depending on how many knots you want to tie). Cut through both front and back layers at the same time.
5. Now take a matching front and back strip of fringe and double-knot them together.
6. Continue tying knots along the bottom of the shirt, always pairing the front fringe piece to the corresponding back fringe piece. Pull each knot tight so there won’t be large gaps between them.
Continue for sewn version:
4. Turn shirt inside out. Line up the bottom of shirt, front to back, smoothing out any wrinkles. Pin together.
5. Sew from end to end to close the bottom opening of the shirt. Use a 5/8-inch seam or sew slightly inside the bottom hemline of the shirt for added strength and stability.
6. Turn right side out.
Jeanne Field is a Hallmark editor who loves finding ways for her kids to get as messy crafting as she does.