Easy Painted Pumpkin Ideas Kids and Parents Will Love
Painted pumpkins have it all: they’re super stylish, fun for adults and kiddos, require zero knife skills, and don’t require sticking your hand in gourd guts.
Hallmark Artist Kelly Castor, a pumpkin-painting pro, gave us some fun design ideas and simple styling tips for creating and displaying a picture-perfect pumpkin pile. Below, you’ll find her hints for three different painted pumpkin approaches: stripes and dots, color-blocking, and mark-making. (Plus some bonus ways to combine all three techniques.)
Inspired? Create and share by tagging @HallmarkStores.
Painted pumpkins supplies
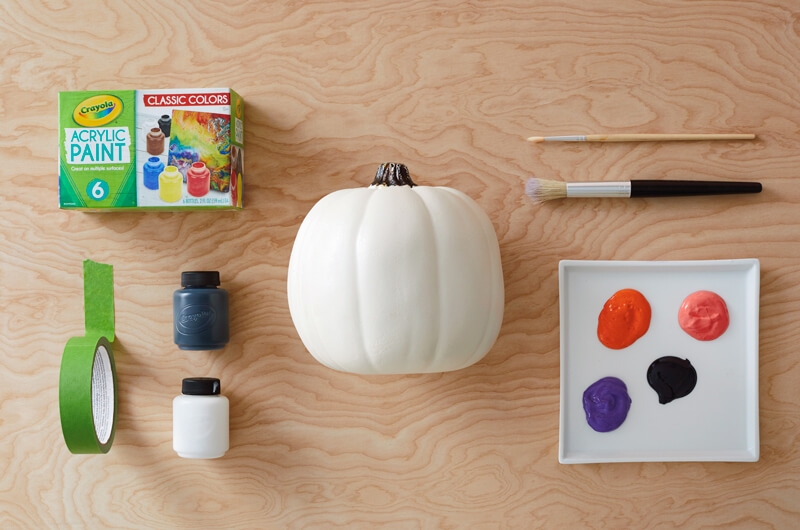
Here’s what you’ll need:
- Real or artificial pumpkins in different shapes, sizes and colors
- Crayola acrylic paint (Kelly used the light red and violet available here and the white, black and yellow from this set)
- Permanent markers
- Painter’s tape
- Paint brushes and sponges
- Paper plate or plastic palette
- Primer (if you want to get fancy)
- Something to cover your table with (newspaper, craft paper, really ugly tablecloth)
- Cups and bowls (for balancing pumpkins)
- Paper towels (for cleanup)
- Paper (for trying out designs)
Artist tips for getting started
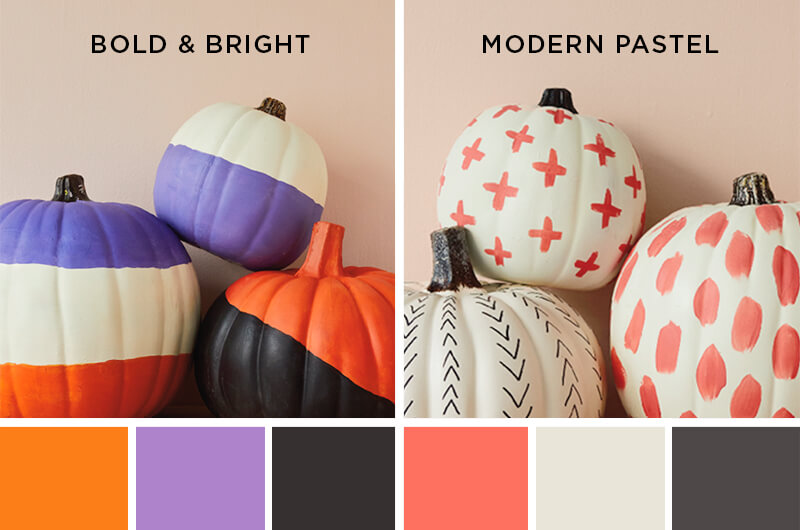
Choose a simple color palette. You can get your inspiration from lots of different places: colors in a set, a photo you find online, or (our favorite) a greeting card. We’ve got two—and we mixed our Crayola paints to adjust the colors a bit:
- Bold and bright: orange (mix 1 part light red with two parts yellow), purple (mix equal amounts of violet and white), black and white.
- Modern pastel: coral (mix equal amounts white and light red), black and white.
Try designs on paper first. Of course, you can just jump in and start painting. But for a cute and coordinated group of gourds, you might try planning a bit. You can test out colors and patterns on a plain piece of paper, play with the scale of different designs on different pumpkin sizes, or make simple sketches to see how all your looks will hang together.
Set up your space. Set out your pumpkins, paint, brushes, tape, etc., so you’re ready to go.
Double up on a single pumpkin. Try multiple techniques by painting different designs on the front and back of the same pumpkin.
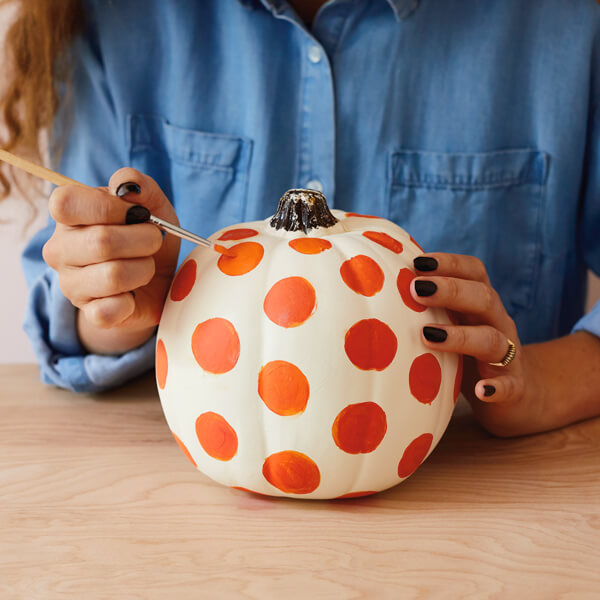
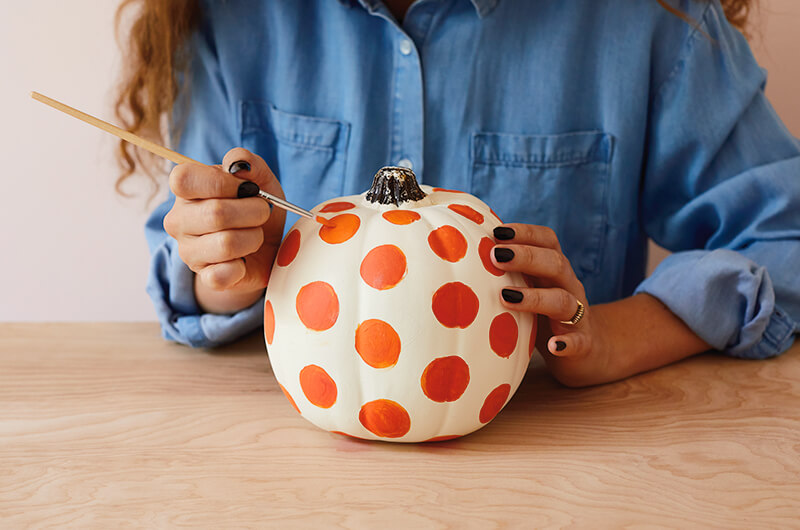
Painting pumpkins with stripes and dots
This is just too easy. You can paint stripes and dots in a bunch of different ways:
- One, two, three or more colors
- Small, medium or large—or all different sizes
- On a grid or randomly spaced
- Messy or tidy
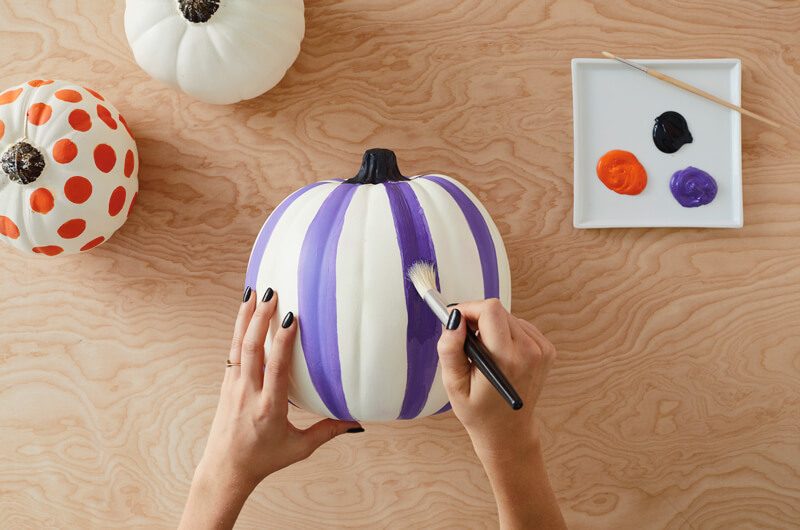
And to make things even easier, pumpkins have built-in guidelines for your stripes and dots. Try:
- Painting stripes between the sections
- Painting each section a different color—or alternate two colors
- Painting dots from top to bottom in one section, then between those dots in the next section, and repeat all around the pumpkin
What happens if your carefully sectioned design doesn’t work out perfectly when you make it all the way around? Easiest solution of all: Turn that part to the wall.
Pumpkin-painting pro tips
- Hold on to the stem to spin the pumpkin while you paint.
- Prop the pumpkin on a cup or bowl to raise it up so you can paint the bottom.
- If you’re using plastic pumpkins, starting with a coat of flat/matte primer, Gesso or white paint will make your paint colors look brighter and adhere better.
- If you’re mixing your own color, make more than you think you’ll need so you don’t run out mid-pumpkin.
- You might have to do two coats to make the colors really solid.
Color-blocking techniques for painted pumpkins
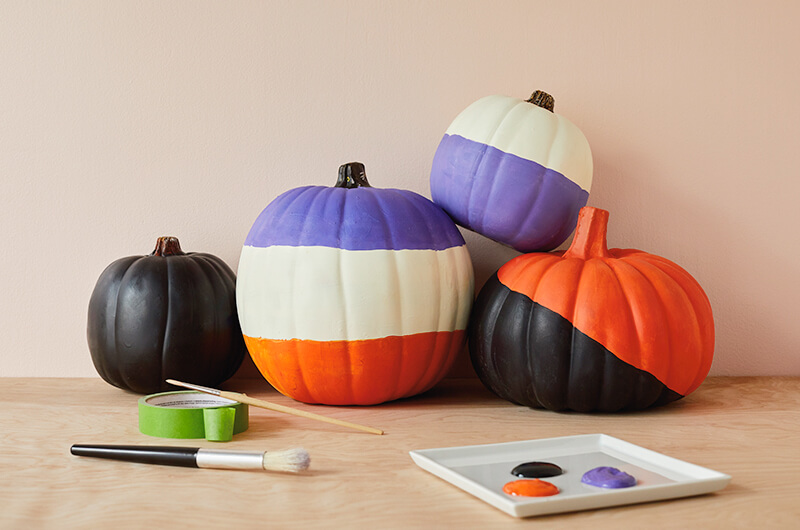
The next technique is color-blocking, which just means painting chunks of your pumpkin in two or more different colors.
The simplest take: Split the pumpkin in two sections horizontally, vertically or on a diagonal, paint one half and leave the other natural. There are a few ways to draw the line:
- Use painter’s tape. Just wrap it around and press it down.
- Grab a cup or can the same height as the line you want to draw. Hold or tape a pencil or marker across the top, set it next to the pumpkin, and rotate the pumpkin slowly to make a line all the way around.
- Freehand it with pencil or pen. Nobody said a pumpkin’s got to be perfect.
Color-blocking is a great way to go if you’ve got a real pumpkin with a showy stem or squishy shape. We love the look of a small pumpkin with a big stem, au naturel except for a painted bottom.
Mark-making designs on no-carve pumpkins
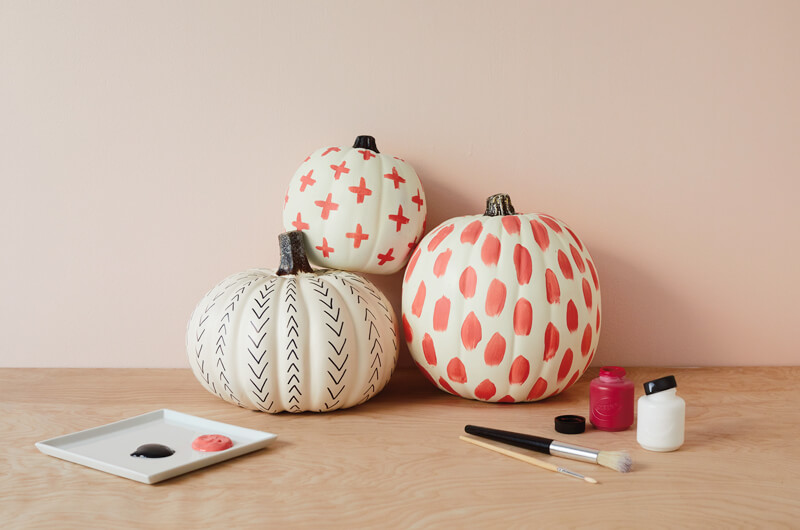
Mark-making is just what it sounds like: using a pen or brush (or stamp or leaf or vegetable or almost anything you can dip in paint) to make a pattern all over your pumpkin.
To see what we mean—and get inspiration to make your own marks and patterns—check out this mark-making workshop lead by Hallmark Artist Marcos Roman for even more ideas. But the easiest thing to do is just grab some paper and practice.
A few mark-making hints to try:
- Let one color dry before adding another. (This is a good excuse for painting more than one pumpkin.)
- Try small-scale mark-making with a permanent marker. If you get tired of doing really detailed work, just do one side of the pumpkin.
- Marks can be abstract, like swooshes, swashes and swirls, or meaningful, like witches hats, moons and eyeballs.
Mix-and-match painted pumpkin techniques
Now that you’ve got three solid pumpkin-painting approaches down, it’s time to let loose. Mix and match the methods. Try:
- A color-block base covered in marks, dots or stripes
- Half in one technique, half in another
- Try adding some doodles or lettering or both
- More tips and techniques from our artists, like these
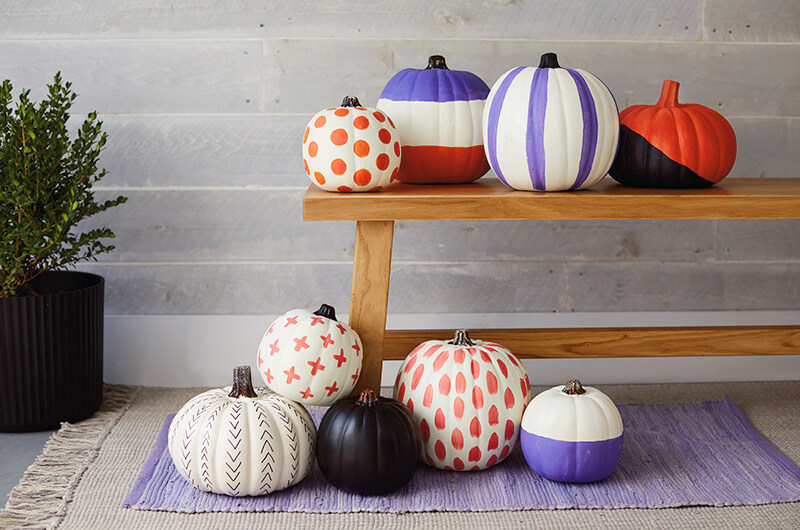
Piling up your painted pumpkins
Now that you’ve got a gorgeous group of gourds, it’s time to show them off on your porch (or table, or buffet or wherever you want a little fall feeling). Here are some ideas from our Photo Stylists:
- Vary the levels. Front porches and stoops are perfect for pumpkin displays because you’ve already got steps. You can also set out your pumpkins in the space on and around a bench, chair, ladder or shelves. Or stack them on some crates or cardboard boxes (you can paint those in your color palette).
- Make it odd. For any kind of vignette (a grouping that makes a pretty picture), odd numbers look best. Three, five, seven or 31 pumpkins it is, then.
- Mix natural and artificial. A bunch of painted pumpkins look great with a few natural, unpainted ones thrown in.
- Make it a family thing. The cool thing about a limited color palette is that it makes everything look like it belongs together. So Dad’s silly doodles, toddler art, a teenager’s awesome lettering and Mom’s color-block fabulousness are perfect pumpkin partners.
The best part about painted pumpkins? The natural ones last a little longer than cut jack-o’-lanterns. And artificial ones last forever—even if you decided to change the design, you can just repaint your painted pumpkin.
