Trick out your house with these DIY Halloween decorations
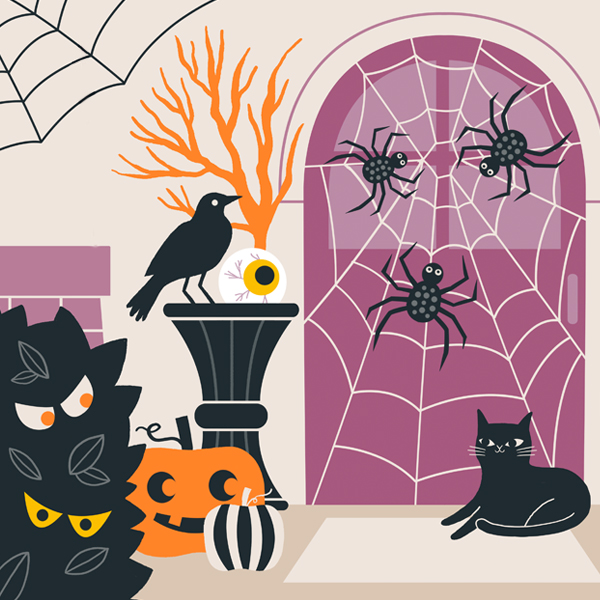
Transforming your home into Halloween headquarters can be a truly terrifying business—there’s so much time and effort involved! So this year, simplify the process without sacrificing the effect by placing unique, clever and easy-to-craft Halloween decorations in a few crucial spots around the house. Our four DIY decor ideas—from a wicked front-door welcome to a not-so-very-scary table monster—are bewitching, of course, but basic enough that the kids can help out.
Inspired? Create and share by tagging @hallmarkstores.
Scaredy-cat
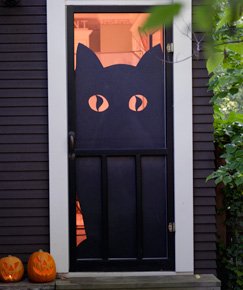
Dress up your storm door with this giant cutout and the neighbors will be in awe, not knowing how easy it was to make. So shhh—just let them think you stayed up all night crafting.
What you’ll need
- 2 pieces of 22-by-28-inch black poster board
- Black masking tape
- Scissors or utility knife
- 2 desk lamps (gathered from around your house)
- 2 indoor flood lightbulbs
How to make it
- Disguise the storm door by first cutting out a triangle shape on the side of one piece of poster board to make the outline of the right front paw. The rest of the poster board should cover as much of the width of the door as possible. Hang in the lower half of the door.
- Cut out a big cat head from the other piece of poster board. (And don’t worry about the details—as long as you have two pointy ears and a cut a squiggly shape in the center of each eye, it will be convincing.) Hang in the top half of the door.
- Make it glow by placing desk lamps on the floor or a table near the door (but out of the way to avoid collisions). Flood lightbulbs will amplify the brightness of the eyes.
Floating broom
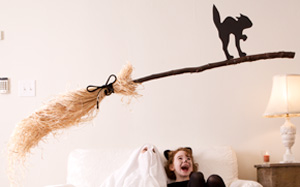
This broom’s owner can always find a parking space above the sofa! Her black cat likes to come along for the ride quite often as well.
What you’ll need
- Broom or mop handle or long branch from outside
- Large bag of raffia
- 1 yard of string
- 1 yard of black velvet cord or rope
- Fishing line
- Black spray paint or brush-on acrylic paint
- One sheet of black foam core or black posterboard (optional)
How to make it
- Paint the mop handle or branch black for the broomstick. Let dry.
- Twist the whole bunch of raffia around the broomstick in one “swoosh” about 10 to 12 inches from the end of the stick. Tie tightly with string.
- Wrap the velvet cord or rope around the stick several times to cover the string and tie securely.
- Suspend the broom from the ceiling or woodwork with fishing line.
TIP: Cut a cat silhouette from the black poster board or foam core and glue to the broom.
Monster legs
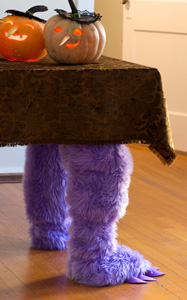
His legs are there, but where is the rest of him hiding? Oh dear! This looks troublesome!
What you’ll need
- 4 yards by 60 inches of long, purple fun fur (or a monster color of your choice)
- 1 skein of matching yarn
- Batting (use packaged polyester batting or you can repurpose plastic grocery bags or newspaper)
- 2 to 3 sheets of craft foam for toenails
- Foam glue or needle and thread
How to make it
- Wrap each leg of the table with the batting or recycled material to create the desired thickness.
- Measure and cut 1 yard of fur for each table leg. Wrap the fur around the “stuffing” and tie securely with the matching colored yarn. Fluff the fur to hide the yarn.
- Slouch the fur at the bottom of the leg, forming a paw shape.
- For each leg, cut five, 2-inch-by-3-inch rectangles from the craft foam; angle one end of each rectangle to a point to create a toenail. Glue or sew each toenail to the bottom of the paw.
TIP: Make sure your tablecloth is long enough to hang down and partially conceal the mysterious monster lurking beneath your table.
Chimney peeps
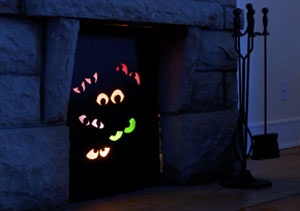
Who are these spooky eyes looking for? Better hope it’s not yooooooou!
What you’ll need
- Black foam core (from art supply store or hobby shop) or paint cardboard with flat black poster paint
- Yellow, orange, green and red tissue paper
- Utility knife (thin blade)
- Metal-edged ruler
- A work light or bundle of white Christmas lights
How to make it
- Measure the fireplace opening to determine the size of your black foam core/cardboard.
- Cut foam core to fit the opening exactly—you don’t want to see any light from around the edges.
- Cut out eye shapes near the center and top of the board. (If you cut them too low, you will see the lights and cords.) Vary the size and shape of the eyes. Include the pupils so that the eyes can look in several directions.
- Tape the colored tissue to the back of the foam core behind the eyes holes.
- Place your light in the fireplace and pull out the cord. You may need to cut a small hole from the corner of the foam core for the cord.
- Fit the foam core in front of the fireplace and plug in the light!
