DIY calaveras de azúcar: How to make sugar skulls for Día de Muertos
Calaveras de azúcar—literal sugar skulls—are beautiful pieces of Día de Muertos (Day of the Dead) rituals and tradition. Names of deceased loved ones are written in royal icing on the foreheads, and they’re placed on altars created to celebrate their lives and loves. As part of Hallmark’s #My5Days creative renewal program, members of our creative team made and decorated sugar skulls, and we’re sharing what they learned.
Inspired? Create and share by tagging @HallmarkStores.
How to make your own sugar skulls
DIY Calaveras de Azúcar supplies
- Sugar skull molds (find them here, along with an exact recipe)
- Sugar
- Meringue powder
- Water
- Bowl
- Oven-safe board for baking (or a piece of sturdy cardboard and parchment paper)
- Sheet pan
- Royal icing
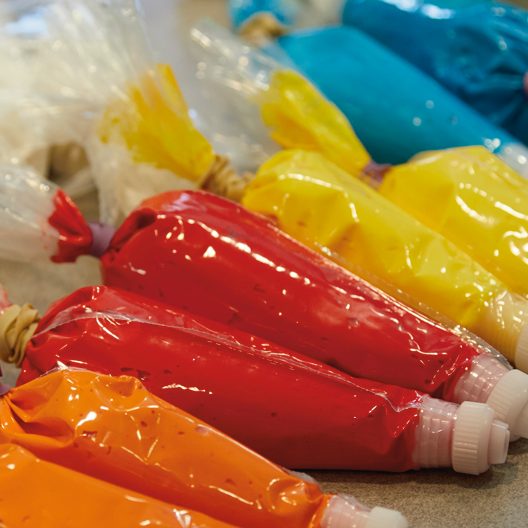
- Food coloring paste
- Pastry bags and tips (we used round 3 and 4, star 17 and 18, and basketweave 46)
- Color fondant
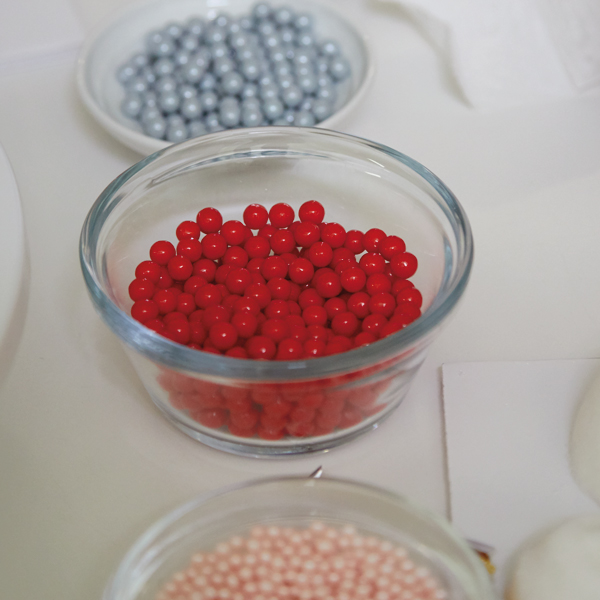
- Sprinkles, jimmies and pearls
- Decorative color foil
- And while we’re at it with the non-edible decorations: Feathers, beads and other baubles (because otherwise sure, you could eat your sugar skull, but you probably don’t want to)
- Offset spatula
- Spoon
- Craft knife
- Scissors
- Tiny cookie cutters
- Tweezers
Make the sugar skulls
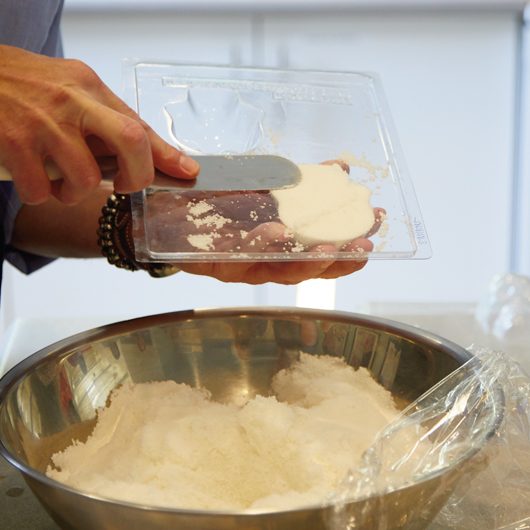
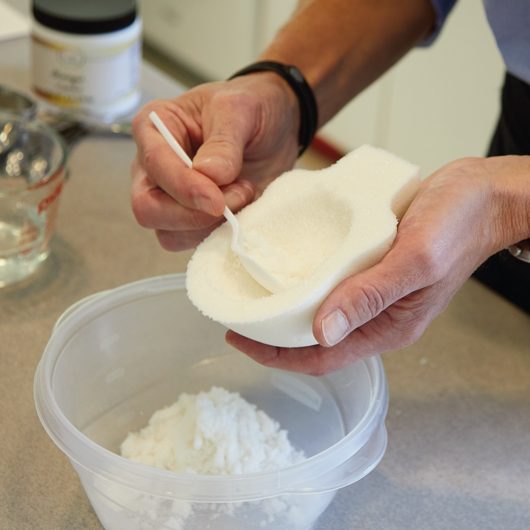
Mix sugar, meringue powder and water to the consistency of beach sand (follow the directions that come with your mold). It should clump when you grab a handful.
Pack it into each side of the mold and scrape off the excess with the offset spatula.
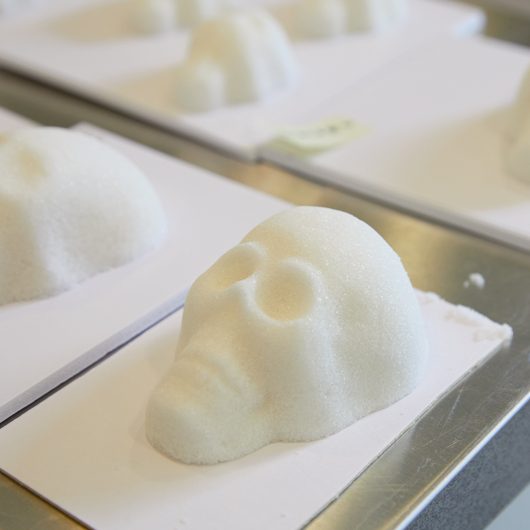
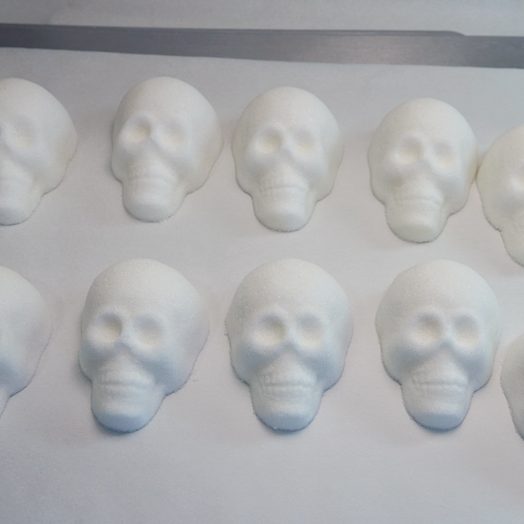
Remove skulls from the molds
Cover the open side of the mold with a board, flip it and pull the mold away. The skull should hold its shape.
If your board isn’t oven-safe and you plan to bake the sugar skulls to dry them, cover the board with a piece of parchment paper. When you remove the skull from the mold, un-mold it onto a metal half-sheet pan and slide the board out from underneath the parchment paper it.
Dry the sugar skulls
Let them dry one of two ways: Leave them out overnight or put them in the oven for 20 minutes at 200 degrees.
Scrape out the inside
When the skulls are mostly dry, hollow them out so they’re not too heavy. Use a spoon to scoop sugar out of the flat side, leaving about a 1/2″ thick wall.
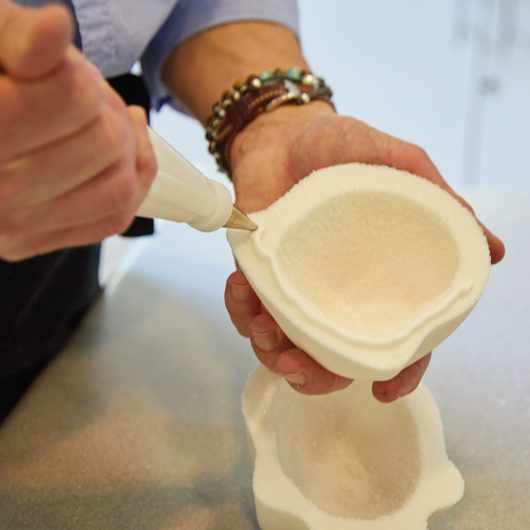
Put the skull together
Use white royal icing to “glue” the front and back half of the mold together. Pipe a line of royal icing around the flat size of one half of the skull, then line up the two halves and gently press them together.
Get the fun stuff ready
While your sugar skulls are drying, get your decorations together: Make the royal icing, cut your fondant into fun shapes and get out the foil, jimmies, pearls and anything else you’re going to use to add personality to your sugar skull.
Prepare the royal icing
Mix royal icing in as many bright colors as you’d like and drop it into pastry bags. (Find our favorite royal icing recipe here.)
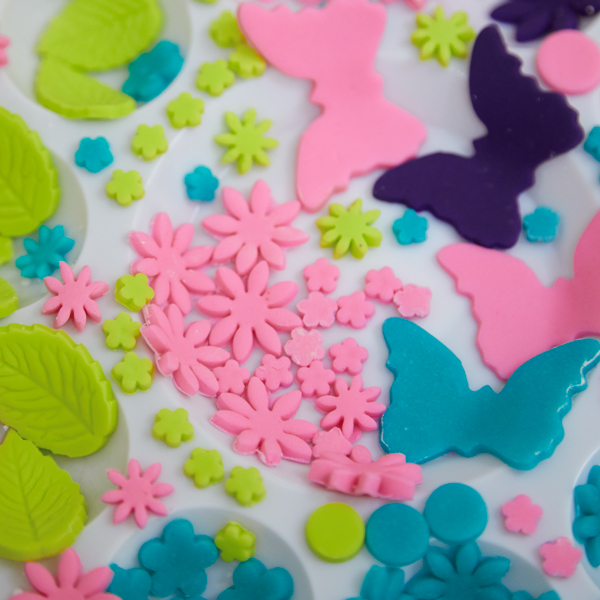
Make decorations from fondant
We used tiny cookie cutters to make decorations out of fondant. Make any that inspire you, from simple circles to flowers, bows and butterflies.
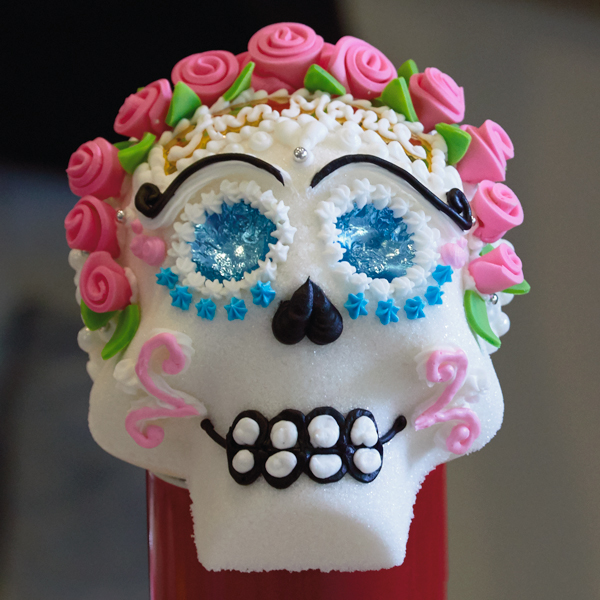
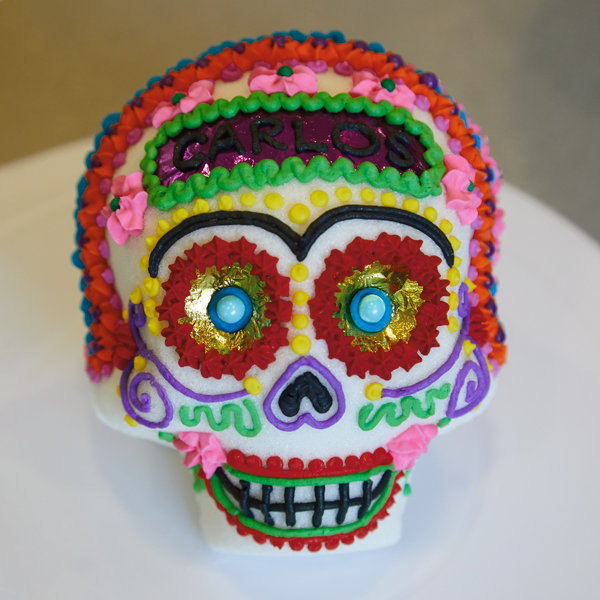
Decorate your sugar skull
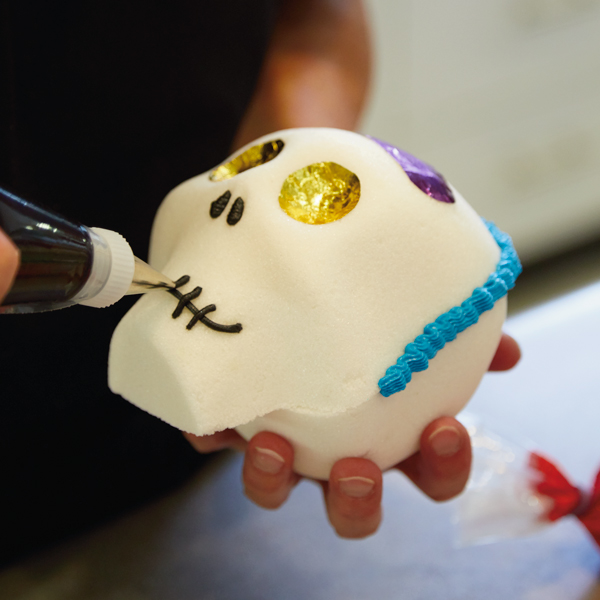
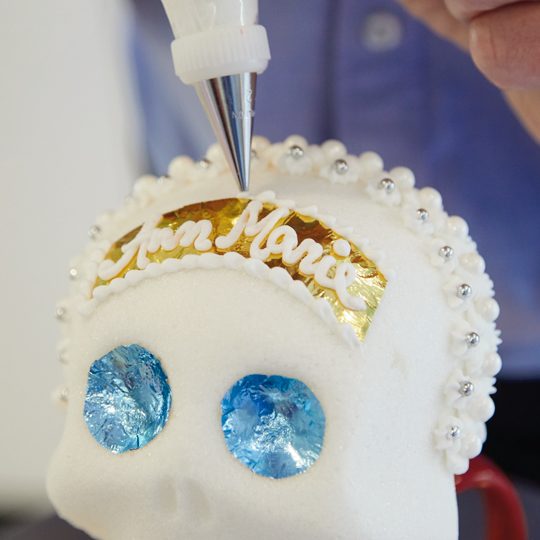
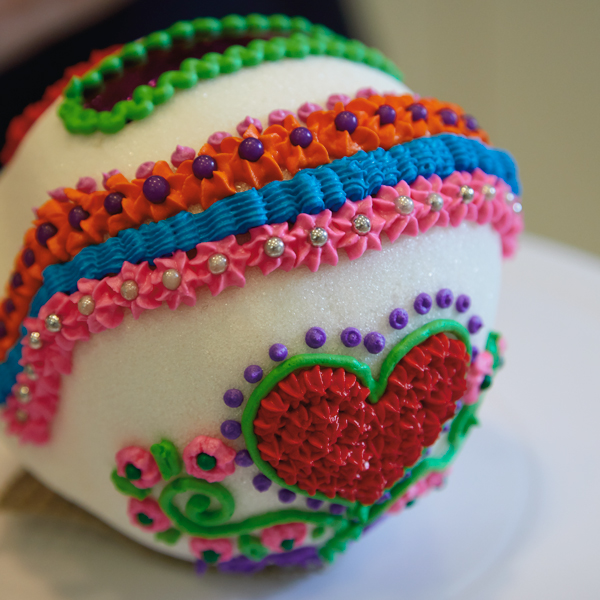
Royal icing is for more than drawing lines and making rosettes. Use it to attach a strip of foil to the forehead for your loved one’s name, help line the eye sockets with the shiny stuff and attach fondant cut-outs and other decorations.
The basketweave 46 tip is great for covering the seam between skull halves with decorative icing.
Take a few tips from Hallmark artists
If you can’t hold the skull without it breaking or denting, it’s not dry enough. Pass time time while you’re waiting by making more fondant flowers.
Use a rotating cake stand to turn the skull as you decorate.
Use a mug to prop up your sugar skull for a better view while you’re decorating
Decorate the back of the skull first and let the royal icing harden—then you can set it down and focus on the face.
Día de Muertos is a celebration of life—so these skulls shouldn’t look sullen. Because molds aren’t super detailed, you’ve got plenty of room to play with the facial expressions. And there’s the whole back of the head just waiting to be embellished.
You can also make sugar calaveras for the living—yourself, your children, friends. Just add their names and give them as gifts.
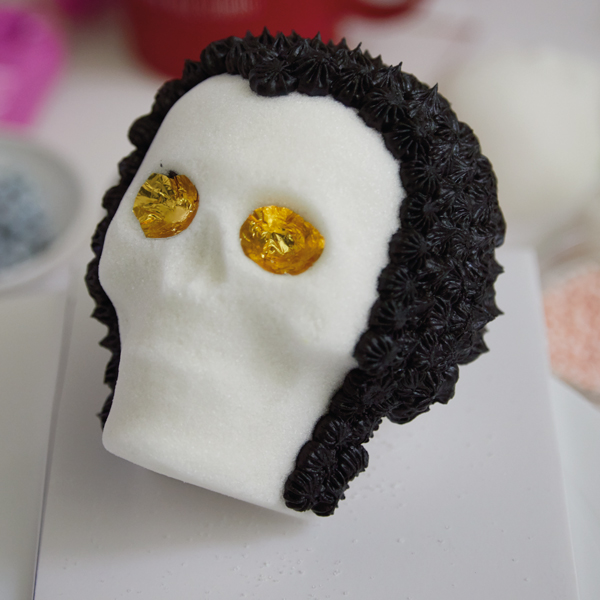
And why stop with people you know? Make calaveras de azúcar to celebrate heroes, celebrities and favorite characters. Guess who this one turned into?
Some people in our group had detailed sketches and plans and research and others improvised. Go online to get ideas for traditional calaveras de azúcar designs—or just let your ingredients speak to you.
Shop Día de Muertos
See allYou may also like
See more-
Fall How to write literary calaveras for Día de Muertos
You’ve made your ofrenda (altar), hung your papel picado (paper banners), and decorated your calaveras de azúcar (sug...
-
Fall How to make a Day of the Dead altar: A personal story
How to make a Day of the Dead altar, featuring the heartfelt story of a Hallmarker.
-
-
Fall Día de Muertos: A celebration of life and love
Día de Muertos, Day of the Dead, is a holiday originally celebrated in the southern and central parts of Mexico and i...
-
Arts, Crafts & DIY Día de Muertos crafts to celebrate with family
The sweet smell of pan de muerto baking, colorful decorations and pictures selected with care, special memories being...
-
Arts, Crafts & DIY Day of the Dead Sugar Skull Coloring Page
Day of the Dead, Día de Muertos—a celebration of loved ones who have passed away—originated in Mexico and is obser...
