How to make a DIY Pride flag
Happy Pride Month, readers! Throughout the month of June, members of the LGBTQ+ community and their allies have a lot to celebrate. Sure, you’ll find us wearing a rainbow pin on our denim jackets any time of the year, but we also love that we’re able to celebrate loudly and proudly for an entire month with friends and family. So we got together to show you how to create a DIY Pride flag or banner.
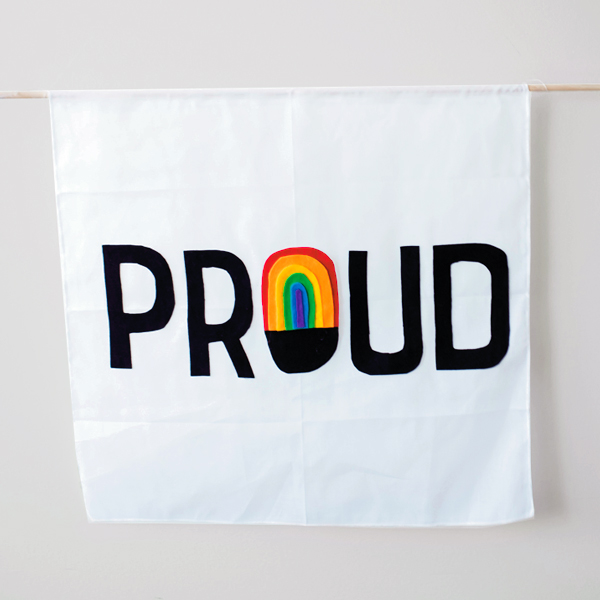
Using felt, fabric, yarn and a whole lot of hot glue, we created our own mini rainbow masterpieces to hang at our desks or in our homes to show that we can’t contain our pride!
Inspired? Create and share by tagging @HallmarkStores.
WHAT YOU’LL NEED
- A base for your flag or banner: Cotton or muslin works great—you can glue or stitch a hem along the edge to keep it from fraying or just use a large white handkerchief. You can also use felt, cardboard or paperboard.
- Felt: Get all the colors of the rainbow flag—plus pink, light blue, brown and black.
- Scissors and/or craft knife
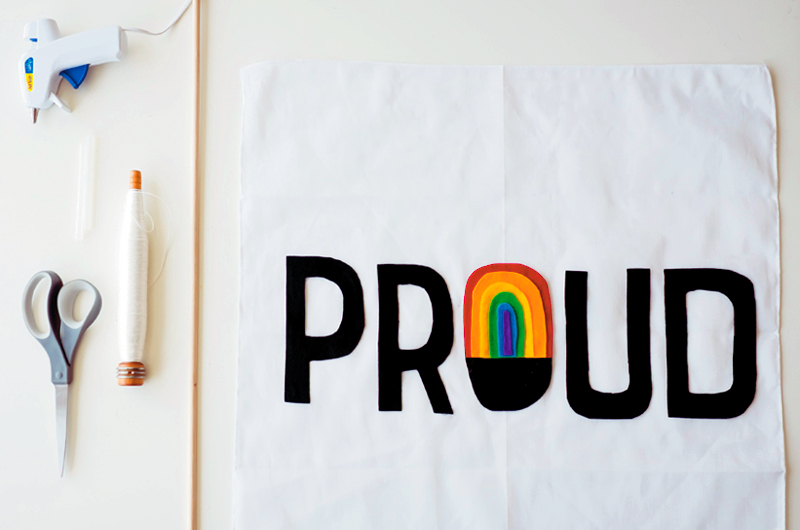
- Hot glue and glue gun (or needle and thread): Sure, you could sew it together—but using hot glue makes it faster and lets you focus on the design instead of the assembly.
- A wooden dowel: It’ll need to be about an inch or two wider than your banner or long enough to hold and wave a flag or pennant.
- String or baker’s twine: For hanging banners.
- Cutting board or butcher paper—whatever you need to protect your work surface.
How to make a DIY Pride flag or banner
The design of the flag is up to you and your imagination. Here are some starter ideas:
- Words: pride, proud, love, yay, magic
- Symbols: Rainbows, triangles, hearts, gender symbols
- Themes: search online for Pride or LGBTQ+ themes and slogans
Try a quick sketch. You can make “thumbnails”—mini-drawings with different ideas to try out ways to place the elements you want in your flag—or bigger, more detailed sketches.
If you’d like to try something a little more precise or print out some online inspiration, you can add tracing paper and fabric transfer pens or pencils to your list.
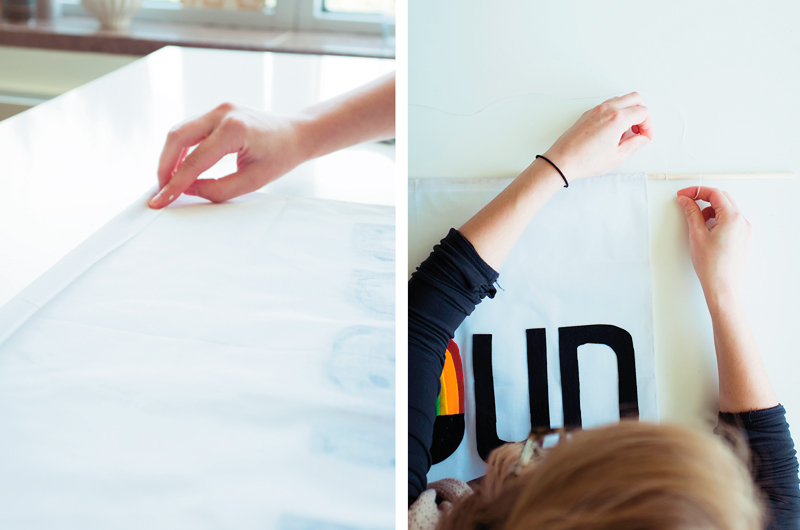
Prepare your base. Cut your base fabric to size, if necessary.
- Leave an extra inch on the top or side to attach your flag or banner to the dowel.
- If you plan to hem it, now’s the time! Fold a thin edge back around the sides and bottom of your base and glue or sew it down.
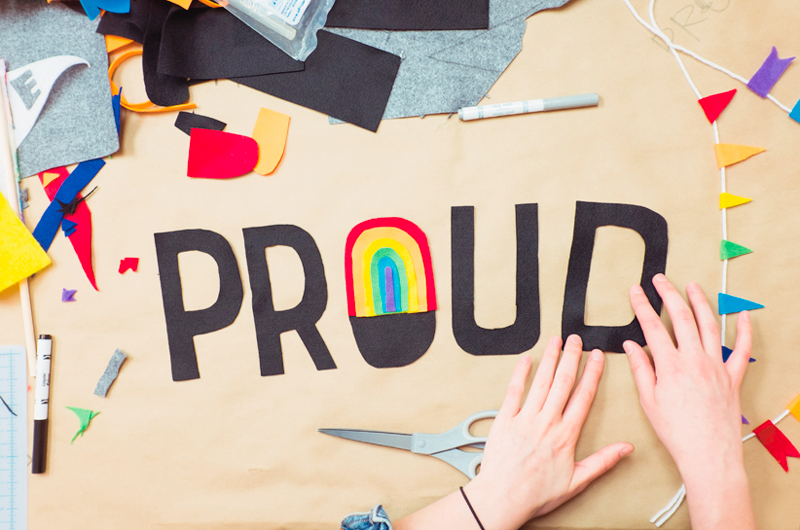
Lay out your design. We freehanded the words and icons on our Pride flags and banners—that’s my kind of craft. You can also cut your designs right into the felt; cut basic shapes into the felt, work out placement on your base, then cut out details; or make patterns out of paper, pin them to the felt, then cut them out.
Glue or sew everything down. This is why we love a glue gun. Careful not to burn your fingers!
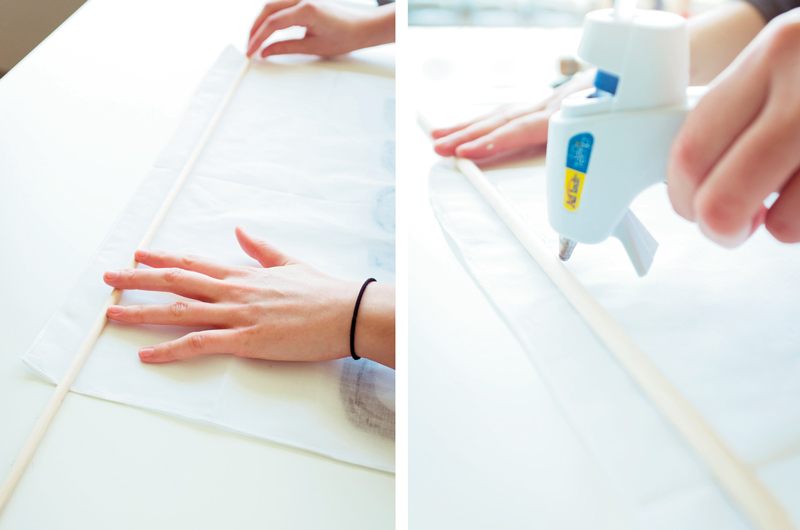
Attach the dowel. Turn your Pride banner or flag upside down and center the dowel rod about an inch down from the edge. Run a bead of glue next to the dowel, fold the fabric over the dowel and press it into the glue.
Hang your banner or wave your flag. For banners, tie the end of your string on one side of the dowel. Decide how much hanging space you want at the top, then snip the string and tie the other end to the other side of the rod. For flags or pennants, Just wait for the glue to dry and you’re all set.
Pride Month means a lot to the LGBTQ+ community; it provides the opportunity to reflect on those who have come before and paved the way for many of the liberties that exist today. It also serves as a reminder of all the things that we can continue to work toward for future generations. And that gives us so much to celebrate!
