7 easy DIY cake toppers for special (or any) occasions
Where there’s a cake, there’s a party—that’s just truth. And while you’re in a festive mood, you might as well add one of these easy DIY cake toppers to make the celebration official. Birthday? Anniversary? Holiday? Cakes were on sale? Craving frosting and needed an excuse to eat some? Doesn’t matter. You know your reasons.
Here are some of our favorite DIY cake toppers, starting with the very easiest—and including some free printable designs!
Inspired? Create and share by tagging @HallmarkStores.
Festive Milestone Birthday Cake Topper
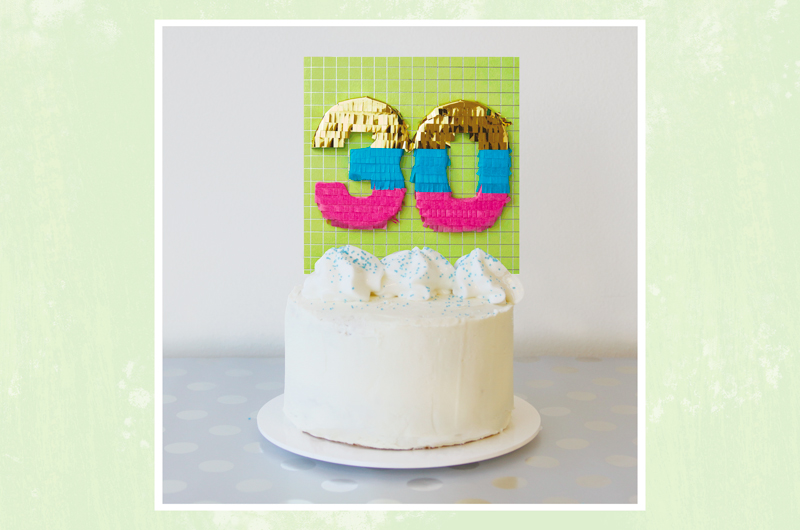
What you’ll need:
- Milestone birthday card with great big numbers
- Hot glue and glue gun
- Two toothpicks (or skewers)
- Optional: Whipped cream or extra frosting and sprinkles
Start with a Hallmark Signature milestone birthday card—the kind with a great big number on it.
Open up the card and hot-glue two toothpicks so they’re sticking out the bottom on each side: They should be about half in and half out of the card. Put a thin line or some dots of glue around the open edges to keep it together. Close the card and let the glue set—all finished!
Because we’re a little extra, we piped on some whipped cream and added sprinkles to hide the toothpicks.
Fruit and Flowers Cake Topper
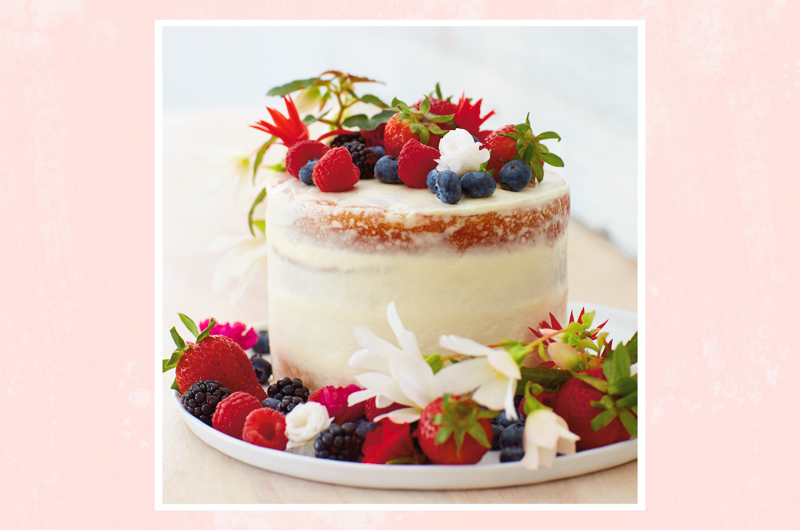
What you’ll need:
- Mixed berries or fruits
- Flowers or herbs (edible or decorative, but nonpoisonous and not treated with pesticides)
- Optional: Sugar and water
- Optional: Citrus fruits
For the minimalist, a “naked cake”—the kind with just a skim coat of frosting—with natural toppers seems just right. That said, if you’re against a mostly frosting-free cake because honestly what’s the point, spread it on thick instead.
Start with berries in different sizes—strawberries, raspberries, blackberries and blueberries are a classic combo—and scatter them over the top and onto the platter. Poke in a few handpicked flowers from your garden and you’re done.
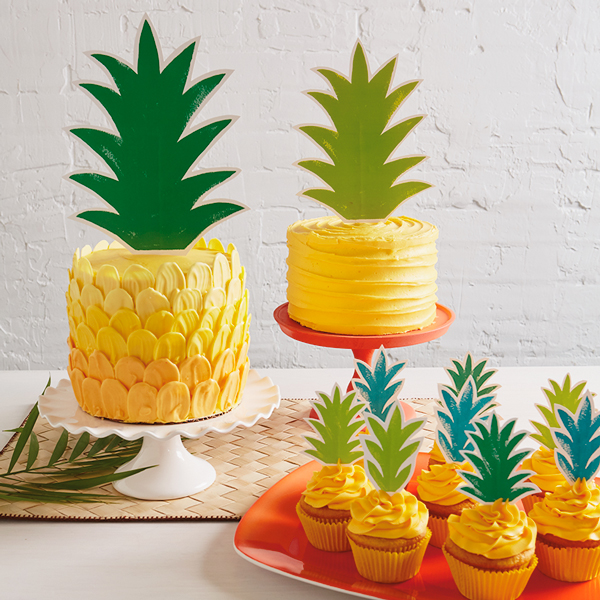
Pineapple Cake and Cupcake Topper
We love a pineapple cake in the summer. (Honestly, any season.)
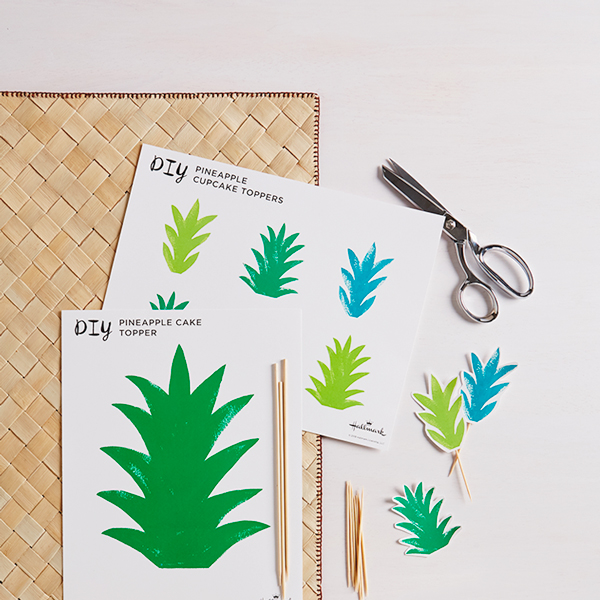
There are a million ways to frost a cake to look pineapple-y, but we wanted an easy out when it came to the leafy top.
What you’ll need:
- Printable pineapple toppers
- Card stock
- Wooden skewers or toothpicks
- Tape
- Scissors or craft knife
- Yellow frosted cake and/or cupcakes
So this one’s extra simple: Print. Cut out. Tape to a skewer or toothpick. Stick in cake. Perhaps you noticed we included printable toppers for two cakes and a half-dozen cupcakes. This is no time for restraint.
Mini Tassel Garland Cake Topper
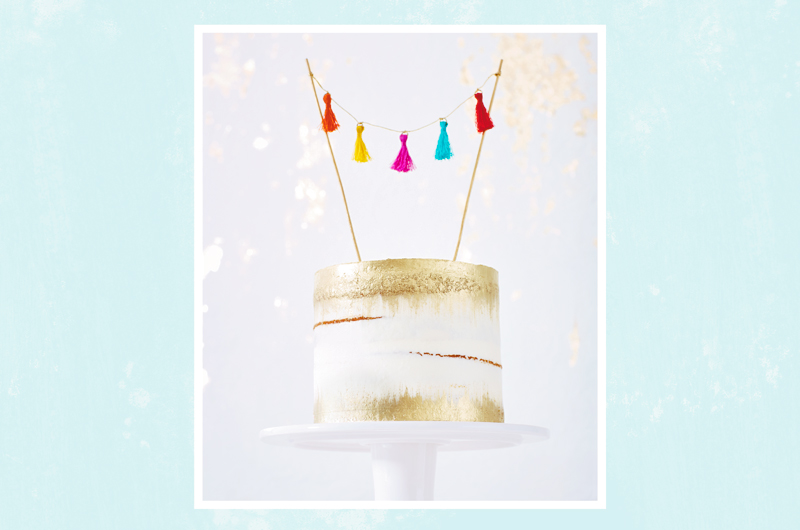
Tassels are like tiny pom-poms. And depending on the colors and materials you use, they can be peppy, elegant or boho-chic.
What you’ll need:
- Pre-made tassels (search for “mini tassels with jump rings”)
- Two wooden skewers
- Gold cord
- Optional: Edible gold paint
To make the Mini Tassel Garland Cake Topper in the photo, just:
- Cut a piece of gold cord a little wider than your cake.
- Evenly space the tassels and tie them to the cord. The easiest way to do this is to start with the one in the center and work your way out.
- Tie the ends of the cord to the tops of the skewers and stick them in the cake.
- If the cake is extra wide—like a sheet cake—you might want to use three or four skewers.
- If you want your skewers to shine, paint them with edible gold paint before you get started.
Want to make your own tassels? This video will show you how.
Love in Bloom Cake Topper
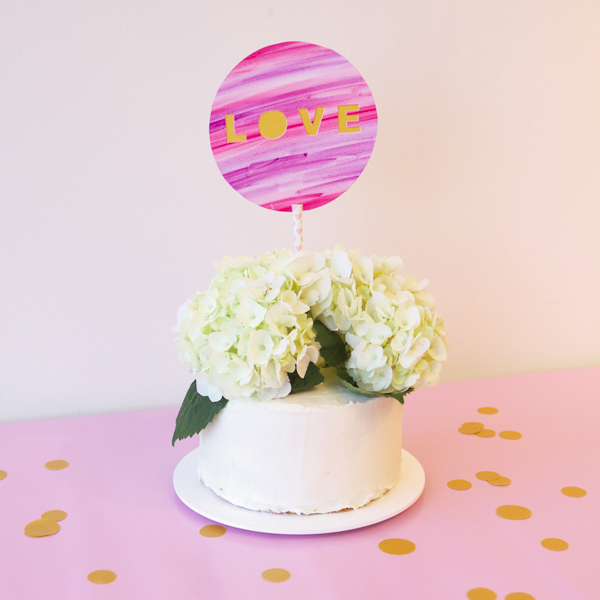
For bonus fancy, add flowers to the top of the cake to hide the bottom of the straw.
This one takes a steady hand…be careful!
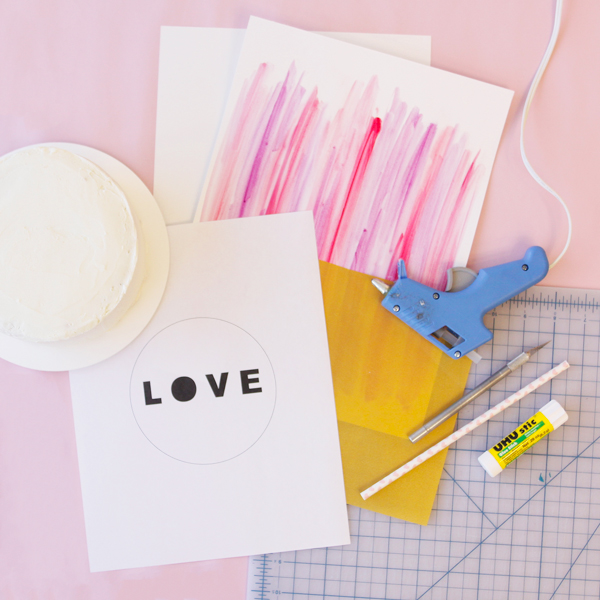
What you’ll need:
- LOVE printable (downloaded and printed)
- Decorated or color card stock (you can decorate it yourself or buy it that way—or you could start with plain card stock and glue wrapping paper to it)
- Vellum or tissue paper in a coordinating color
- Glue stick
- Hot glue and glue gun
- Paper straw
- Craft knife
- Scissors
- Optional: Flowers
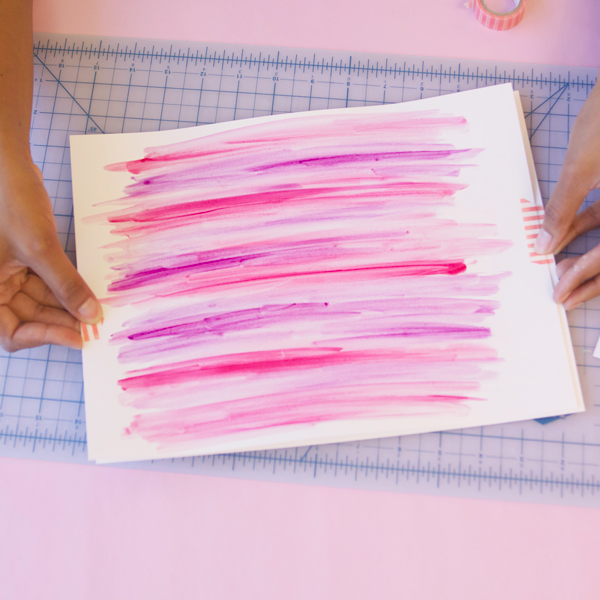
Our artist started her design by doing a simple watercolor wash on a sheet of Bristol paper—a great, easy way to match the colors of your party theme.
The most important thing is that the front and back of your LOVE topper are made of card stock heavy enough to stand up straight.

Stack the decorated paper on top, face up, and the plain cardstock underneath it, then tape them together for stability. Tape the Love printable over that, carefully cut around the circle with a craft knife, making sure to cut through all three layers.
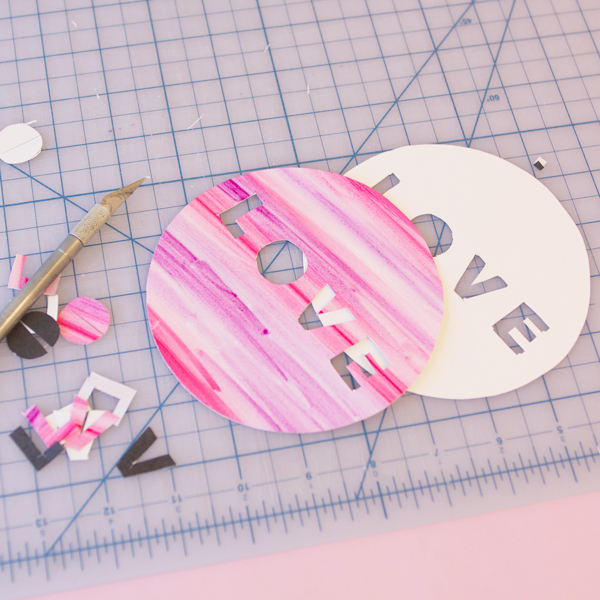
Then cut out the letters the same way.
Cut a piece of vellum or tissue paper big enough to cover all the word LOVE—there should be space around the words, but it shouldn’t stick out of the circle. Use the glue stick to adhere the vellum or tissue paper to the reverse of the decorated paper, then apply glue all over the back, line up the blank cutout and stick it on.

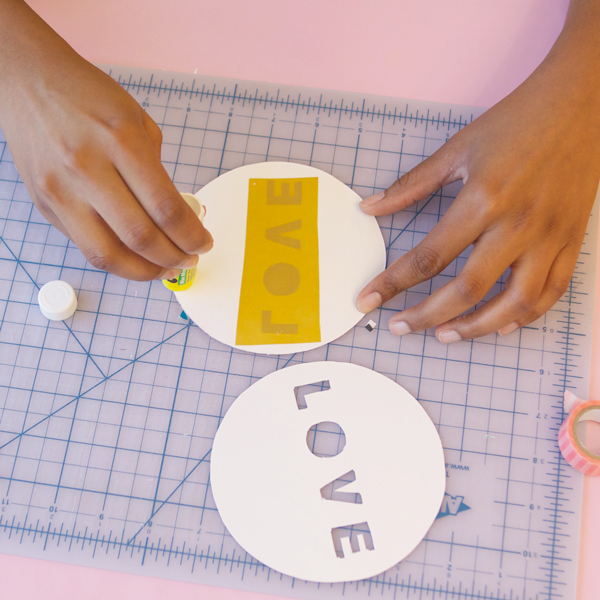
Use the craft knife to cut two slits in the top of the paper straw. Slide the LOVE circle in to be sure it fits and looks centered, then remove it and add some hot glue inside the straw. Re-insert the circle and allow to dry.
Insert it far enough into the cake for the LOVE topper to feel stable.
Summer Sun Cake Topper
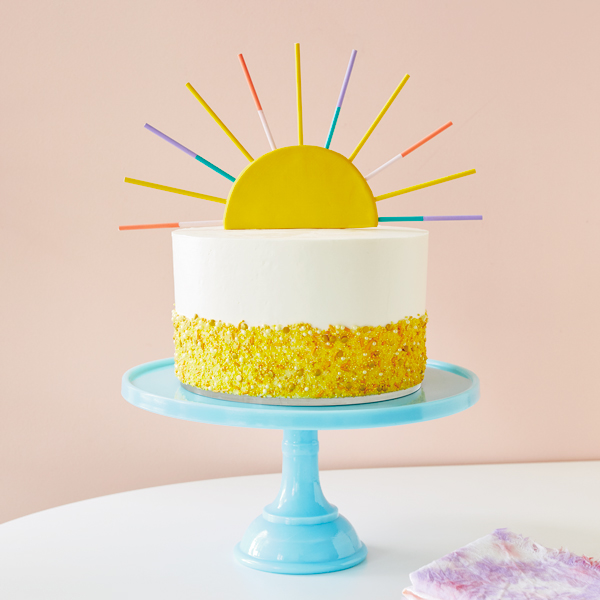
Happy up any celebration with this bright, sunny cake topper!
It’s super easy and perfect for a summer birthday party.
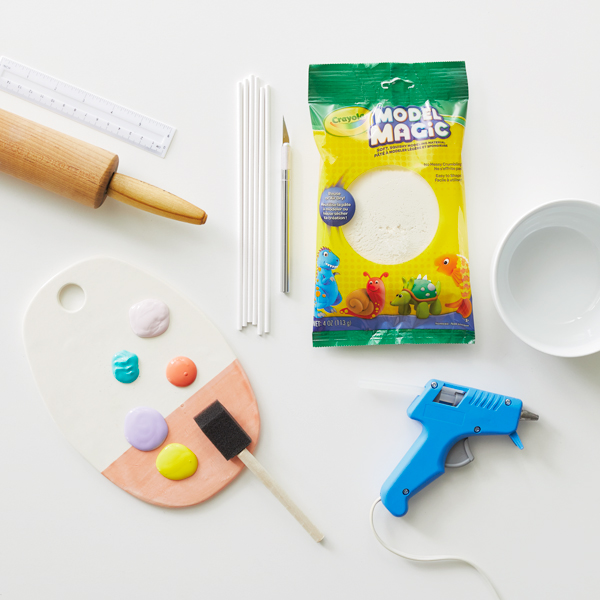
What you’ll need:
- Crayola model magic
- Rolling pin
- Smallish bowl (or another circle-shaped thing to trace)
- Ruler or straight edge
- Craft knife
- Paint brush or foam brush
- Acrylic craft paint in the party palette
- About 13 4″ treat sticks (like for cake pops)
- Hot glue and glue gun
- Cake
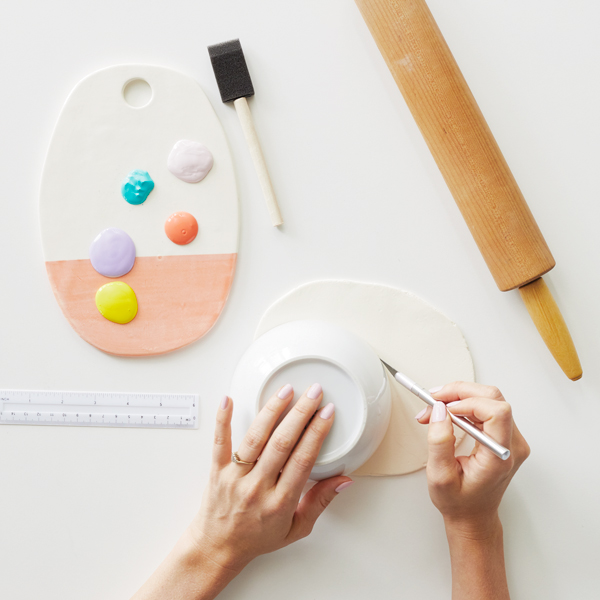
First, roll out a piece of Model Magic to about 1/4″ thick. Pop a bowl (or plate or any other circle-shaped thing) on top and trace around it with a craft knife.
Pull away the extra clay, then use a ruler or straight edge to cut a half circle. Let the Model Magic dry for 12-24 hours so it’s hard enough to stand up without sagging.
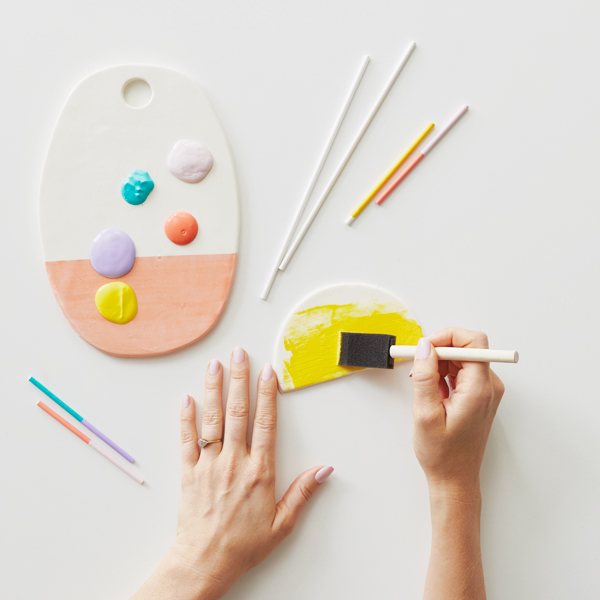
Paint the sun with bright yellow acrylic paint.
Create the rays by either rolling, dipping or painting the treat sticks in a variety of colors. Paint some solid colors and some half-and-half to make the rays extra colorful.
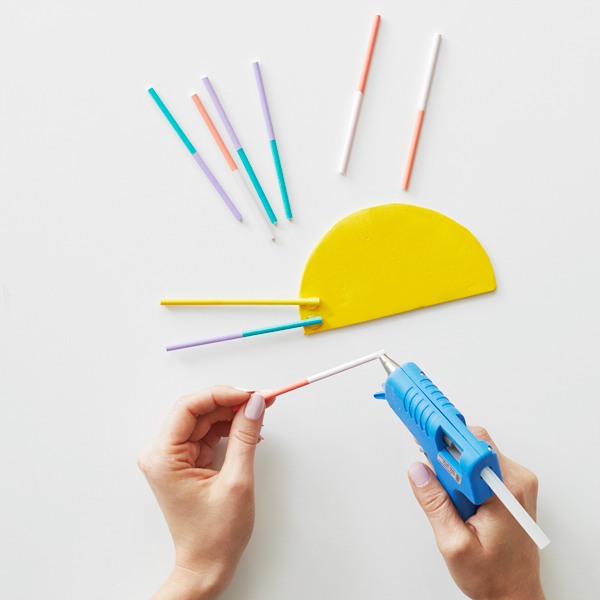
When the sun and the rays are completely dry, hot-glue the rays to one side of the sun. Make it easy on yourself by gluing the top-center and side rays first, then filling in between.
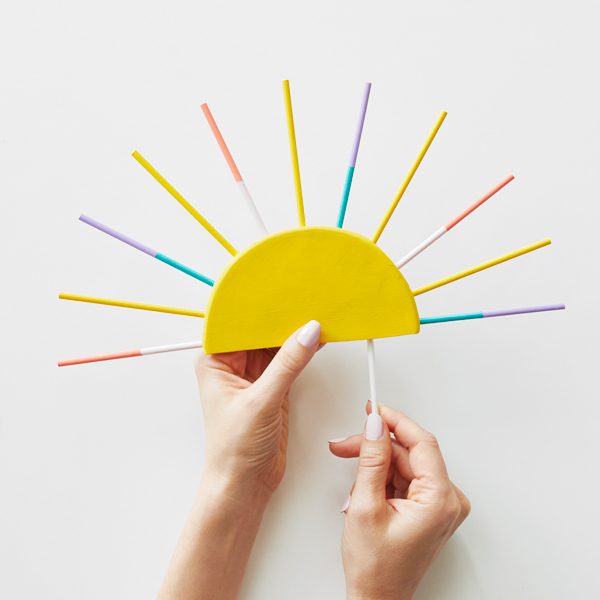
Hot-glue the two unpainted treat sticks to the bottom edge. When everything is cooled and set, gently press it into the top of the cake.
Daisy Cake Topper
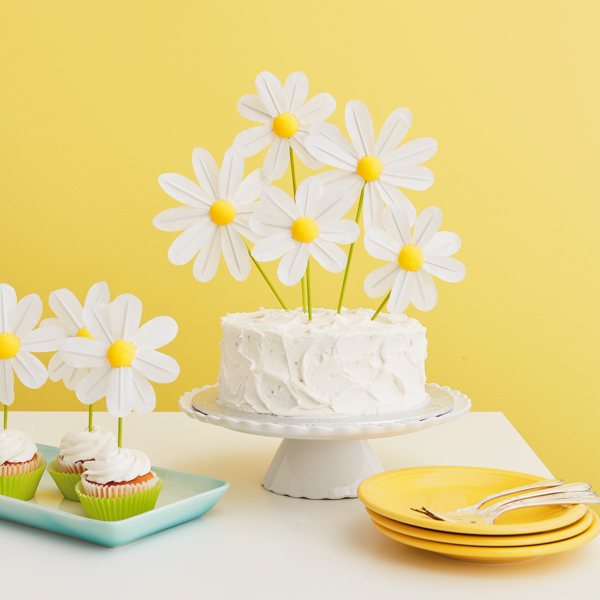
This cute cake topper can go super retro or sweet and springy…your call!
Get different colors of tissue paper for the petals to create a “crazy daisy” effect.
We love daisy cake toppers as much as we love real daisies. They’re simple and iconic enough to stand alone on a simple white cake or cupcake or top a retro ’70s cake with marbled or ombre multicolor frosting.
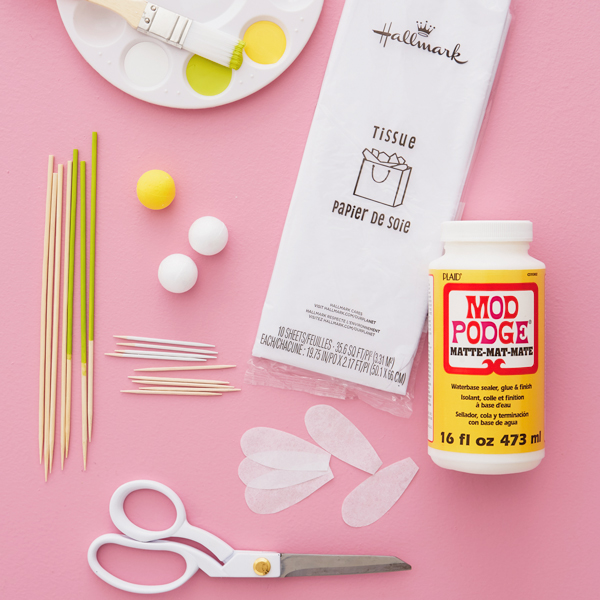
What you’ll need:
- White tissue paper (or get all fancy and do lots of different colors)
- 1″ Styrofoam balls (1 for each daisy)
- Round toothpicks (8–10 for each daisy)
- Wooden skewers (1 for each daisy)
- Yellow, green and white acrylic paint
- Scissors
- Paintbrush
- Mod podge
- Craft glue (optional)
- Paint palette or paper plate
- Foam block or Styrofoam egg carton
- Scrap paper
Start by painting the skewers green, leaving a few inches of the pointed ends unpainted for food safety. (Vary that up if you want your daisies to be different heights.)
Once the skewers are dry, stick the blunt ends into the Styrofoam balls. Paint the balls yellow and poke the skewers into an egg carton while they dry.
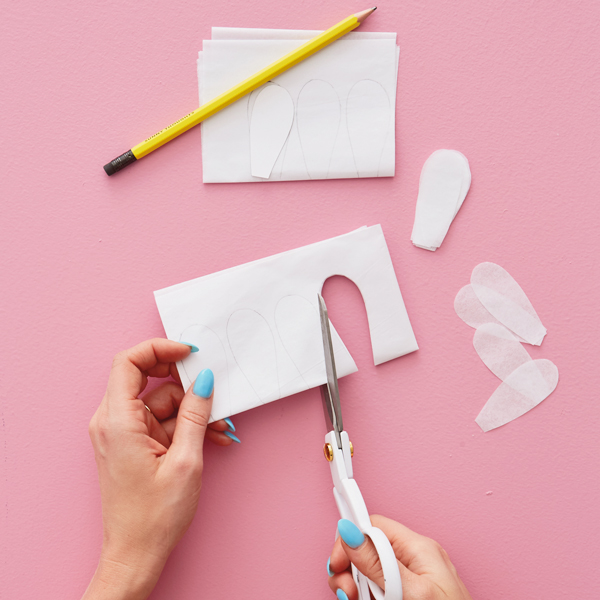
Next, draw your own petal shape—basically a teardrop with the pointy tip cut off. You can make it long and lean or short and squatty or mix it up.
To get more bang for your cut, fold your tissue paper a few times and trace the petals before you cut them out. You’ll want 8–10 petals per flower, and you’ll need two pieces of tissue paper for each petal.
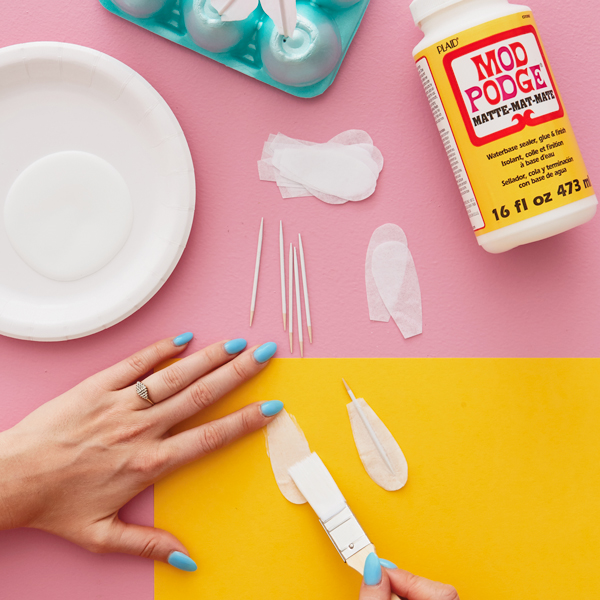
To make each petal:
- Put a tissue petal on a piece of scrap paper and paint it with Mod Podge.
- Center a toothpick on the petal with a little bit of one of the pointed ends sticking out.
- Smooth another tissue petal over the top.
Stick the petals in the foam block or egg carton or lay them flat to dry.
Editor’s note: You can paint the toothpicks white, so the wood doesn’t show through the tissue paper in the next step. This is an admittedly fussy step, but that’s who we are.
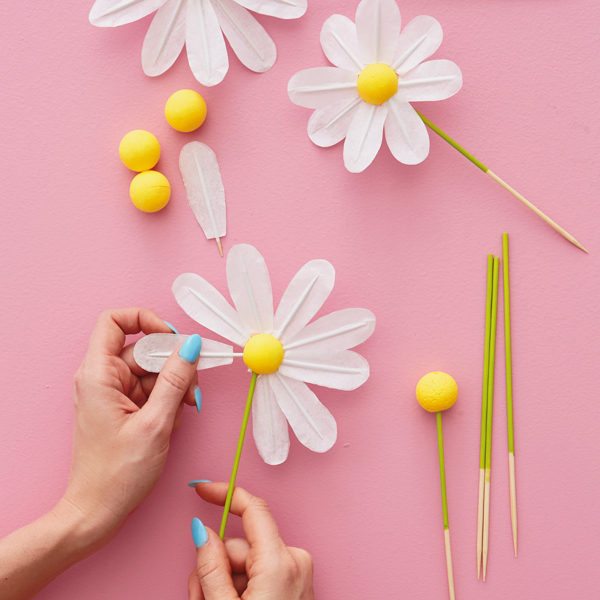
Poke the petals into the yellow balls. If anything feels wobbly, you can always add a dot of craft glue.
If you want the petals evenly spaced, start by putting two directly across from each other. Then center two more at the top and bottom. Then fill in, placing the new petals a little behind the others to add dimension.
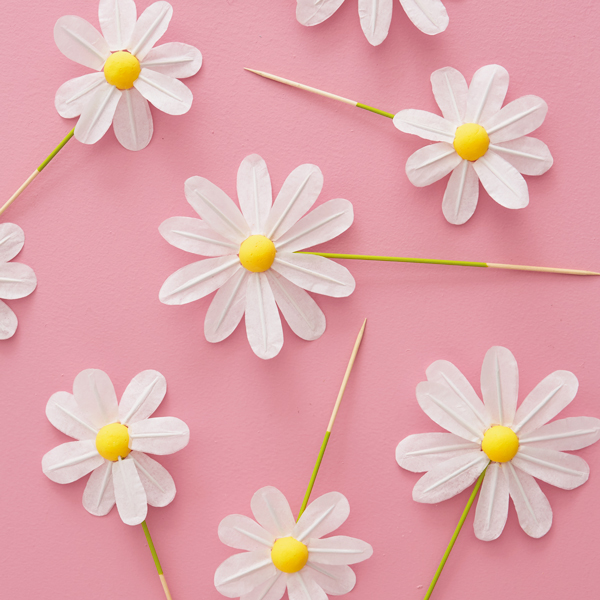
To make a big impact, scatter three or five daisies on top of your cake. And a single flower on a cupcake is JUST. THE. CUTEST. (You’ll notice we coordinated the cupcake liners with the stems and petals.)
Looking for more DIY cake toppers?
- Download one of our cute, festive or fancy free printable birthday designs.
- Or try these elegant wedding cake topper printables.
- We love cake. So we have cakes, cupcakes and cake balls for pretty much any occasion.
You may also like
See more-
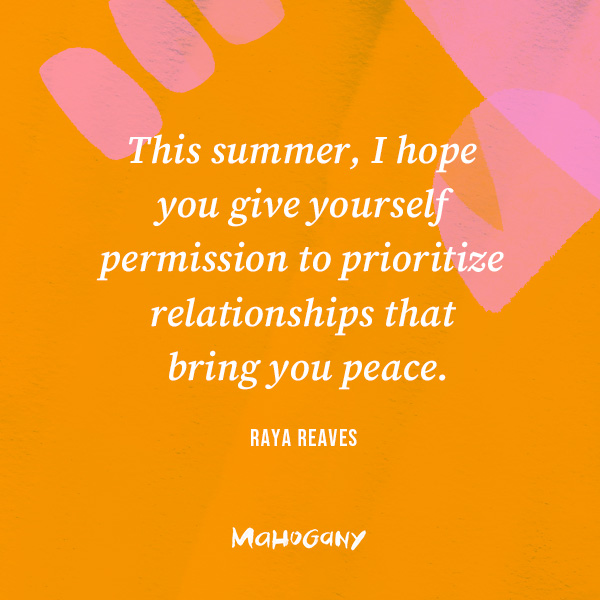
Mahogany The joy of movement
As I've gotten older, I've learned that wellness isn't just about exercise. It's about feeling good, living well and ...
-

DaySpring How to start each day feeling renewed by grace
Amid the demands of daily life, carving out time for spiritual nourishment can indeed be a challenge. However, center...
-
Keepsake Ornaments Complete your collection!
Class is in session with Defense Against the Dark Arts professor Gilderoy Lockhart™. 🪶 ✨ Complete your Harry Potter a...
-
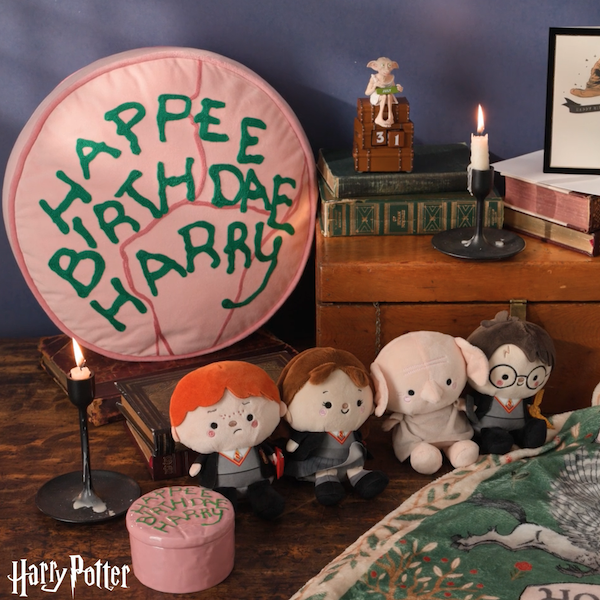
Gifting Happee Birthdae, Harry!
Celebrate the birthday of the Boy Who Lived with this fun collection of Harry Potter gifts! From cozy blankets perfec...
-
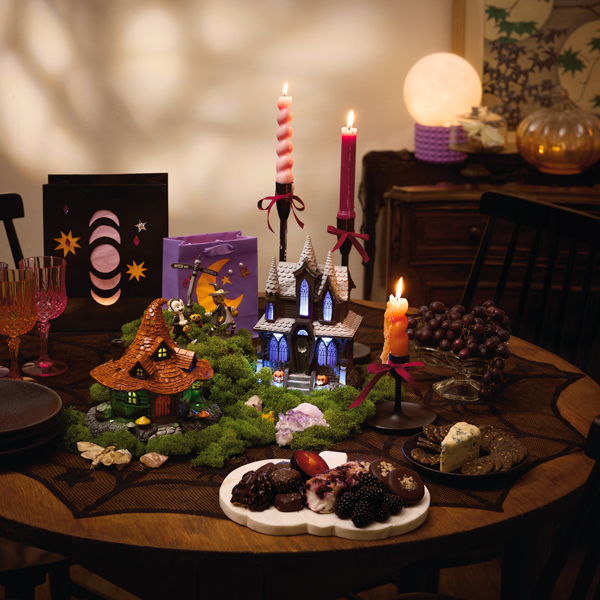
Halloween Witchy Halloween party ideas: Fun crafts and activities for a magical night in
Witch-themed parties have always delighted Halloween fans. They offer hosts and partygoers alike the chance to intera...
-
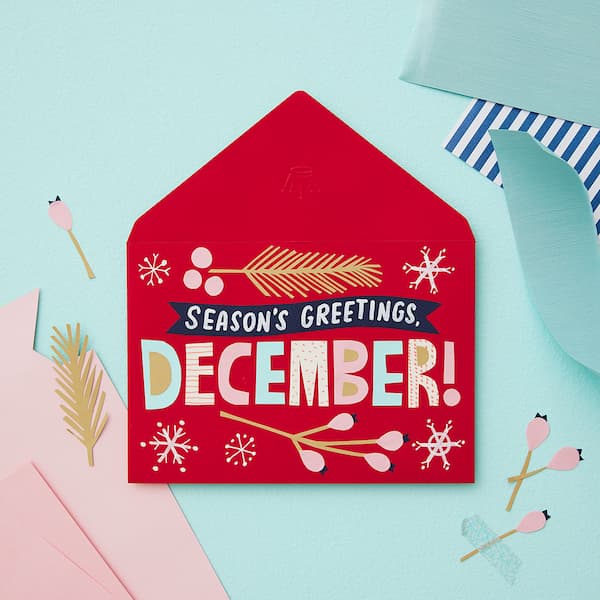
Calendar Flip Share More Moments: December 2026 Holidays and Observances
Whichever holidays you celebrate, whatever your traditions and whoever you call family, December is a month full of m...
-
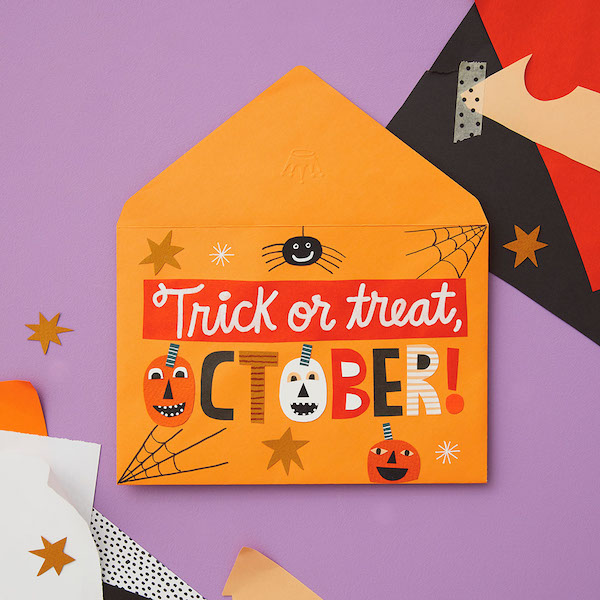
Calendar Flip Hey, Pumpkin! October 2026 Holidays and Observances
Get info, ideas and inspiration for October holidays and observances, including free sharable quotes and digital wall...
-
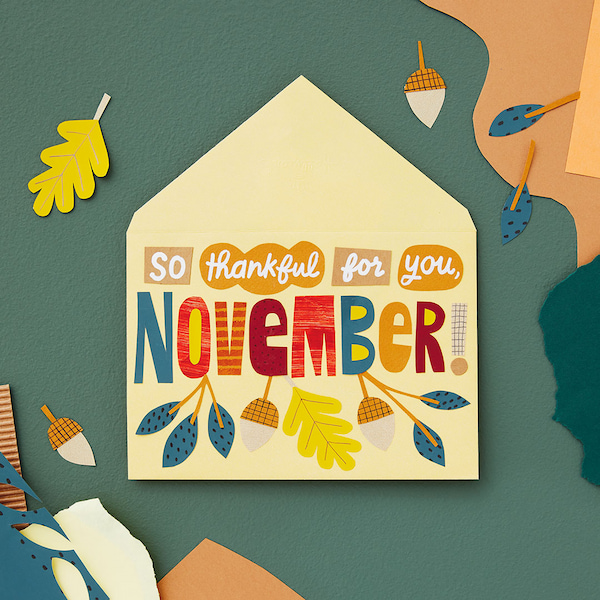
Calendar Flip Share joy, give thanks: November 2026 Holidays and Observances
Get info, ideas and inspiration for November holidays and observances.
-
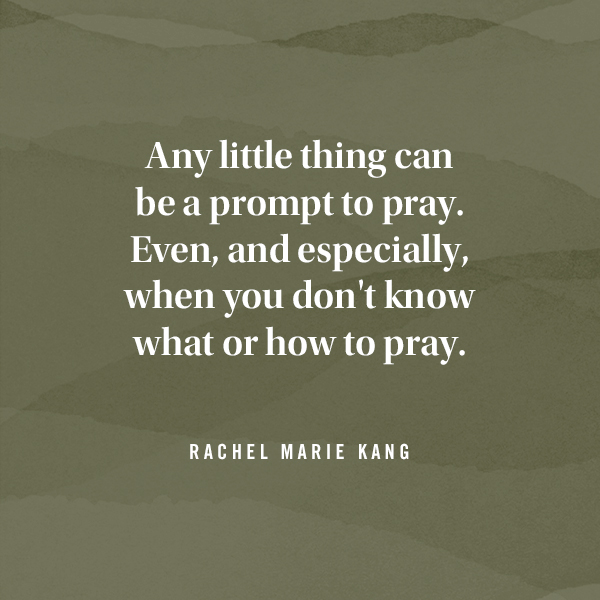
DaySpring The secret to praying when you don't know how to pray
I open the closet door in a room that is not my own. I put packages of diapers on the top shelf, rearranging and rest...
-
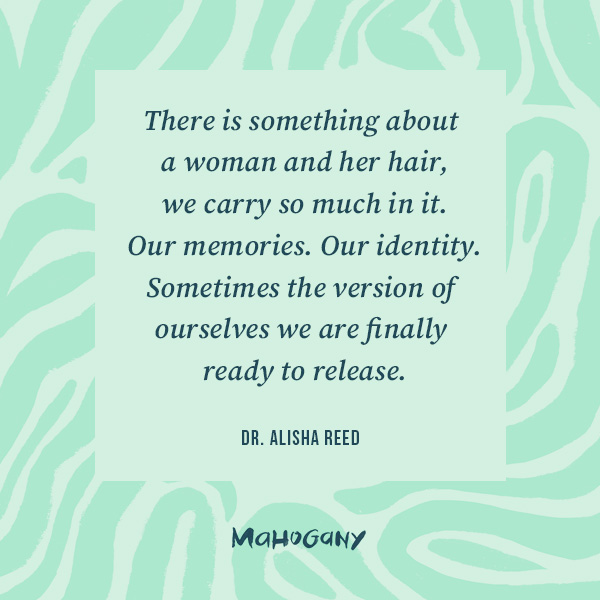
Mahogany Every woman has a hair story
I always take a selfie as soon as I get in the chair at my hair appointment. Most women take photos after, but it’s t...
-
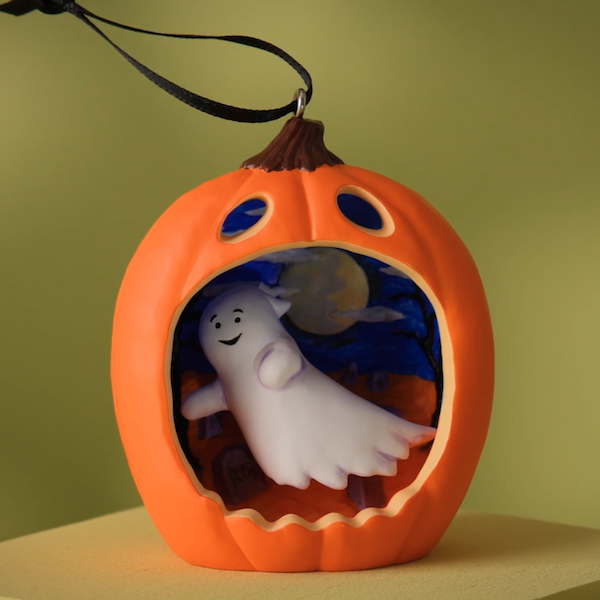
Keepsake Ornaments Add some Halloween glee to your tree! 🎃
From sassy cats to friendly ghosts, vintage vampires to mischievous kittens, we have lots of options if you're lookin...
-

Keepsake Ornaments An epic adventure for your tree 🧙🏻♂️
Relive some of your favorite moments from The Lord of the Rings: The Fellowship of the Ring™ with this Keepsake Ornam...
-

Keepsake Ornaments What a great little tree! 🎶🎄
This little tree has a LOT going for it. And just like the one in "A Charlie Brown Christmas," this Peanuts® ShowTopp...
-
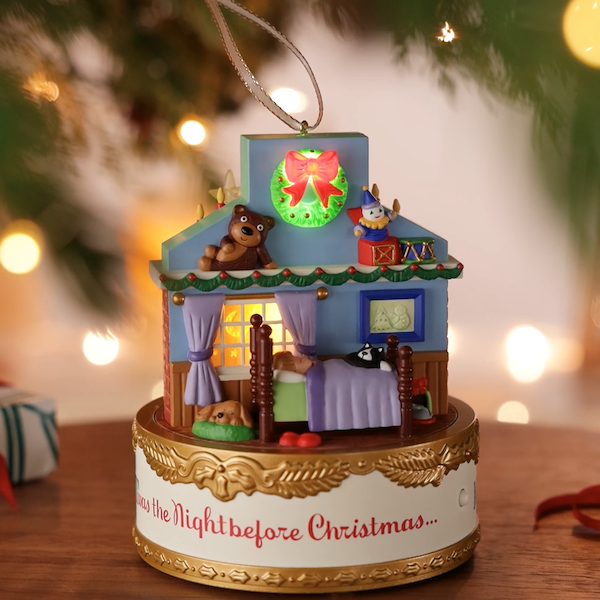
Keepsake Ornaments Childhood nostalgia incoming! 🥰
This incredible Keepsake Ornament depicting scenes from the classic poem, "A Visit from St. Nicholas," will take you ...
-
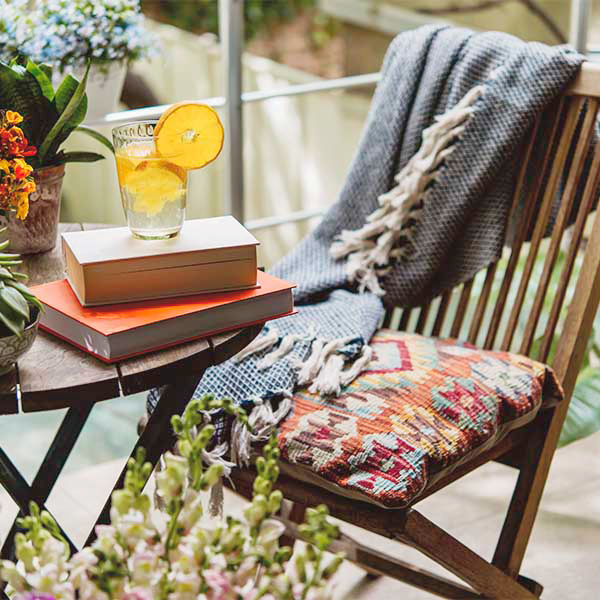
DaySpring Six Scriptures for spiritual rest this summer
A recipe for a relaxing summer afternoon: the sun’s warming rays, a cool drink, something good to read, a comfortable...
-

Keepsake Ornaments A carousel fit for a princess 👸
A Disney Princess, that is! Cinderella, Jasmine and Ariel are riding in high style on this gorgeous, gilded carousel...
-
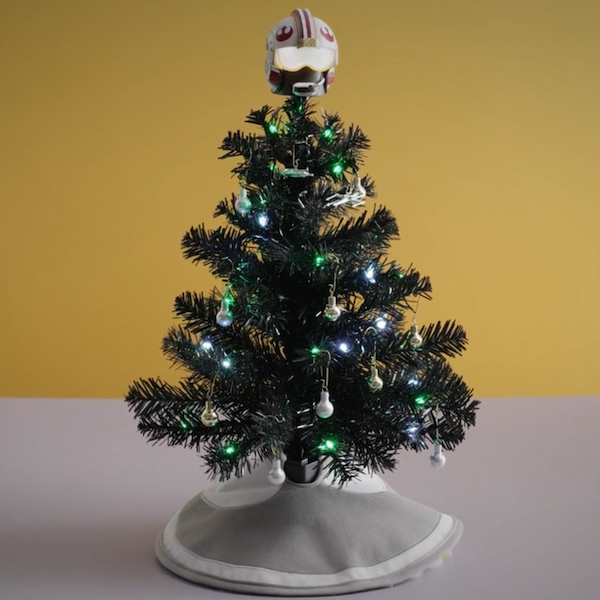
Keepsake Ornaments Mini tree, big pew-pew energy ✨
Immerse yourself in intergalactic adventure with a mini tree that's filled with Star Wars™ fun. From the Mini Star Wa...
-

Keepsake Ornaments Soar to new holiday heights with Disney Dumbo 🐘
First in the Disney Parks Memories series, this Keepsake Ornament is inspired by the original 1955 facade of the clas...
-
Mahogany Making new summer memories
When I think about summer and friendship together, my mind immediately goes back to one particular day in college. I ...
-
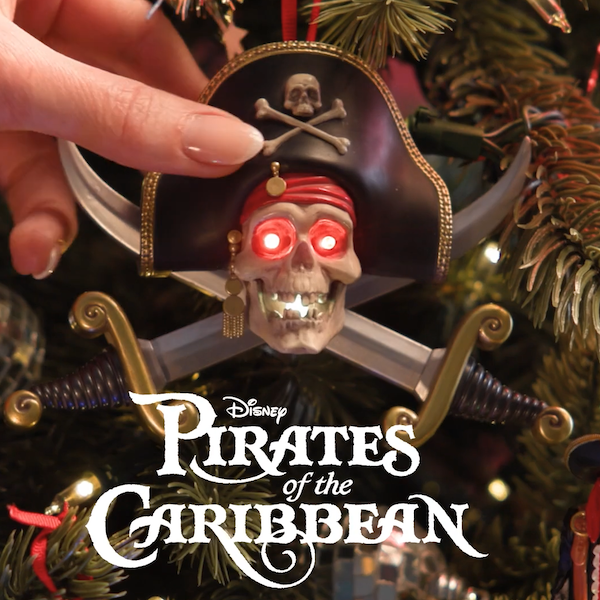
Keepsake Ornaments Avast mateys, here be pirates 🏴☠️
So it's pirates yer lookin' for, is it? Well, ye've stumbled upon a veritable treasure trove! Relive the swashbuckl...
