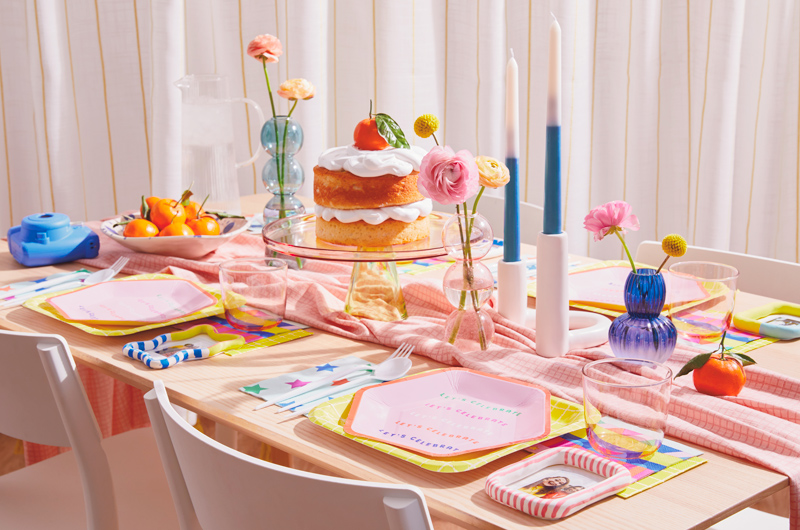
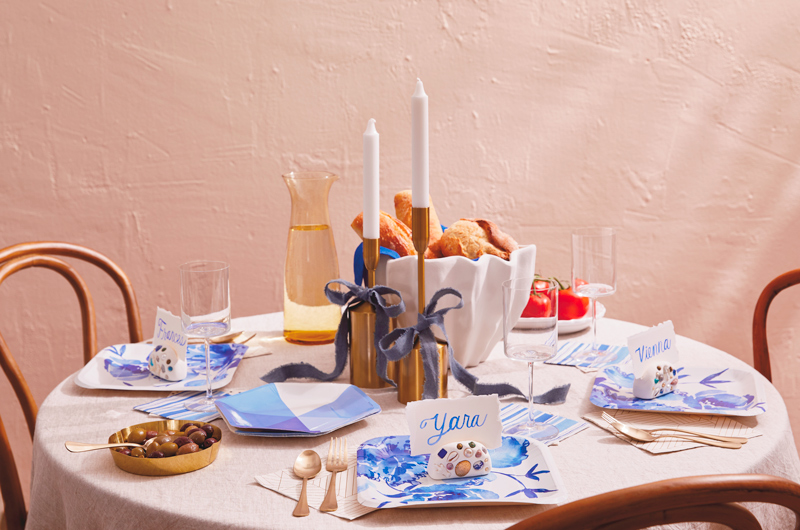
Make these delightful DIY personalized place card holders to elevate your party table

If you’re the sort of person to throw a dinner party, chances are you’re all about the details. And if you’re all about the details, we think you’ll love these two DIY personalized place card holder ideas.
They’re easy, fun and can be made with a few simple craft supplies. They can also be decorated in many different ways—even if you don’t consider yourself the “artsy type.”
Don’t believe us? Keep scrolling!
Inspired? Create and share by tagging @HallmarkStores.
We love these personalized place card holders for a few reasons:
1. There’s nothing more welcoming than something that signals to a guest, “Right here…this is your spot. This is where you belong.”
2. It shows guests that among all the other details, you thought about them individually, not just as part of a group.
3. Both designs make a fun takeaway for your guests—a memento of the evening’s fun for them to keep!
Idea #1: DIY Photo Frame Personalized Place Card
Hello, can you say adorable? These personalized place card holders give you a great excuse to actually print out all those cute pictures you’ve taken with your loved ones over the years. Plus, it’s so fun and sweet to have your guests find their spot at the table by looking through your special moments together!
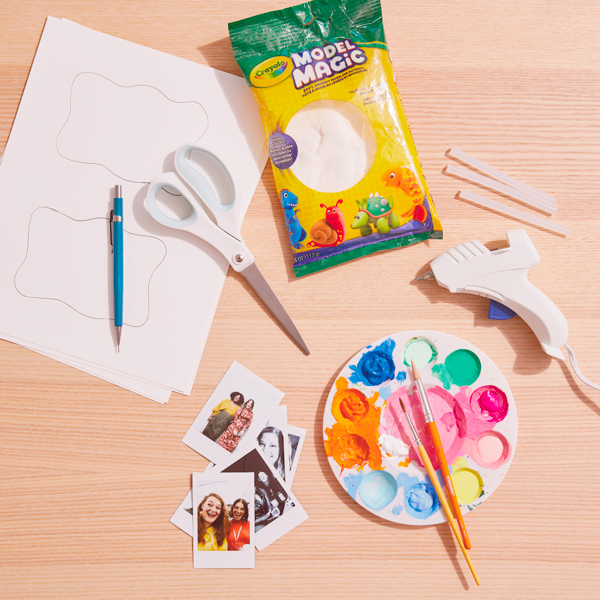
What you’ll need:
• Crayola® Model Magic
• Card stock
• Pencil
• Scissors
• Hot glue gun & glue sticks
• Acrylic craft paint and paint brushes
• Photos of party guests
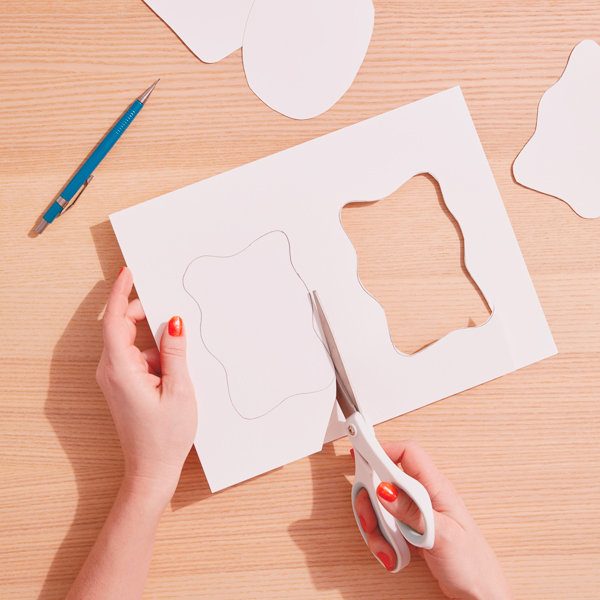
To start, create some shapes as a guide for the Model Magic frames. Place the photo of your guest on the card stock, then draw your frame shape, leaving enough room around the photo for a bit of a mat. Draw your shape and then cut it out with the scissors. We liked this wavy shape and also did some organic ovals and rounded squares.
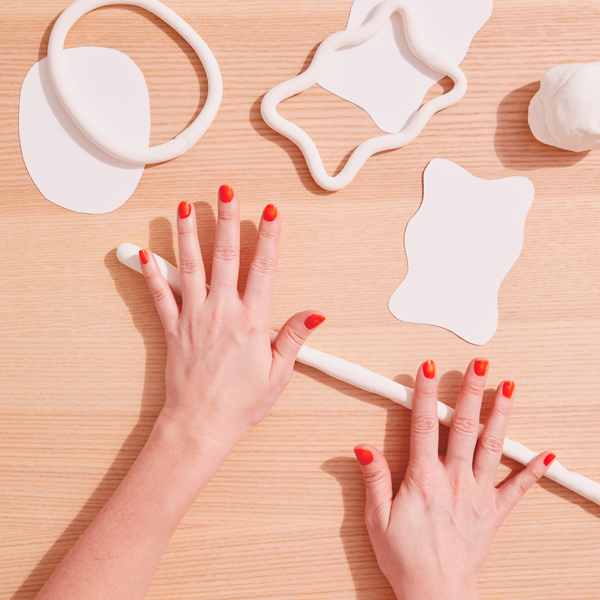
To make your frame, start by rolling pieces of the Model Magic into a long rope, about 3/4 inch thick.
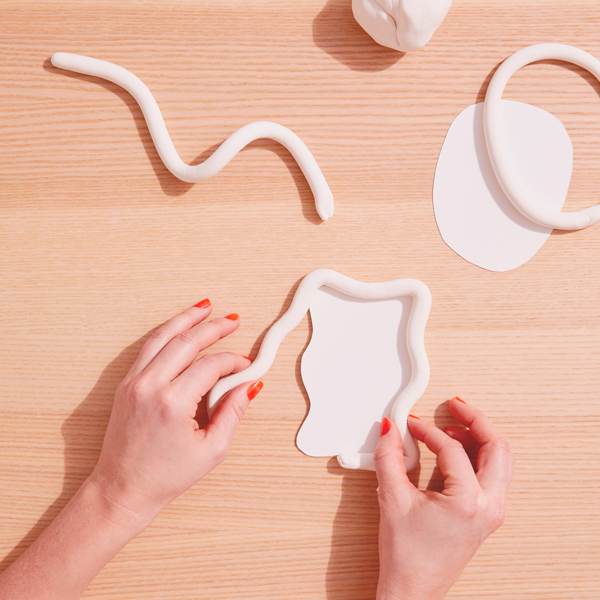
Shape your Model Magic frame using the piece of card stock you cut earlier as a guide. Connect the ends of the rope by gently rolling them together. Let the Model Magic dry for 24 hours.
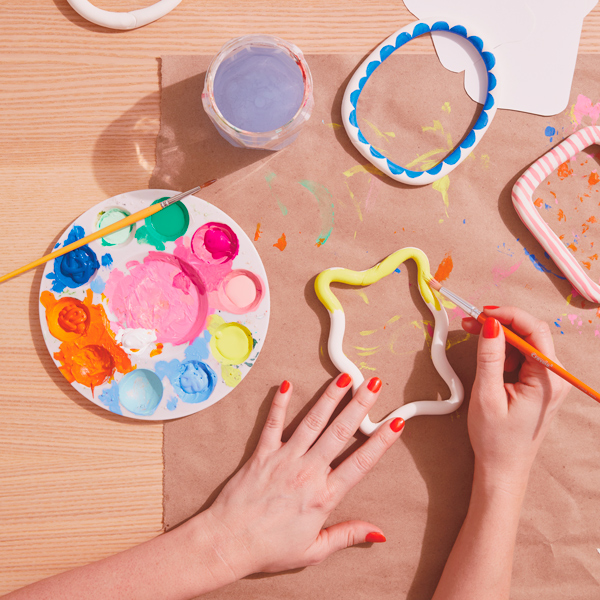
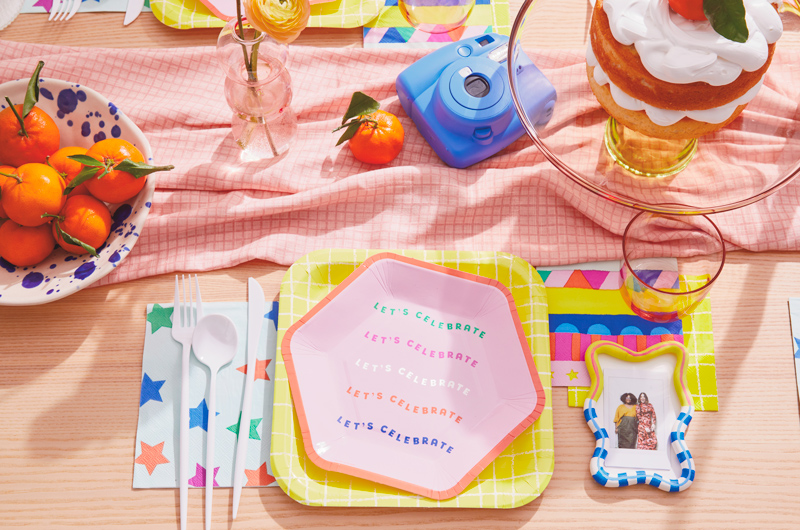
After the frames are dry, paint with craft paint. We picked a color palette similar to the Hallmark Celebrate! plates featured in the party table setting above.

After the paint is dry, use the hot glue to attach the frame to the card stock backing.

Next, use hot glue to attach the photos to the frames.
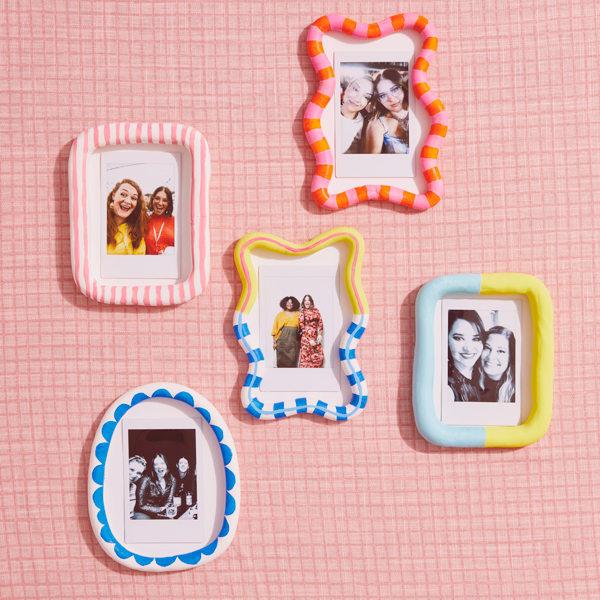
Congrats—your photo frames are done! They are great little personalized gifts for your party guests. You could even attach a magnet to the back to make the gift more useful!
Idea #2: DIY Mosaic Personalized Place Card Holder
You can spin this idea SO many ways. While we used seashells and glass beads to create our mosaic place card holder—say, to celebrate a friend’s upcoming solo trip to a seaside paradise—you could decorate using pretty much any small, decorative items. Wildflowers, leaves and seeds to celebrate spring, perhaps! Or tiny holiday decorations for a Christmas dinner party. The possibilities are endless, so long as the embellishments are on the itty-bitty side.
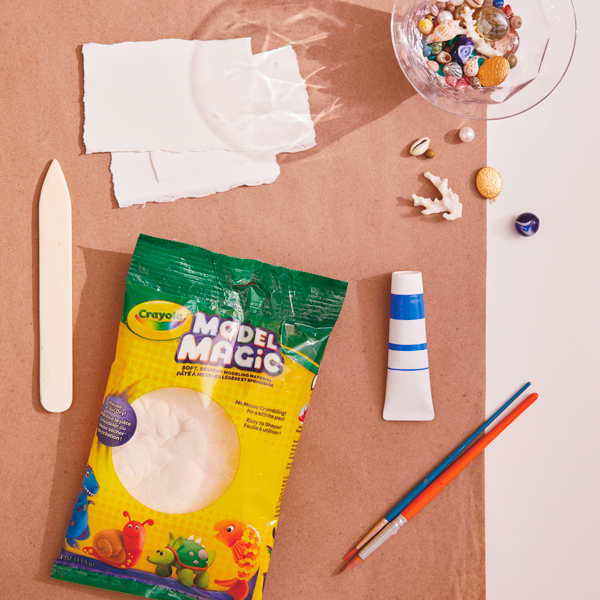
What you’ll need:
• Crayola® Model Magic
• Mix of little trinkets such as craft shells, beads, pearls, etc.
• Bone folder or other tool to create a place card slot, like a popsicle stick
• Place cards (we used cut-down watercolor paper)
• Blue gouache paint
• Paint brushes
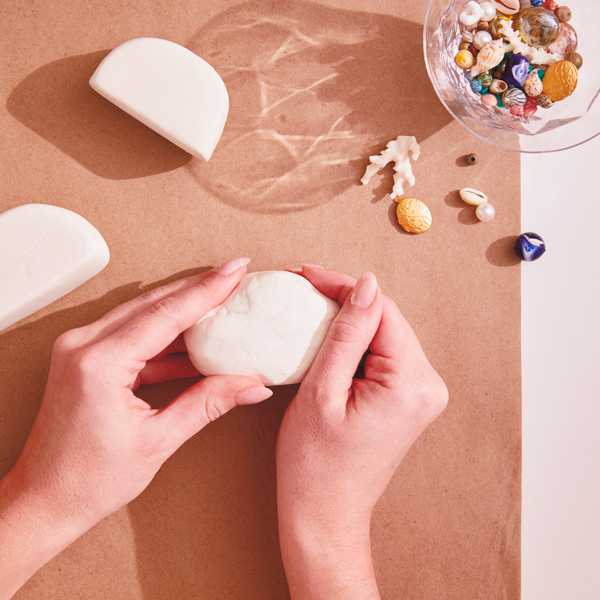
First, shape the Model Magic into half-circle mounds. Then, press the sides, rounded top edge, and bottom onto a flat surface to help smooth them out.
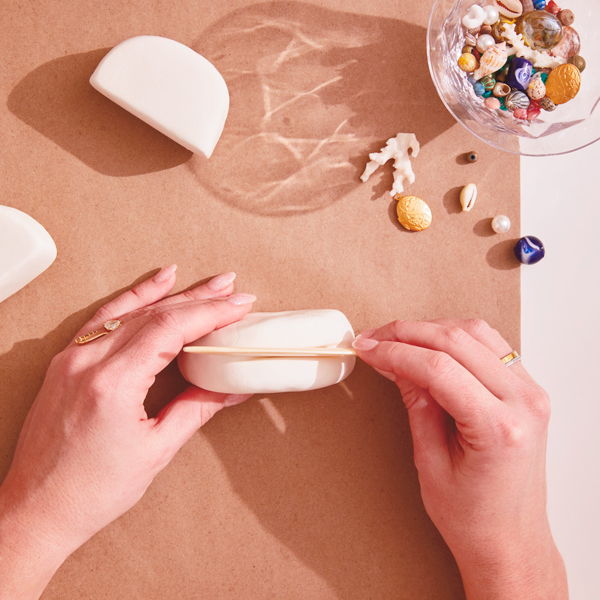
Use the bone folder to create a slot in the top to hold your place cards.
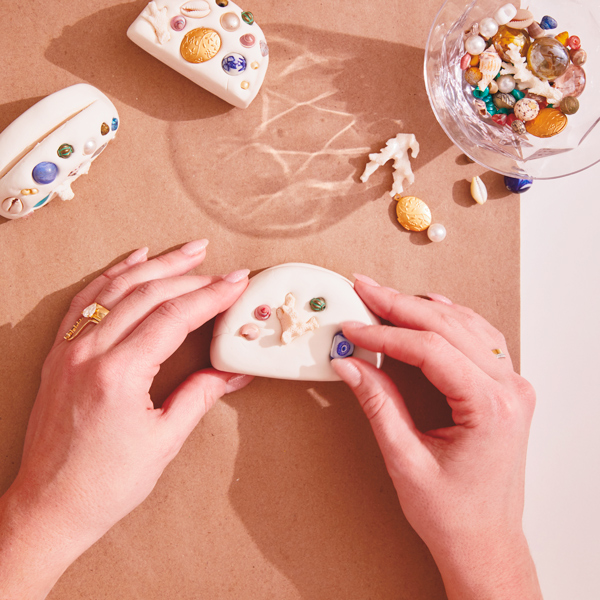
Next, press your trinkets into the front of your name card holder. Let the Model Magic dry for 24 hours with the trinkets pressed in. You can then glue them into the holder if you’d like, but we found they stayed in once the Model Magic was dry.

Next, paint guest names onto the place cards.
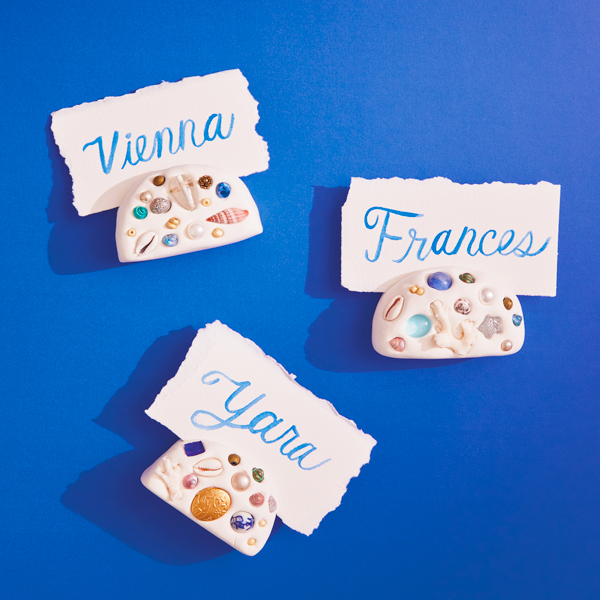
Voila! Done. The perfect little addition to personalize your dinner party.

Whatever you’re celebrating, we know these DIY personalized place card holders will be a fabulous addition to your dinner party table. And your guests? They’re gonna LOVE them.
Want some more party inspiration? Oh, you know we have tons:
- Let’s get together: 11 party ideas for adults
- From parallel parking to prom: Celebrating your teen’s big moments
- Worth the wait: Milestone party ideas for life’s biggest moments
- How to throw the ultimate surprise birthday party
- DIY party decorations for all of life’s celebrations
- 7 easy DIY cake toppers for special (or any) occasion
Shop Party Supplies
See allYou may also like
See more-
Mahogany The joy of movement
As I've gotten older, I've learned that wellness isn't just about exercise. It's about feeling good, living well and ...
-
DaySpring How to start each day feeling renewed by grace
Amid the demands of daily life, carving out time for spiritual nourishment can indeed be a challenge. However, center...
-
Keepsake Ornaments Complete your collection!
Class is in session with Defense Against the Dark Arts professor Gilderoy Lockhart™. 🪶 ✨ Complete your Harry Potter a...
-
Gifting Happee Birthdae, Harry!
Celebrate the birthday of the Boy Who Lived with this fun collection of Harry Potter gifts! From cozy blankets perfec...
-
Halloween Witchy Halloween party ideas: Fun crafts and activities for a magical night in
Witch-themed parties have always delighted Halloween fans. They offer hosts and partygoers alike the chance to intera...
-
Calendar Flip Share More Moments: December 2026 Holidays and Observances
Whichever holidays you celebrate, whatever your traditions and whoever you call family, December is a month full of m...
-
Calendar Flip Hey, Pumpkin! October 2026 Holidays and Observances
Get info, ideas and inspiration for October holidays and observances, including free sharable quotes and digital wall...
-
Calendar Flip Share joy, give thanks: November 2026 Holidays and Observances
Get info, ideas and inspiration for November holidays and observances.
-
DaySpring The secret to praying when you don't know how to pray
I open the closet door in a room that is not my own. I put packages of diapers on the top shelf, rearranging and rest...
-
Mahogany Every woman has a hair story
I always take a selfie as soon as I get in the chair at my hair appointment. Most women take photos after, but it’s t...
-
Keepsake Ornaments Add some Halloween glee to your tree! 🎃
From sassy cats to friendly ghosts, vintage vampires to mischievous kittens, we have lots of options if you're lookin...
-

Keepsake Ornaments An epic adventure for your tree 🧙🏻♂️
Relive some of your favorite moments from The Lord of the Rings: The Fellowship of the Ring™ with this Keepsake Ornam...
-

Keepsake Ornaments What a great little tree! 🎶🎄
This little tree has a LOT going for it. And just like the one in "A Charlie Brown Christmas," this Peanuts® ShowTopp...
-
Keepsake Ornaments Childhood nostalgia incoming! 🥰
This incredible Keepsake Ornament depicting scenes from the classic poem, "A Visit from St. Nicholas," will take you ...
-
DaySpring Six Scriptures for spiritual rest this summer
A recipe for a relaxing summer afternoon: the sun’s warming rays, a cool drink, something good to read, a comfortable...
-

Keepsake Ornaments A carousel fit for a princess 👸
A Disney Princess, that is! Cinderella, Jasmine and Ariel are riding in high style on this gorgeous, gilded carousel...
-
Keepsake Ornaments Mini tree, big pew-pew energy ✨
Immerse yourself in intergalactic adventure with a mini tree that's filled with Star Wars™ fun. From the Mini Star Wa...
-

Keepsake Ornaments Soar to new holiday heights with Disney Dumbo 🐘
First in the Disney Parks Memories series, this Keepsake Ornament is inspired by the original 1955 facade of the clas...
-
Mahogany Making new summer memories
When I think about summer and friendship together, my mind immediately goes back to one particular day in college. I ...
-
Keepsake Ornaments Avast mateys, here be pirates 🏴☠️
So it's pirates yer lookin' for, is it? Well, ye've stumbled upon a veritable treasure trove! Relive the swashbuckl...
