We're sorry
There was an error adding this product to your cart. Please close this window and try again.

Get it in time
Order by 11:59 p.m. CT on these dates for non-personalized items to arrive by Easter.
Standard: Saturday, 4/12
Expedited: Tuesday, 4/15
Rush: Wednesday, 4/16
Need it today? Store pickup is fast and free. Just use the “shop by store” filter to shop what’s in stock at your local Hallmark Gold Crown store.
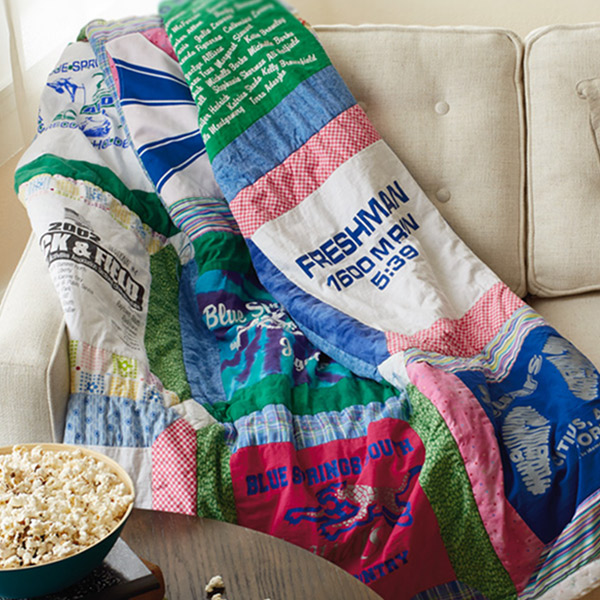
Inspired? Create and share by tagging @Hallmark.
Cut a 13-inch square from the cardboard and use the outer piece of cardboard as a stencil to mark your T-shirt squares. Center the design of a T-shirt within the stencil and mark around the edges with a water-soluble marker. Remove stencil and cut out T-shirt along the marked lines. Repeat for all the T-shirts.
Once you have 20 squares, cut squares of equal size from the interfacing and, following manufacturer’s instructions on the interfacing, fuse each interfacing square to the back of a T-shirt square. Use a press cloth and low-heat iron to avoid ruining the T-shirt designs. Now the knit fabrics should be easier to work with.
Trim the fused squares to be 12½ inches on all sides. Mark the center of each square along each side with the water-soluble marker.
Cut your various cotton fabrics into 80 strips that are 3½ inches wide by 18½ inches long. Mark the center length of each strip. Match the center mark of a strip with the center mark of a T-shirt square and pin together with right sides facing (the strip should overhang the square by 3 inches on both sides). Repeat until all 20 squares have strips pinned to them.
Sew strips to squares at sewing machine using a ¼-inch seam allowance. Repeat process for the opposite sides of each square with new strips—always centering strips. Now you should have something that looks like this for each T-shirt square:

Center and pin strips to the third side of each square. With the first square at the sewing machine, sew the strip to the square, but do not sew past the square on either side. Remove from the sewing machine and take square to your ironing board. Flip both ends of the third strip under at a 45° angle to form mitered angles with the strips adjacent to it. Use the quilting ruler to help. Iron the strip along the 2 folds and pin in place along folds. Take it back to the sewing machine and topstitch the folds to the adjacent strips. Repeat for the remaining squares.

Repeat Step 6 with the fourth strip on each square.
Once you have all 20 squares surrounded by the mitered borders, you can start arranging them. Place them all on the floor or table, 4 across and 5 down. Rearrange them until you have a color pattern you like. Then pin the squares together, right sides facing, and sew along the sides to create rows.
Pin and sew the rows together. When your quilt top is complete, iron it on the wrong side, pressing down the seams to face the same direction.
To make a quilt “sandwich,” iron your quilt top again, this time from the front using a press cloth, to remove as many wrinkles as possible.
Lay the quilt top right side down on a large, open area of floor or low-pile carpeting. With 2-inch-wide masking tape, tape the edges of the quilt top to the floor, pulling it taut as you go and working opposite sides first, then corners. You don’t want to pull it too tight, but you do want to remove wrinkles.
Then unfold your batting and lay it, centered, over the quilt top, gently pulling out any wrinkles in the batting. Batting should completely cover the quilt top on all sides and corners.
Iron your backing fabric and lay it on top of the batting, smoothing out wrinkles and centering the fabric so it, too, covers your quilt top on all sides. Tape your backing fabric down to the floor on all sides, using the 2-inch-wide tape and pulling it taut, as you did the quilt top.
Pin all 3 layers together using your large safety pins. Start in the center of the quilt and work your way out to the edges, pinning about every 4 to 6 inches across the entire quilt. If you’re working on carpeting, lift up the pins slightly as you secure them to make sure you’re not pinning the quilt to the carpet.
After the quilt is all pinned together, carefully remove the tape from both layers of fabric and throw it away. Now it’s time to quilt.
Mark your desired quilt pattern onto the entire quilt top using the water-soluble fabric marker and quilting templates or a ruler. We just “stitched in the ditch” around all the squares so we didn’t need to mark any lines.
For machine-quilting, roll up the quilt from 2 opposite edges into tight spirals. Use quilt clips to hold the spirals in place. Starting at the center, quilt along your seam lines or marked lines, removing pins as you go. Then work your way to the outside of the quilt, keeping the layers you’re not working on rolled up tightly out of the way.
To bind, trim off excess backing and batting to within 1 inch of the quilt top edges if necessary. About halfway down 1 side of the quilt, and starting about 12 inches from the end of your binding, pin the raw edges of the binding strip to the raw edge of the front of the quilt. Begin sewing the binding to the quilt along the first side using a ¼-inch seam allowance.
At the end of the first side, miter the corner: Stop sewing when you reach ¼ inch from the end of the first side.

Backstitch 1 to 2 stitches, and then raise the needle and presser foot and pull the quilt out from the machine towards you (you can leave threads attached). At a 45° angle, lay the binding out so that it is parallel with the quilt top edge, but going in the opposite direction.

Flip the binding back 180° across the quilt, keeping the previous 45° angle in position underneath. The binding should now be completely straight, with the folded edge of the binding parallel with the just-sewn quilt edge, and the bottom, raw edges of the binding aligning with the raw edge of the quilt edge still to be sewn.

Place the corner of the quilt back under the presser foot at a 90° angle to start on the next side of the quilt. Place the needle ¼ inch from the corner, close to where you ended your stitches previously. Continue to sew the binding to the quilt. Continue along the second side until you get to the next corner. Repeat the mitering process and continue again, until all 4 corners are mitered.

On the last side, continue sewing the binding to the quilt until you’re about 10 to 12 inches from where you began. Take the first “tail” of bias binding and, about 5 to 6 inches from the attached end, open it up and iron it at a 45° angle towards the quilt. With the other tail of binding, place it along the unsewn edge of the quilt until it touches the angled first piece of binding. Open and iron the second piece at a 45° angle away from the quilt, so that the 2, 45° angles match up.

Pin the 2 strips of binding together, right sides facing, along the 45°-angle fold. (It’s awkward but will give you an invisible join when you’re done.) Sew together, and then clip off seam allowances ¼ inch from the seam. Iron seam open, fold in half right side out, iron again, and then sew the final bit of unattached binding to the front of the quilt.
Now that the binding is secure to the front of the quilt, trim the raw edges for all 3 layers (quilt top, batting and backing fabric) to about ¼ inch from the binding seam. Then fold the binding over to cover the raw edge of the quilt, and whipstitch the folded edge of the binding to the back of the quilt. For the mitered corners, if you sew the binding down right up to the corner, the next edge of binding should fold down straight and create a 45° angle. Tack a few extra stitches in the corners to keep them crisp.
Spray the marks from the top of the quilt with water to remove. Then wash the quilt to soften it up.
Milestone birthdays are an excuse to go BIG. And if you’ve got a big birthday coming up (yours or theirs!) and are in...

Milestones don’t come much bigger than a 100th birthday. Turning 100 is a major accomplishment for anyone—not just in...

A 90th birthday party is a truly special time. It’s a chance for family and friends to celebrate the guest of honor a...
An 80th birthday is a truly remarkable milestone! Just think of all the change an 80-year-old has seen in their lifet...

Seventy is not just another birthday. A 70th birthday is a (hopefully) retired hoot. A celebration and continuation o...

If you know someone turning 60, you know it’s a pretty incredible milestone to celebrate. When you turn 60, you’ve li...

If you or someone you love is turning 50, it’s officially a big deal—a great excuse to celebrate all that’s gotten yo...
A 40th birthday is such a fun milestone to celebrate! Once upon a time, it may have been joked about as “over the hil...
Turning 30 can feel so surreal. Adulthood is nothing new, but you still catch yourself looking for the adult in the r...
For many, turning 21 is a huge milestone. 21st birthdays are ones that people tend to look forward to the most. This ...

Voting! Graduating! Tattoos without parental consent! 

It’s not every day that you or someone you love turns 16. It’s a great time to celebrate who you are in this moment a...
Everything feels big when you’re twelve, but a 13th birthday feels HUGE. It’s the gateway to teenager-dom! 

When a kid turns 10, it’s a really big milestone. 
A fifth birthday is a big deal. When you turn five, you’re halfway to ten, just around the corner from starting kinde...
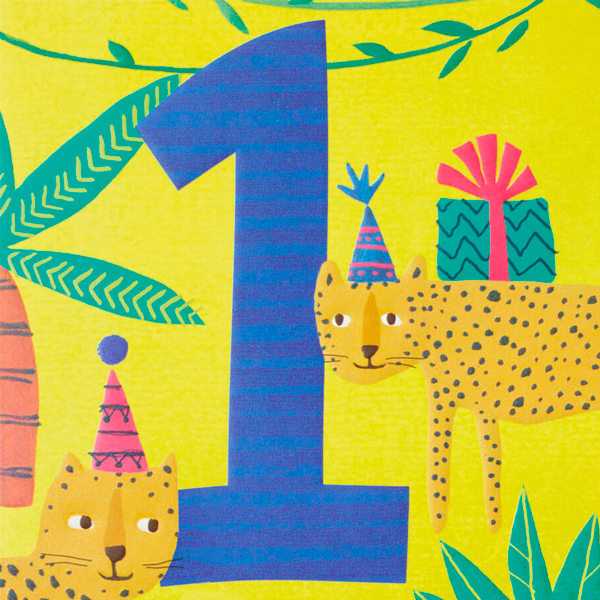
When it comes to milestone birthdays, a first birthday celebration is literally number one! The birthday kid may be l...

Giant fountains full of chocolate sauce. Tubs of neon glitter. Dancing robots that belt pop songs while aggressively ...

If you're looking for a card that stops Mom in her tracks on her big day, look no further—this Signature Paper Wonder...

Moms give a lot to be good mothers—things like time, attention and affection. They also give up a lot over the course...
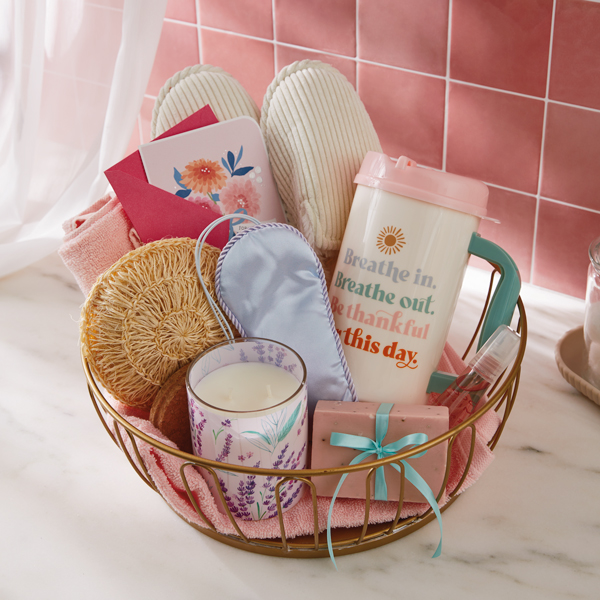
Mother’s Day is here again, which means it’s the perfect time to start thinking of gifts that celebrate all the moms ...