Holiday Mail Art: 5 Ways to Decorate Christmas Card Envelopes
Holiday mail art is the best: A beautifully decorated Christmas card envelope is a gift. But a long card list might make addressing your envelopes seem like a daunting task instead of a glorious way to spend the evening. So we asked Hallmark artists to come up with easy ways to create hand-lettered envelopes that won’t take you all season long.
Here are five different gorgeous, easy ways to make everyone on your list feel like your very favorite person. And we’ve added bonus tips—the easiest way to add an envelope liner and some DIY confetti ideas.
Inspired? Create and share by tagging @HallmarkStores.
Holiday Mail Art with DIY Stamps
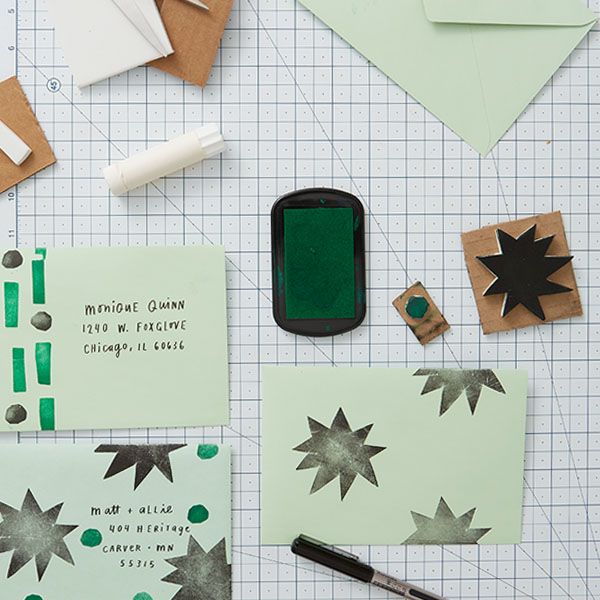
Supplies for making stamps
- Craft foam sheet
- Scrap pieces of cardboard
- Scissors
- Glue
- Crayola brush markers
- Archival ink pad in two colors (or ink brayer and paint)
- Scrap paper or butcher paper (to protect your work surface)
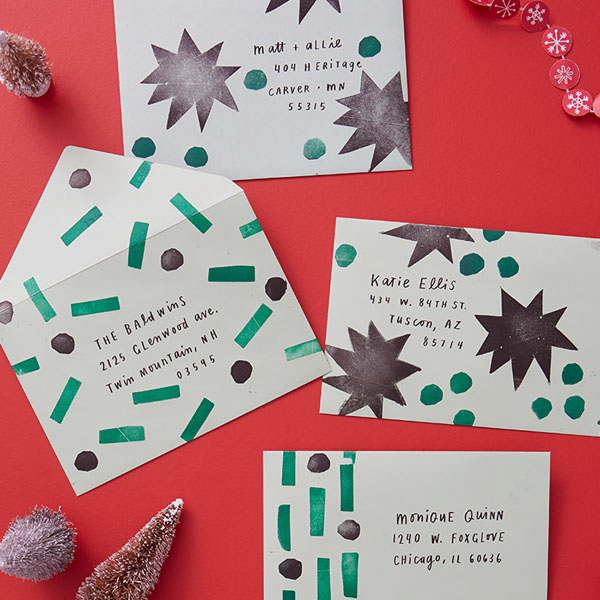
How to stamp envelopes
- Cut simple shapes from the craft foam—try stars or starbursts, circles or blocks.
- Glue the foam shape onto a slightly larger scrap of cardboard.
- Press your stamp onto the ink pad (or use a brayer to apply paint). Practice pressing the stamps on a scrap sheet of paper to get the right amount of pressure and to try different designs.
- Open and flatten the envelope and stamp your designs. Make sure to leave room for the recipient’s name and address on the front and your own return address in the upper left or on the back.
- Let your envelopes dry completely before you address them.
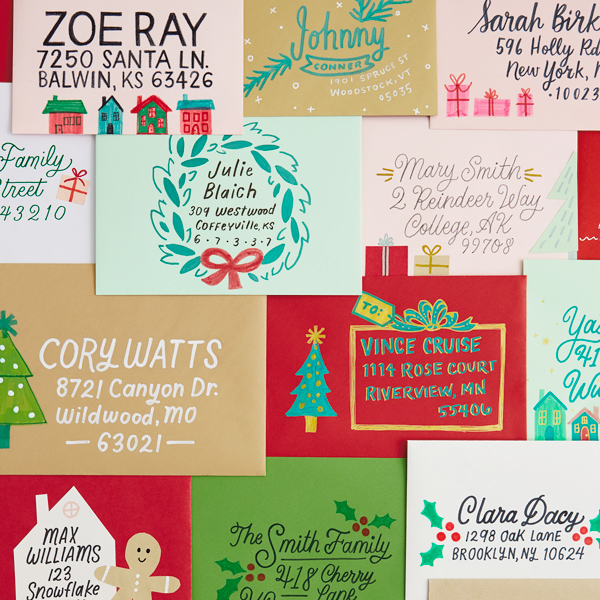
Cut Paper Christmas Mail Art
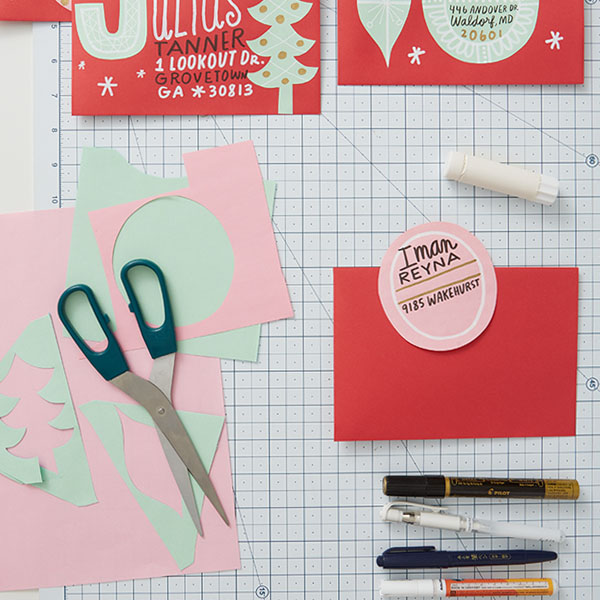
Supplies for cut paper designs
- Scraps of colored paper or leftover gift wrap
- Scissors
- Glue stick
- Crayola brush markers
- Crayola metallic markers or paint markers
- White paint marker or Crayola silver glitter marker
- White gel pen
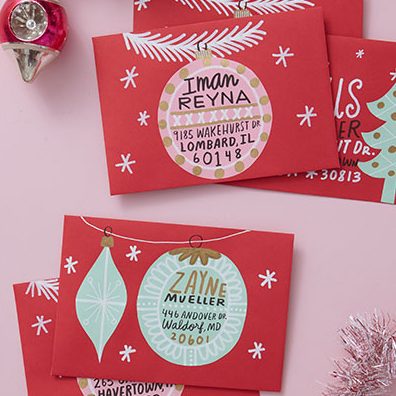
How to make cut paper envelope designs
- Cut a super-simple shape from the paper. We made different ornament shapes and trees and tried a few first initials.
- Lay your cut paper out on the envelope to figure out your design.
- If you’re going to write or draw on the paper, do that before you glue it down—that way if you mess up, you don’t ruin the envelope.
- Use the white paint or silver glitter marker to draw simple designs—branches, stars, garland strings—on your envelope.
- Glue down your cut paper then add the address. Don’t forget to put your return address in the upper left or on the back flap.
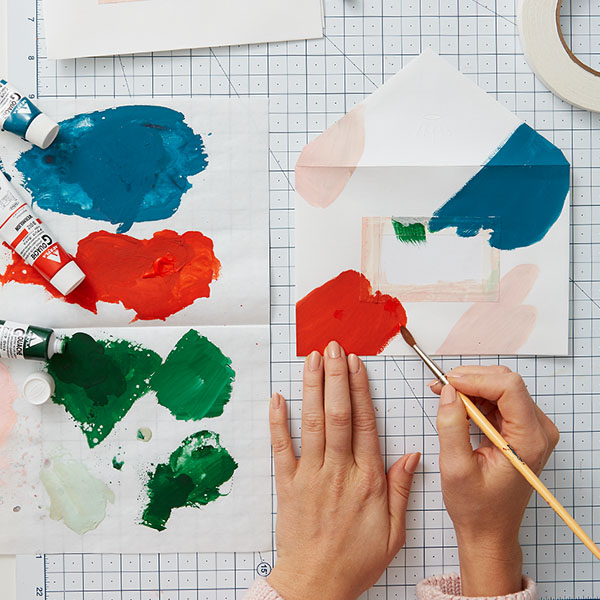
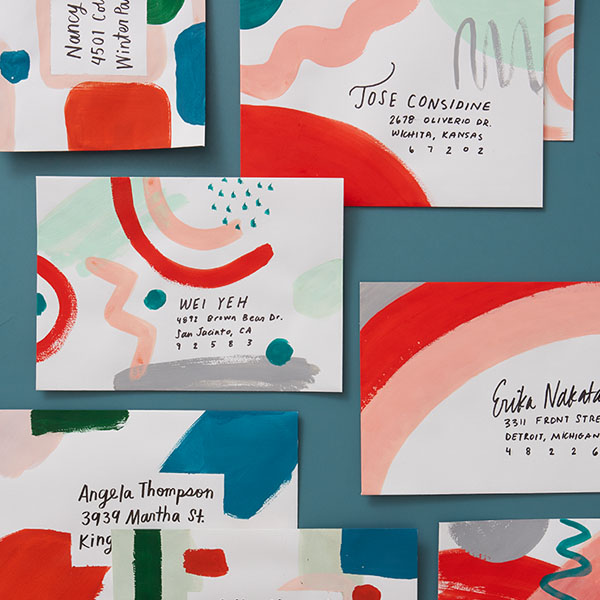
Hand-Painted Holiday Mail Art
Supplies for hand-painted envelopes
- Crayola acrylic paint (we are big believers in a limited color palette—choose 3 colors and use white paint to make lighter shades)
- Paintbrush
- Artist masking tape (“low-tack” means it’s less sticky and won’t rip paper)
- Scissors
- Crayola brush markers
- Scrap card stock or paper
How to make hand-painted mail art
To leave the perfect space for an address:
- Cut a square or rectangle from your scrap piece big enough to write the address. Use the masking tape to stick it to the envelope.
- Paint swatches of color on the envelope—try abstract shapes, swashes or blocks of color, squiggles and lines and dots.
- If you’re going to layer colors, make sure you let one dry before adding another.
- When it’s all completely dry, pull off the tape and paper scrap and add the address.
- With the right pen, you can write the address on a dry swash of color.
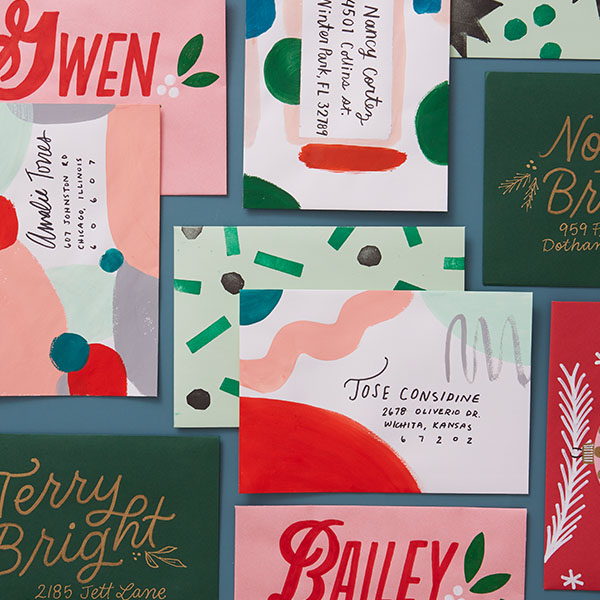
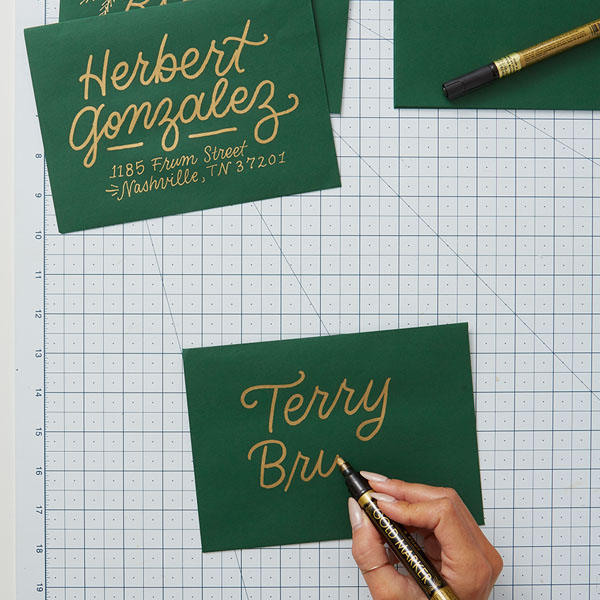
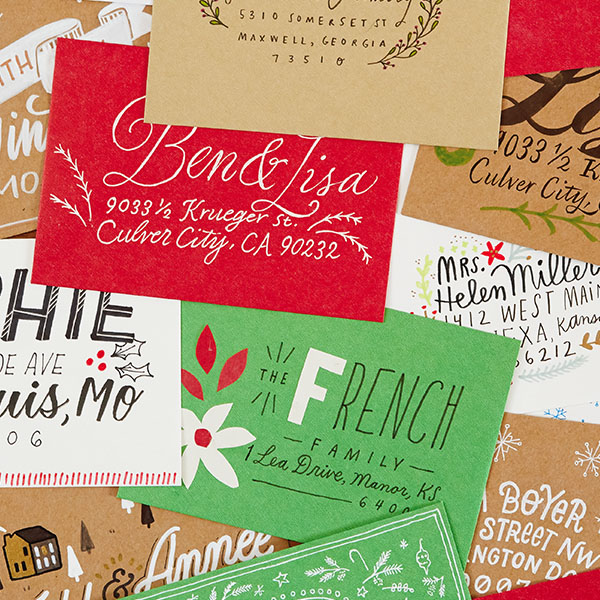
Bold Lettered Envelope Art
Supplies for hand-lettered envelopes
- Crayola Gold Metallic paint markers with bullet-shaped tips—not chiseled or angled—to make lines with a consistent weight (that’s called monoline lettering) or Metallic Markers
- Crayola Signature Metallic Outline Paint Markers & Project Glitter Markers or paint markers in white, red and green (or another fun, limited color palette)
- Pencil
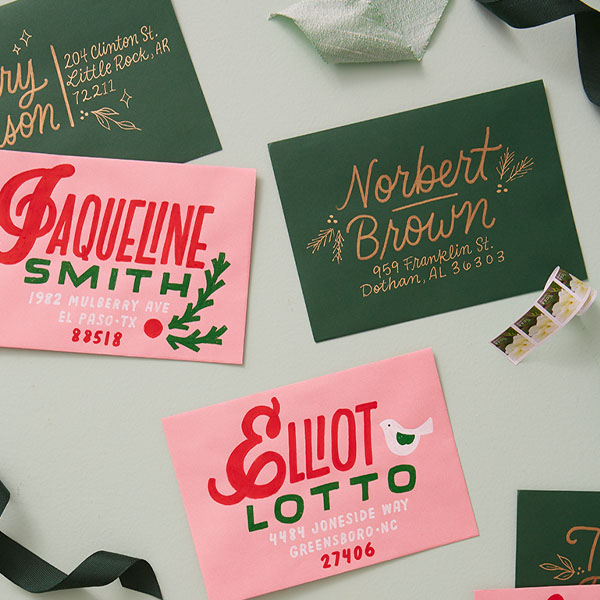
How to create envelopes with bold lettering
- Before you start, lightly sketch out the name and address—and maybe any other designs you want to add. It’s easy to draw pine and holly branches and berries, stars and diamonds, accent marks and simple doves.
- Make the name the star—go big and bold, but don’t forget to leave room for the address. (Unless you’re hand-delivering a card! Then the name can be super huge.)
- Let each color dry before adding the next.
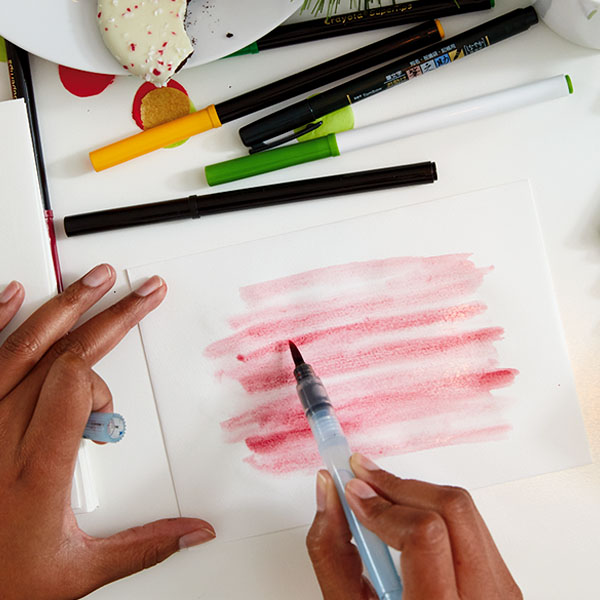
Easy Painted Envelope Backgrounds
Supplies for painted backgrounds
- Crayola Brush Markers or acrylic paint and brushes
- Crayola permanent markers (for addressing)
- Scrap paper
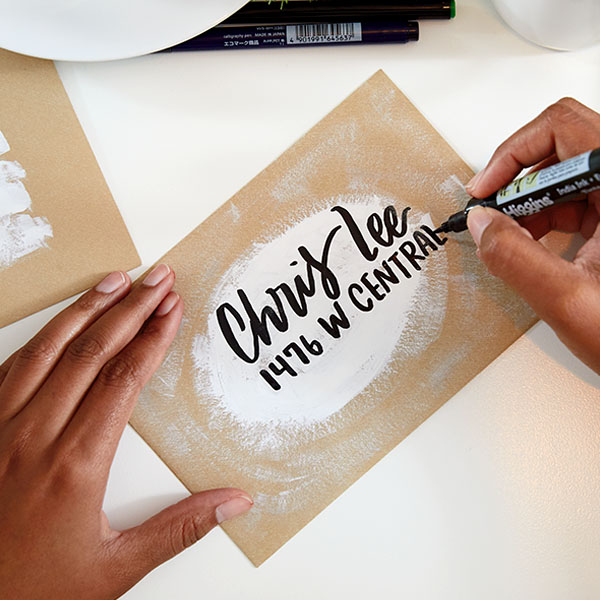
How to paint backgrounds to make addresses stand out
- Play around with techniques and designs—like translucent washes or snowy circles—on scrap paper or extra envelopes. Test the markers you’ll use for addresses on your backgrounds once they dry.
- Slide a piece of paper into your envelope before you paint to prevent bleed-through.
- Paint designs on your envelopes and let them dry.
- Once you’re absolutely positively certain they’re dry, add the addresses with permanent markers.
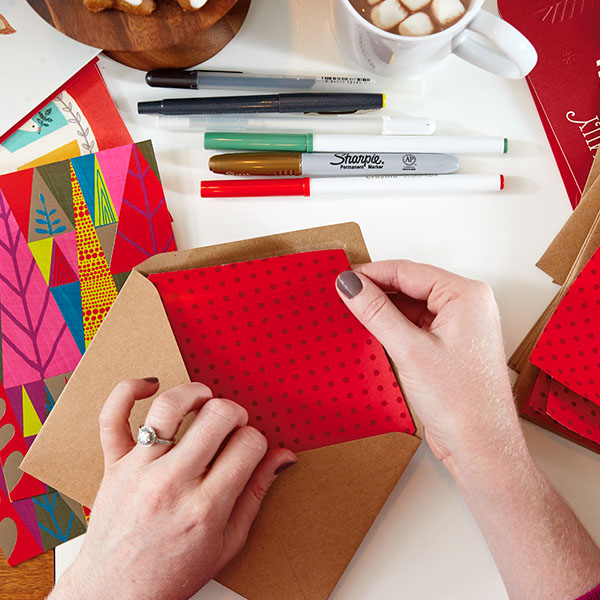
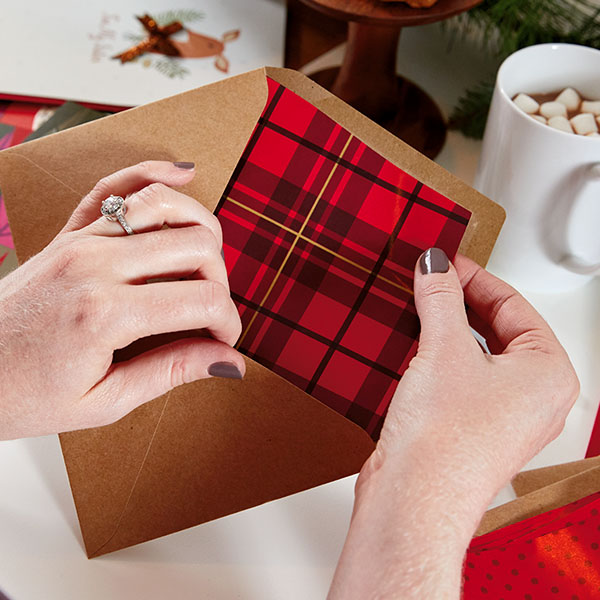
Bonus Tip: Wrapping Paper Envelope Liners
Supplies for wrapping paper envelope liners
- Envelopes
- Wrapping paper
- Ruler
- Scissors or craft knife
- Glue stick
- Optional: Chipboard (cereal boxes are perfect) or poster board for templates
How to add envelope liners
If you’re just doing a few liners, follow the directions below. If you decide to make a whole bunch, make a template using chipboard or poster board (first three steps). Then trace the template onto the wrapping paper and follow the last two steps.
- Open the flap of an envelope and lay it open and flat on the reverse side of a piece of wrapping paper.
- Trace the envelope shape onto the wrapping paper and cut it out.
- Cut a sliver (1/8″ or less) off each side and about 1/2″ off the bottom.
- Slip the liner into the envelope, design up, and close the envelope, creasing the liner.
- Open the envelope and glue the liner in place.

Another Bonus Tip: Christmas Card-fetti
What’s a Christmas card party without confetti? We much prefer the giant kind, cut with paper punches from tissue paper. (Find the easiest DIY tips here.) Sprinkle a few pieces inside a card or use a glue stick to decorate the envelope. Circles are classic and perfect…but snowflakes or trees or other holiday icons would also be pretty great, too.
NOTE: All envelopes shown are decorated with made-up names and addresses so we don’t violate anyone’s privacy.
Shop Christmas
See allYou may also like
See more-

Mahogany I’m a Leo—here’s how I’m finding rest this season
Being a woman with a dream is exhausting. We live in a world that’s obsessed with the rise and grind narrative, and i...
-

DaySpring Finding God’s grace in wilderness seasons
Walking through one hard thing is difficult. Walking through multiple simultaneous struggles can feel crushing. That ...
-

DaySpring How to have faith like fireworks
If you’ve ever watched fireworks, then you know how mesmerizing the view can be. Each tiny light makes its way into t...
-
Card Ideas 5 tips to help you get the most out of Hallmark’s Semi-Annual Sale
I don’t know a person on this earth who doesn’t love a good semi-annual sale. In fact, I know several people who keep...
-

DaySpring Take time to catch the fireflies
Dinner is over and it’s time for cleanup. Piling dishes into the sink, I pause to stare out the kitchen window and dr...
-

Calendar Flip A (Very) Warm Hello! August 2026 Holidays and Observances
Is it hot enough for you? Well, we’re here to add some extra sizzle. It’s time to flip the calendar page, check ou...
-

Calendar Flip Welcome Autumn! September 2026 Holidays and Observances
Fall brings cooler nights, cute sweaters, homecoming games and tailgate parties. It’s time to flip the calendar page,...
-
Calendar Flip Let’s celebrate, y’all! July 2026 Holidays and Celebrations
Get ready for friends, family and fireworks—and break out the red, white and blue for Independence Day. It’s time ...
-
Mahogany Summer is ours
As a Black woman, I sometimes feel like society wants us to be forlorn and sad, as if we aren't deserving of letting ...
-
Christmas Share more merry: Our very best Christmas card tips
It's easy to make a Christmas card list, choose your cards, and sign, seal and mail them on time with our very best t...
-
Christmas 20+ ideas to help you plan your trip to the Hallmark Christmas Experience
Ever wanted to step inside of a picture-perfect Hallmark Christmas movie? Or travel to a place where you could immers...
-

Christmas This way to the North Pole: 50+ Kids Bedroom Christmas Decoration Ideas
Kids LOVE getting to express themselves—especially when it comes to their rooms. And when it comes to Christmas-lovin...
-
Christmas Easy Christmas Card Envelope Lettering: Make Mailboxes Merry
Part of the fun of sending Christmas cards is making pretty envelopes. That’s why our creative team came up with an e...
-

Christmas Stocking stuffer ideas for literally everyone on your list
The stocking stuffer struggle is real. By the time you’ve bought your main presents, you feel like you’re all out of ...
-
Christmas 50+ white elephant ideas: Party themes, gift ideas and more
If you're looking for new white elephant ideas, you've come to the right place. Whether you're hosting a party or loo...
-

DaySpring God pieces broken people back together
On an ordinary December day, on what would’ve been our oldest daughter’s 29th birthday, our pipes backed up, flooding...
-
Christmas 50+ holiday goodie bag ideas to bring joy to their world
Giving gifts is one of my favorite things to do. And during the holidays, there are lots of opportunities to give! Th...
-
Christmas Christmas wishes: What to write in a Christmas card
Get sample messages, tips and watch our new video guide to write the perfect Christmas card.
-