Easter Eggs-travaganza: Our favorite Easter egg ideas
When it comes to Easter, we think both adults AND kids deserve to have some fun and make fabulous, way-too-pretty-to-eat eggs. That’s why we rounded up some of our favorite Easter egg ideas, with decorating options for all age, skill and patience levels.
So choose your own exciting Easter egg adventure, gather up your supplies, and let’s get crackin’.
Inspired? Create and share by tagging @Hallmark.
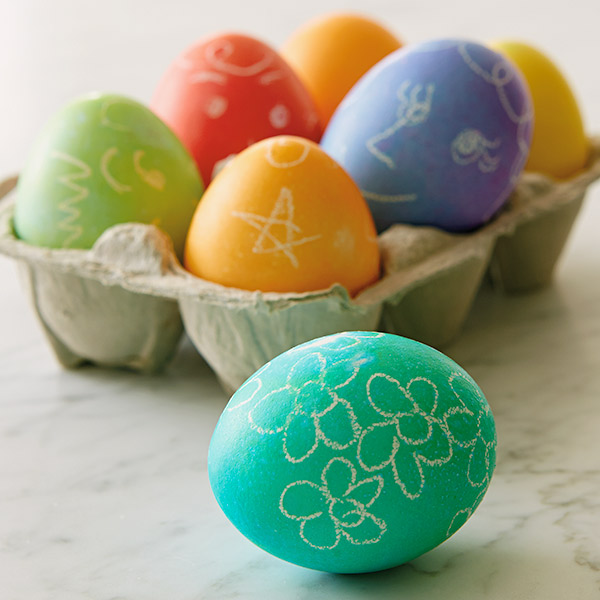
Pass-alongs
Skill level: Easy
Materials needed:
• Boiled eggs
• White crayons
• Easter egg dye
• Vinegar
Directions: Make decorating a group project. Using a white crayon, each child draws one facial feature or design of their choosing on a boiled egg. Keep passing the egg until the face is complete, or the egg is completely covered with your designs. When the artists are finished, dip the egg in colored dye bath (made according to the instructions on your dye kit or food coloring box). The crazy face or pattern that’s revealed is sure to crack everyone up.
Tip: Can’t see the white crayon on a white egg? That’s what makes this idea so fun! Kids will love the element of surprise when they dip the egg and their designs suddenly appear.

Pretty florals
Skill level: Intermediate
Materials needed:
• Wooden eggs and acrylic paint or boiled eggs and Easter egg dye
• Acrylic paint
• Different size paintbrushes
• Paint markers
Directions: To make these gorgeous flowers, start by using dyed boiled eggs or painted wooden eggs with at least 2 coats of paint applied. Because eggs can be a little tricky to paint on, we suggest marking the stems, leaves and largest petals first. Wait a few minutes for them to dry, then go back in with a smaller paintbrush or paint markers to add details. And voilà—you’ve just made showstopping flowers fit for any garden!
Tip: Need help deciding which flowers to paint? Learn about different flowers and their meanings here!
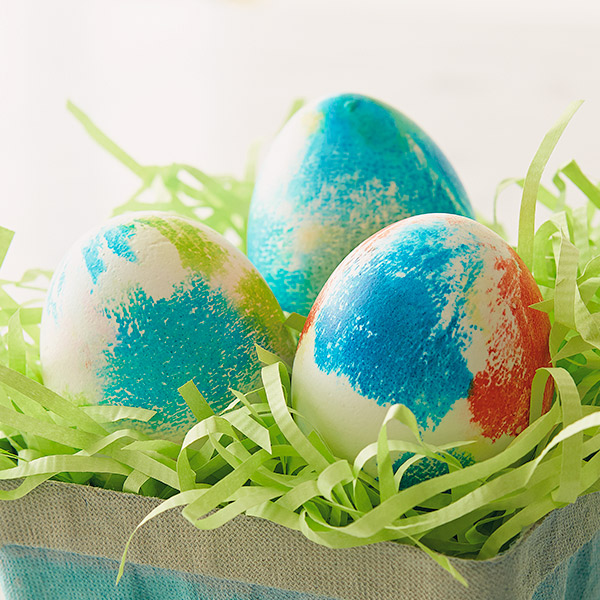
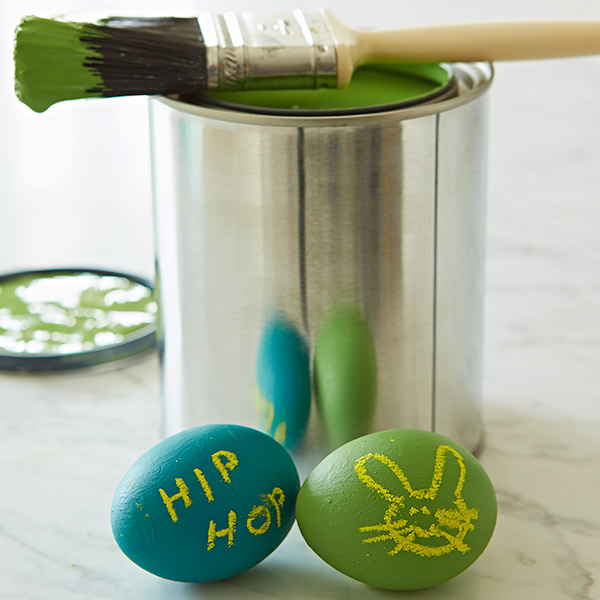
Groovy tie-dyes
Skill level: Intermediate
Materials needed:
• Boiled eggs
• Cotton cloth scraps
• Eyedropper
• Food coloring
• Plastic gloves (optional)
Directions: Wrap a boiled egg in slightly dampened cotton cloth, such as cheesecloth or a scrap of a T-shirt. With an eyedropper, dab dots of different food colors on the cloth. After 10 minutes, put on the plastic gloves and unwrap the egg. Let dry before handling without gloves.
Tip: Because you’re using undiluted food coloring, be careful—these might not be ones you want the kids to play with.
Rubber band stripes
Skill level: Easy
Materials needed:
• Boiled eggs
• Rubber bands in varying widths
• Easter egg dye
• Vinegar
Directions: Make the egg dye bath according to the instructions on your dye kit or food coloring box. Wrap rubber bands of varying widths around a boiled egg before you dip it into the dye bath. Once the dye has completely dried, remove the rubber bands to reveal the pattern.
Tip: Varying the looseness of the rubber bands will also result in different patterns on the eggs.
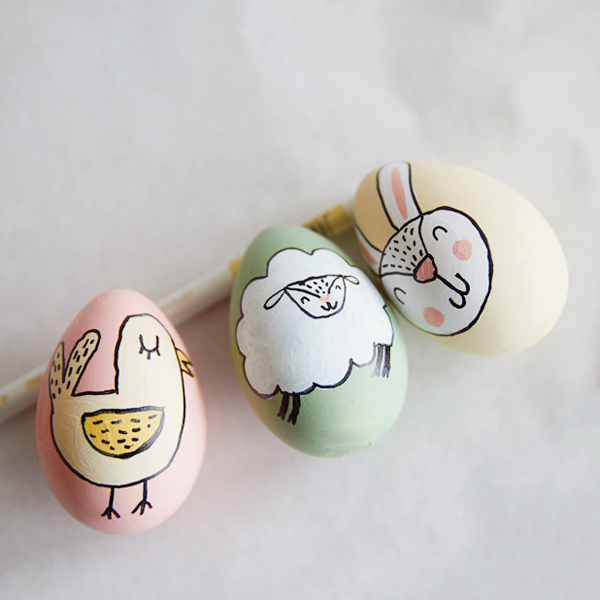
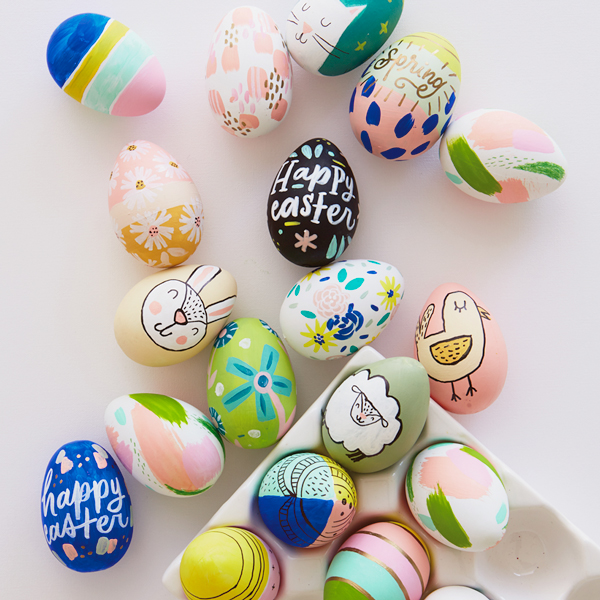
Fuzzy friends
Skill level: Easy
Materials needed:
• Boiled and dyed eggs
• Permanent and paint markers
Directions: It’s time to make your own Easter bunny or other supercute animals! Start by marking the animal’s face and ears with paint. Once dry, use a black permanent marker to outline the shapes and give your furry pals a cleaner look. Then add eyes and a sweet (or silly) smile. Use colorful paint markers for features like rosy cheeks, feathers or a beak.
Tip: Use a roll of washi tape to rest your eggs in while you add details. We don’t want any smeared faces!
Stickers
Skill level: Easy
Materials needed:
• Boiled eggs
• Stickers
• Easter egg dye
• Vinegar
Directions: Apply stickers to boiled eggs. Make the egg dye bath according to the instructions on your dye kit or food coloring box. Dip the eggs in the dye baths. Peel the stickers off when they’re completely dry.
Tip: Apply stickers in stages, dipping the eggs in different dyes between sticker applications for a more colorful look.
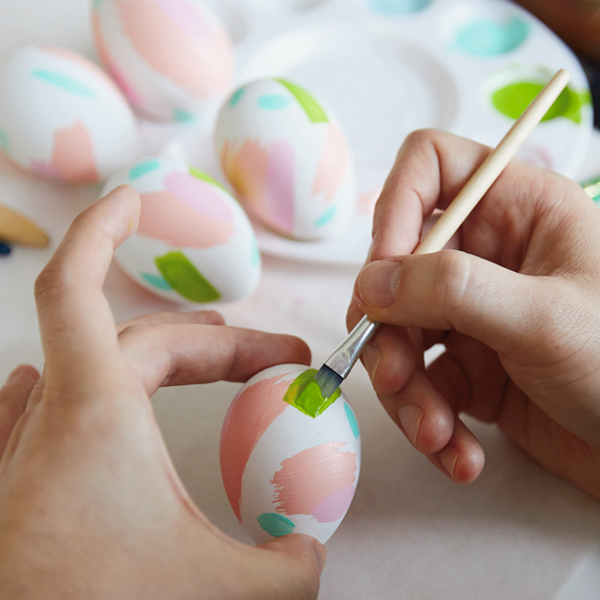
Brush swatches
Skill level: Easy
Materials needed:
• Boiled eggs
• Acrylic paint
• Paintbrushes in a variety of shapes and sizes
• Cups of water for rinsing brushes
Directions: People of any age or artistic ability will love this super simple design! First, pick a color palette to play with. We chose these cheerful spring colors, but use whichever shades your heart desires. Then work in layers, painting different size swatches one color at a time. Make sure to wait for things to dry in between layers, and let colors overlap for a cool, chaotic effect.
Tip: In a hurry? Use a hair dryer to speed up the process.
Swirls
Skill level: Easy
Materials needed:
• Boiled eggs
• Vegetable oil
• Easter egg dye
• Vinegar
Directions: Make the egg dye bath according to the instructions on your dye kit or food coloring box. Add 3 tablespoons of vegetable oil to the dye bath. Stir quickly, and keep stirring while you dip a boiled egg into the mixture. For more color, add the egg to different dye baths, letting it dry in between.
Tip: Be careful lifting the swirled eggs out of the dye cups (or transferring them to another dye bath). The vegetable oil makes them extra slippery!
Lettering
Skill level: Intermediate
Materials needed:
• Wooden eggs and acrylic paint, or boiled eggs and Easter egg dye
• Permanent and paint markers
• Paintbrushes of different sizes
Directions: Easter eggs are the perfect vessels for cute, tiny messages! Before working on the egg, we suggest sketching out your phrase beforehand on paper. This is a good time to try out different lettering styles and get the sizing right. Once you’re feeling confident in your handwriting skills, grab some markers and get to work! If you’re worried about having brush control, skip the paint and use paint pens or Sharpies instead.
Tip: To make things extra easy, just write messages using alphabet stickers!
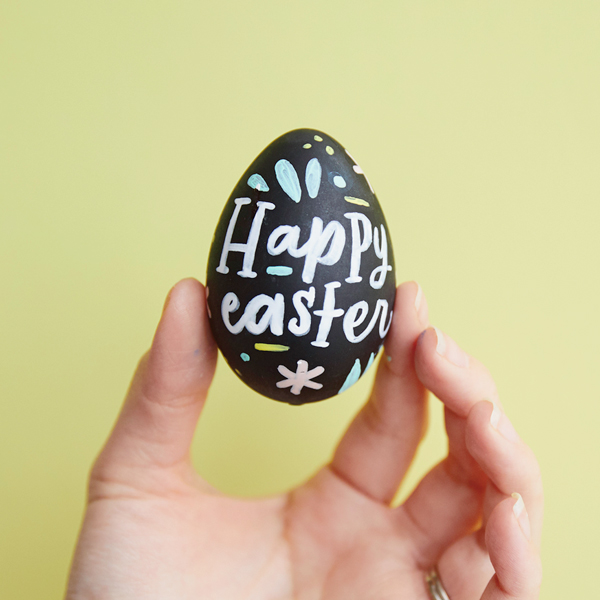
Chalkboard paint
Skill level: Easy
Materials needed:
• Wooden eggs
• Chalkboard paint and brush
• Chalk
• Hairspray (optional)
Directions: Paint wooden eggs with several coats of chalkboard paint (available in different colors at most craft stores), letting the eggs dry after each coat. Let eggs sit for 24 hours. Draw on the eggs with colored chalk. When you want to change the design, just wipe off the chalk with a damp paper towel.
Tip: Blow off excess chalk and spray light layers of hairspray over the chalk designs to temporarily keep them from smearing. If you want to keep the designs in place long-term, use artists fixative spray (available at most craft stores).
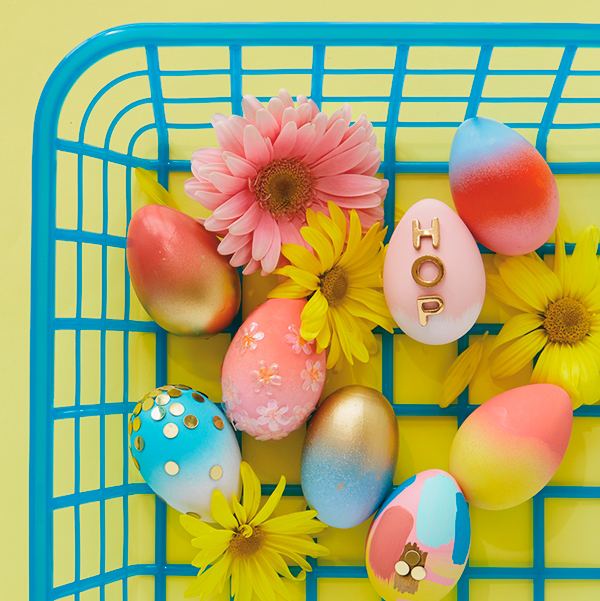
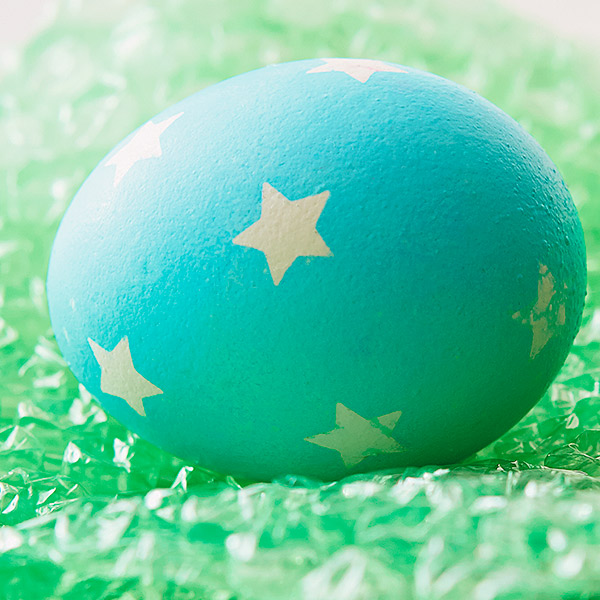
Gradients
Skill level: Easy
Materials needed:
• Plastic eggs
• Spray paint
Directions: To create an ombre effect, start by spray-painting the entire egg with the lightest color first. Once it dries, add a darker color on half of the egg only. Then spray the darkest color at the bottom of the egg. Try to keep each section around the same size for the ultimate gradient look!
Tip: Make a little hole in the bottom of the egg to stick a wooden skewer in to help hold and stabilize the egg. Then you can stick the skewer in the egg carton to dry.
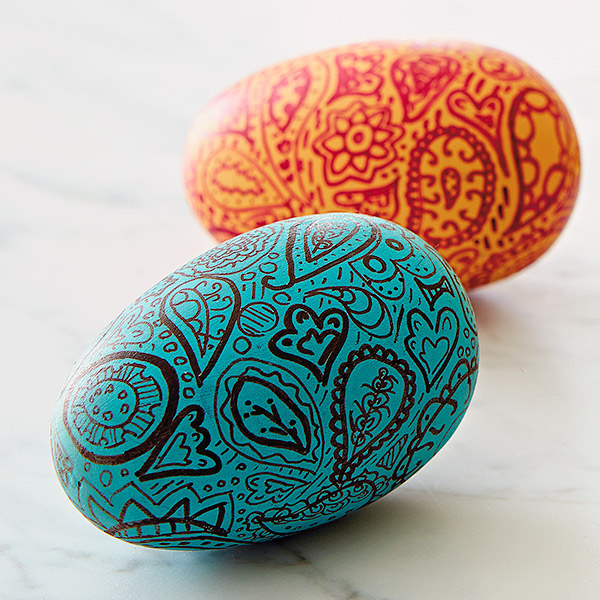
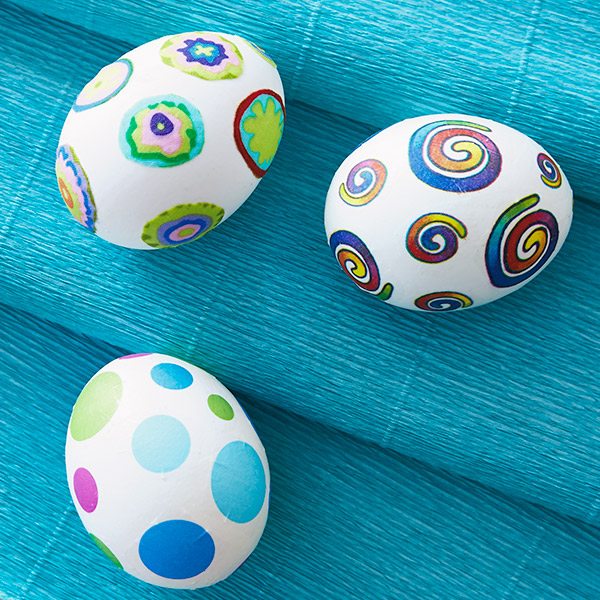
Doodles
Skill level: Easy
Materials needed:
• Wooden eggs and acrylic paint, or boiled eggs and Easter egg dye
• Markers
Directions: Use painted wooden eggs with at least 2 coats of paint applied, or white or dyed boiled eggs for this project. Grab some markers (you can use permanent markers for “keeper” eggs or non-toxic water soluble markers for real eggs that will be eaten) and let your imagination loose.
Tip: This project is great for kids of any age, but teenagers especially seem to love this project! All the two eggs pictured here were done by a teen.
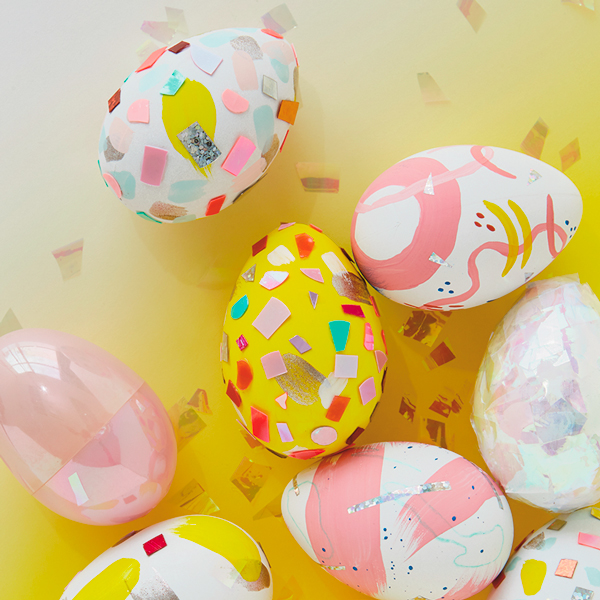
Confetti pieces
Skill level: Intermediate
Materials needed:
• Wooden eggs and acrylic paint
• Bag of confetti
• Sequins
• Glue
• Nail polish
• Cotton swabs
• Craft knife
Directions: Start by choosing your favorite pieces of confetti and sequins. Feel free to cut the confetti into smaller pieces for easier gluing (or just to switch up the sizes!). To add some fun splashes of color and a sleek look, paint some pieces on with nail polish instead of glue.
Tip: You can also use a cotton swab to put dots of glue on the egg, then use a craft knife to help place the confetti on the dot of glue.
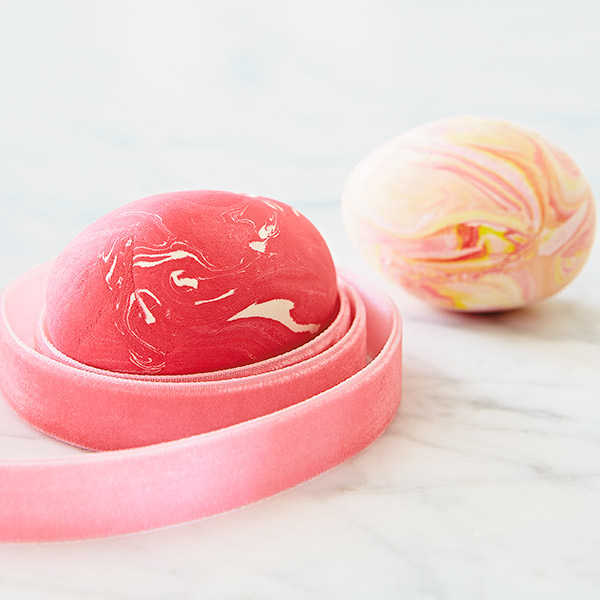
Marbled
Skill level: Easy
Materials needed:
• Crayola® Model Magic®
• Wax paper
Directions: Grab some Model Magic in different colors. (We used a multipack of primary colors plus an extra bag of white to do ours.) For more pastel colors, mix each primary color together with white. For example: To make pink, use mostly white with just a bit of red. Begin with a small amount of your favorite colors of Model Magic. Twist and knead the colors together with your hands to marble the colors. Then form the Model Magic into an egg shape with your palms, and gently roll them on a sheet of wax paper to smooth out any lumps. Let dry. The fun part about this project is that the eggs aren’t all the same size and no two eggs look the same.
Tip: The more you twist the Model Magic, the more the colors marble; but don’t knead too much or the colors will muddy.
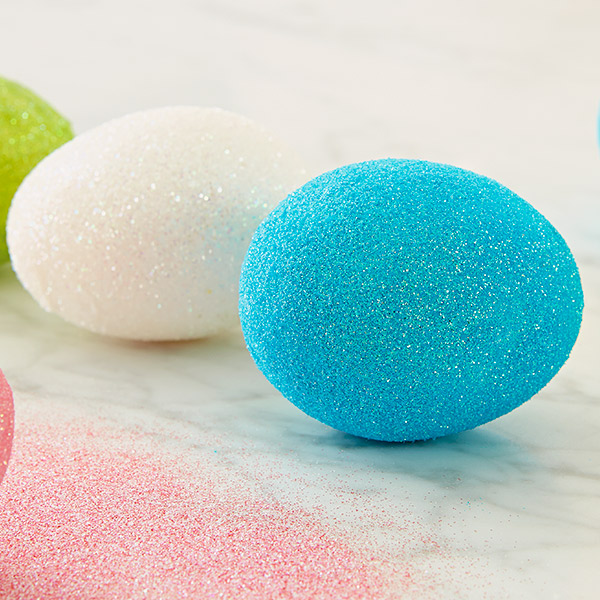
Glitter
Skill level: Intermediate
Materials needed:
• Raw eggs
• Nail or needle
• Fine glitter
• Spray glue (or white glue and paintbrush if working with children)
• Paper bowls
• Bamboo skewers
Directions: Blow out eggs by piercing raw eggs at both ends with a nail or needle. Make 1 hole bigger than the other. Gently blow into the smaller hole, forcing the egg yolk and white out of the larger hole and into a bowl or sink. Rinse out the eggs with soapy water or vinegar to clean out the inside of the egg. Let dry completely before starting the craft. Fill a bowl with 1 color of glitter. Thread a bamboo skewer through the holes of the blown egg to hold it “rotisserie style.” Apply glue evenly to cover the egg. Gently roll the egg into the bowl of glitter until it is completely covered. Use a spoon to sprinkle glitter over any parts of the egg you can’t cover by rolling. Let dry. Remove skewer.
Tip: Glitter can get everywhere, so use a few coats of hairspray or artists fixative spray to help keep the glitter on the egg and not on you.
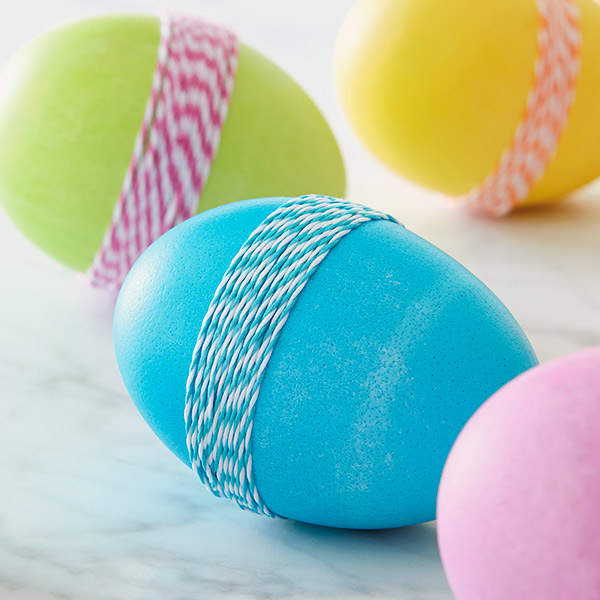
Twine-wrapped
Skill level: Easy
Materials needed:
• Boiled and dyed eggs
• Baker’s twine (available at most craft stores)
Directions: Hold 1 end of a long piece of baker’s twine (1 yard or more in length), and wrap the rest of the twine around the egg until you have about 6 inches of twine remaining. Tie both ends of the twine together to secure.
Tip: Get another person to help you tie the ends. It’s a great job for tiny little fingers—just like wrapping a gift.
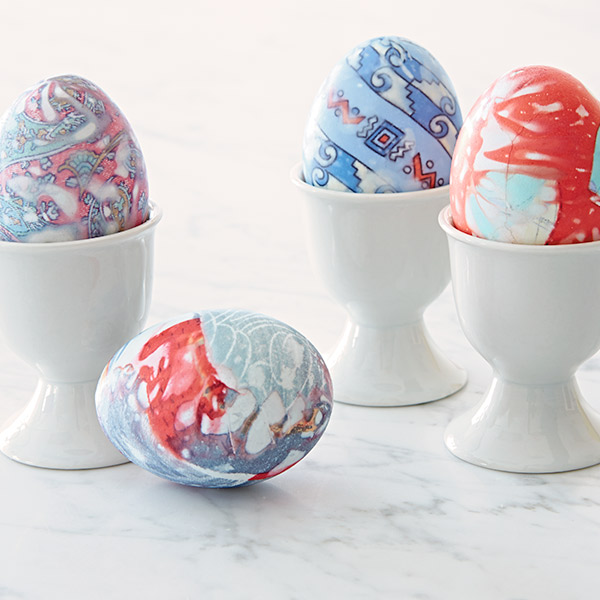
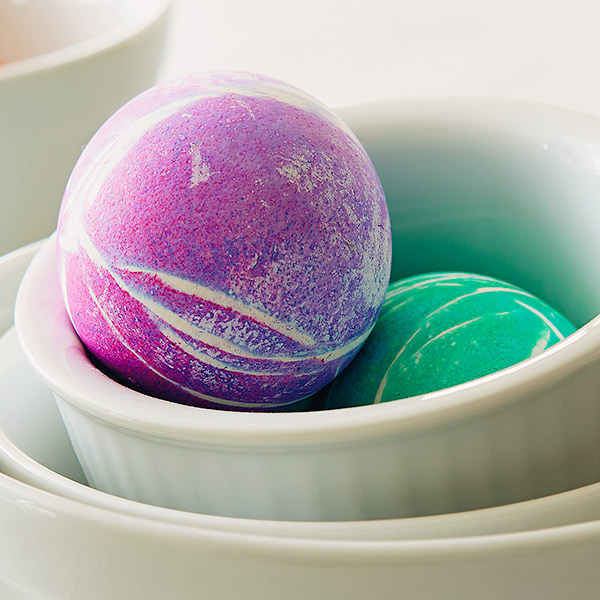
Silk-wrapped
Skill level: Advanced
Materials needed:
• Raw eggs
• 100% silk ties
• T-shirt scraps or muslin
• Vinegar
• String or rubber bands
Directions: Hit the thrift stores to find some 100% silk ties or recycle some of Dad’s old ties (just check with him first before raiding his closet because he won’t get these back!) for this project. Cut the tie into pieces large enough to wrap around an egg, removing the interfacing “guts” from each piece. Carefully wrap an egg in the piece of silk with the front side of the tie scrap touching the egg. Wind string or rubber bands around the wrapped egg to hold the silk in place. Using scraps of T-shirt or muslin a bit larger than the scrap of silk, wrap the egg again and secure with additional string or rubber bands. Carefully place the wrapped eggs in a pot, slowly adding enough water to cover them completely. Add 3 tablespoons vinegar and boil at least 20 minutes. Remove the eggs and let cool. Unwrap the cooled eggs to reveal the beautiful colors and patterns from the tie.
Tip: Use ties with bold colors (like red) for the best transfers, and make sure they’re 100% silk. Polyester doesn’t work!

Stamped
Skill level: Easy
Materials needed:
• Boiled eggs
• Easter egg dye
• Vinegar
• Stamp pads and letter stamps
Directions: Dye your eggs in various colors and allow to dry. Use letter stamps to put your kids names on the eggs or to leave a fun message. Or use small stamps with other simple designs to make an all-over pattern on the eggs. Let dry for 24 hours before handling, as stamp ink dries slowly.
Tip: Roll the stamp a little as you apply it to the egg surface for better coverage.
Decoupage
Skill level: Advanced
Materials needed:
• Blown eggs
• White glue
• Water
• Paintbrush
• Waxed paper
• Fabric scraps or tissue paper with small prints or motifs
Directions: Blow out eggs by piercing raw eggs at both ends with a nail or needle. Make 1 hole bigger than the other. Gently blow into the smaller hole, forcing the egg yolk and white out of the larger hole and into a bowl or sink. Rinse out the eggs with soapy water or vinegar to clean out the inside of the egg. Let dry completely before starting the craft. Cut out motifs from fabric scraps or tissue paper. Set aside. Mix equal parts water and glue into a bowl and dab the mixture on a small area of the egg with a paintbrush. Place 1 motif over the glued area and pat down with your fingers or the paintbrush to smooth out the edges. Continue process until you’ve covered the egg in a random pattern, making sure to cover the blow holes. Let egg dry on waxed paper.
Tip: Apply a layer of the diluted glue mixture over the completed eggs for a smoother texture. Because the blown eggs make this project more time-consuming, you could also substitute painted wooden eggs.
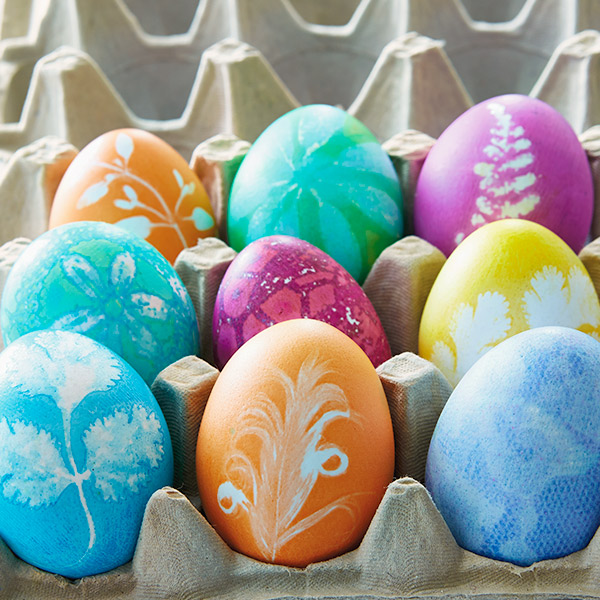
Printed
Skill level: Advanced
Materials needed:
• Boiled eggs
• Easter egg dye
• Vinegar
• Small feathers
• Lace and small, fresh botanicals (we used thyme, cilantro and small fern sprigs)
• Used nylons/pantyhose
• Rubber bands
Directions: Holding the botanical, lace or feather against the egg, wrap nylons around the egg and twist tightly. Cut off the extra nylon, and wrap a rubber band around the end of the nylon—tight, but not so tight that you break your egg! Dip your nylon-wrapped eggs in a dye bath. Remove and pat dry. When using botanicals and feathers, remove the nylon and botanical or feather immediately. For lace, you can create a two-tone effect by leaving the nylon and lace on overnight.
Tip: Pick materials flexible enough to lay flat against the surface of the egg. And try double dipping the egg in a lighter color dye for multiple colors!
Now that you’ve made such beautiful Easter eggs, we think they deserve to be shown off! Start by having a memorable Easter egg hunt full of fun for everyone with our tips here. Or, include them in a gift basket, like these fun DIY ones or some that are candy-free! Before you send them out, remember to throw a sweet card in, too!
No matter what you do with them, we hope you’re feeling proud of your gorgeous eggs. Happy Easter!
Need more inspiration? Check out these fun Easter articles:
Shop Easter
See allYou may also like
See more-
Mahogany The joy of movement
As I've gotten older, I've learned that wellness isn't just about exercise. It's about feeling good, living well and ...
-

DaySpring How to start each day feeling renewed by grace
Amid the demands of daily life, carving out time for spiritual nourishment can indeed be a challenge. However, center...
-

Keepsake Ornaments Complete your collection!
Class is in session with Defense Against the Dark Arts professor Gilderoy Lockhart™. 🪶 ✨ Complete your Harry Potter a...
-
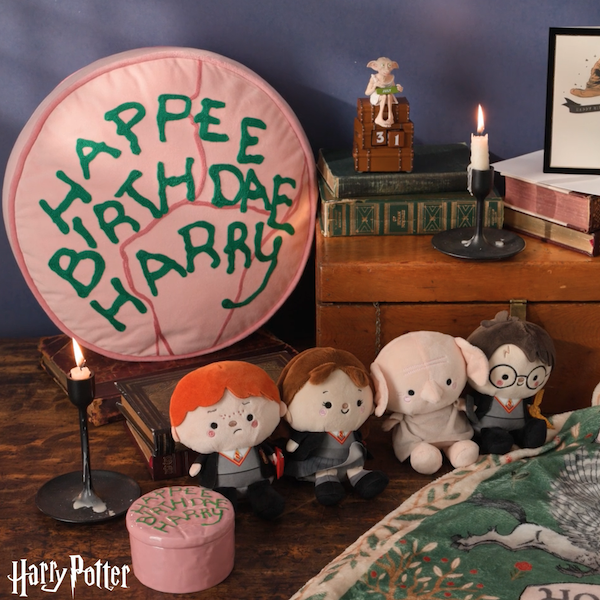
Gifting Happee Birthdae, Harry!
Celebrate the birthday of the Boy Who Lived with this fun collection of Harry Potter gifts! From cozy blankets perfec...
-
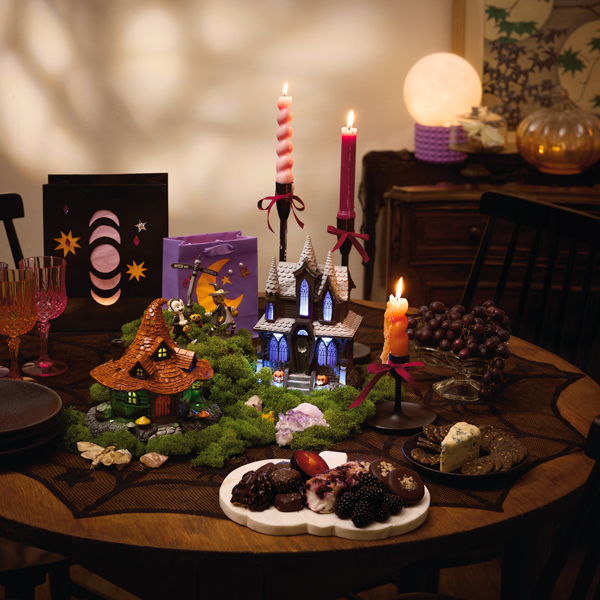
Halloween Witchy Halloween party ideas: Fun crafts and activities for a magical night in
Witch-themed parties have always delighted Halloween fans. They offer hosts and partygoers alike the chance to intera...
-
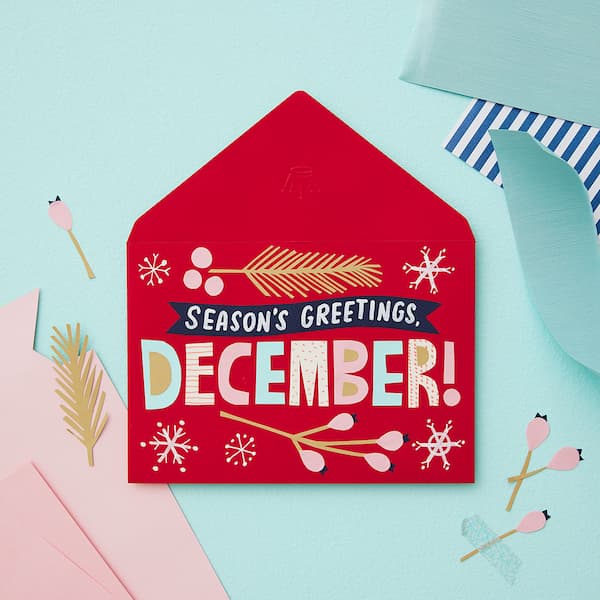
Calendar Flip Share More Moments: December 2026 Holidays and Observances
Whichever holidays you celebrate, whatever your traditions and whoever you call family, December is a month full of m...
-
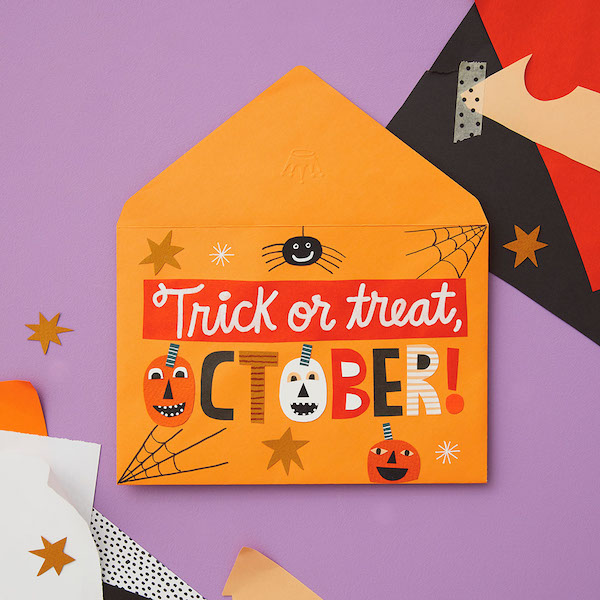
Calendar Flip Hey, Pumpkin! October 2026 Holidays and Observances
Get info, ideas and inspiration for October holidays and observances, including free sharable quotes and digital wall...
-
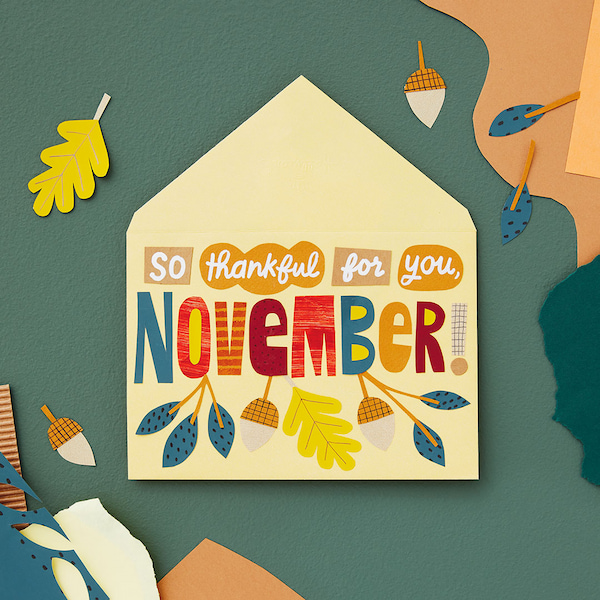
Calendar Flip Share joy, give thanks: November 2026 Holidays and Observances
Get info, ideas and inspiration for November holidays and observances.
-
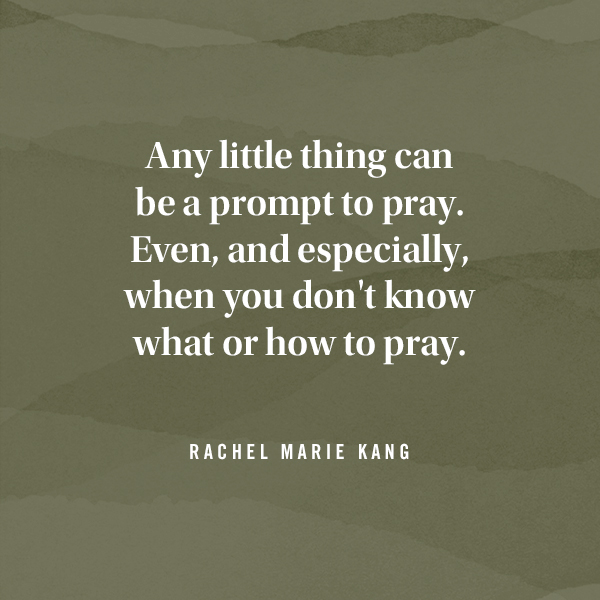
DaySpring The secret to praying when you don't know how to pray
I open the closet door in a room that is not my own. I put packages of diapers on the top shelf, rearranging and rest...
-
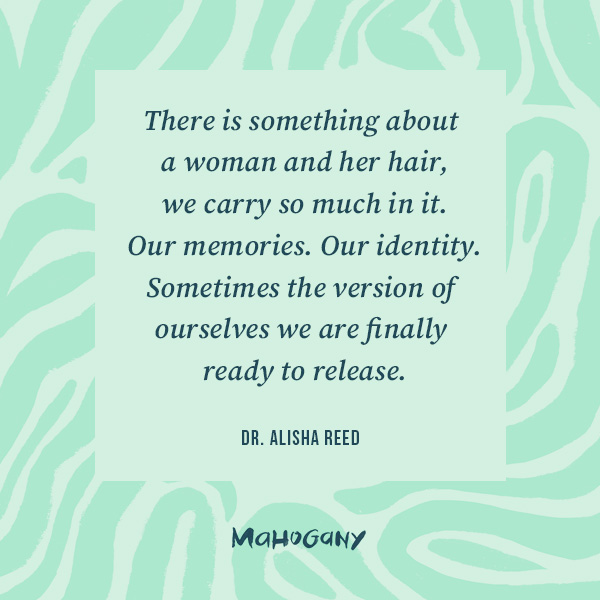
Mahogany Every woman has a hair story
I always take a selfie as soon as I get in the chair at my hair appointment. Most women take photos after, but it’s t...
-
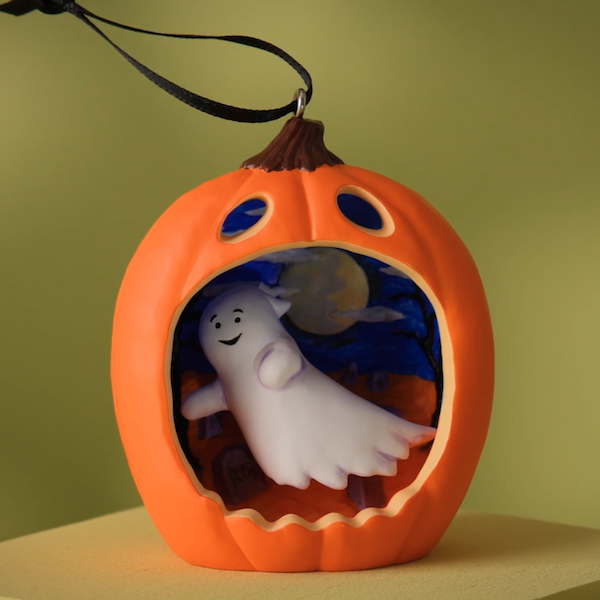
Keepsake Ornaments Add some Halloween glee to your tree! 🎃
From sassy cats to friendly ghosts, vintage vampires to mischievous kittens, we have lots of options if you're lookin...
-

Keepsake Ornaments An epic adventure for your tree 🧙🏻♂️
Relive some of your favorite moments from The Lord of the Rings: The Fellowship of the Ring™ with this Keepsake Ornam...
-

Keepsake Ornaments What a great little tree! 🎶🎄
This little tree has a LOT going for it. And just like the one in "A Charlie Brown Christmas," this Peanuts® ShowTopp...
-
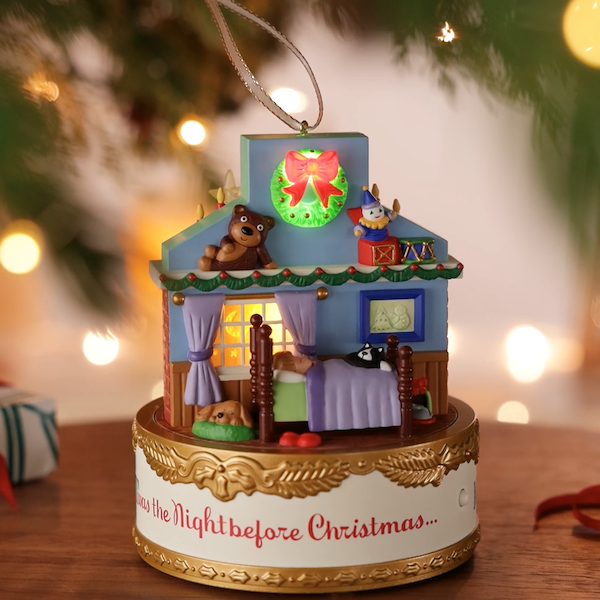
Keepsake Ornaments Childhood nostalgia incoming! 🥰
This incredible Keepsake Ornament depicting scenes from the classic poem, "A Visit from St. Nicholas," will take you ...
-
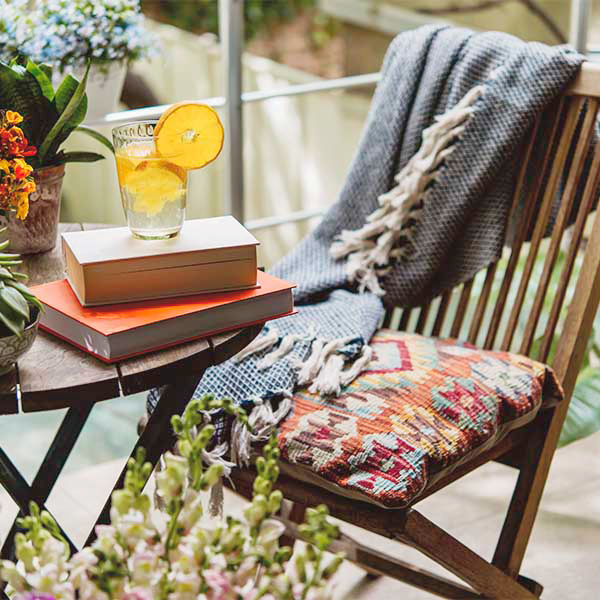
DaySpring Six Scriptures for spiritual rest this summer
A recipe for a relaxing summer afternoon: the sun’s warming rays, a cool drink, something good to read, a comfortable...
-

Keepsake Ornaments A carousel fit for a princess 👸
A Disney Princess, that is! Cinderella, Jasmine and Ariel are riding in high style on this gorgeous, gilded carousel...
-
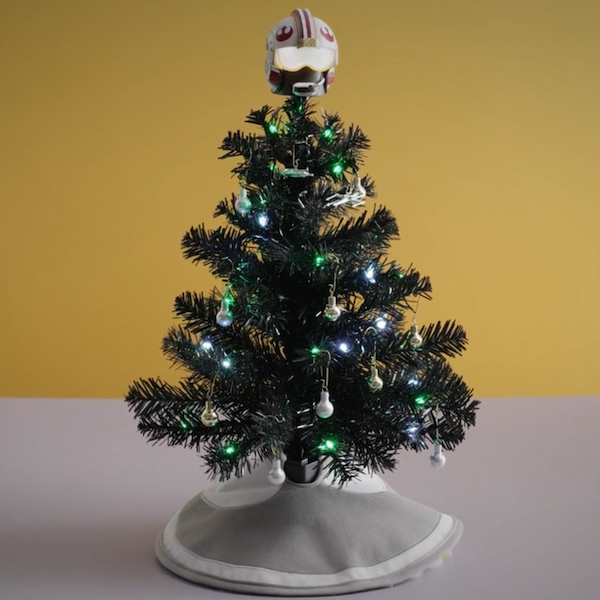
Keepsake Ornaments Mini tree, big pew-pew energy ✨
Immerse yourself in intergalactic adventure with a mini tree that's filled with Star Wars™ fun. From the Mini Star Wa...
-

Keepsake Ornaments Soar to new holiday heights with Disney Dumbo 🐘
First in the Disney Parks Memories series, this Keepsake Ornament is inspired by the original 1955 facade of the clas...
-
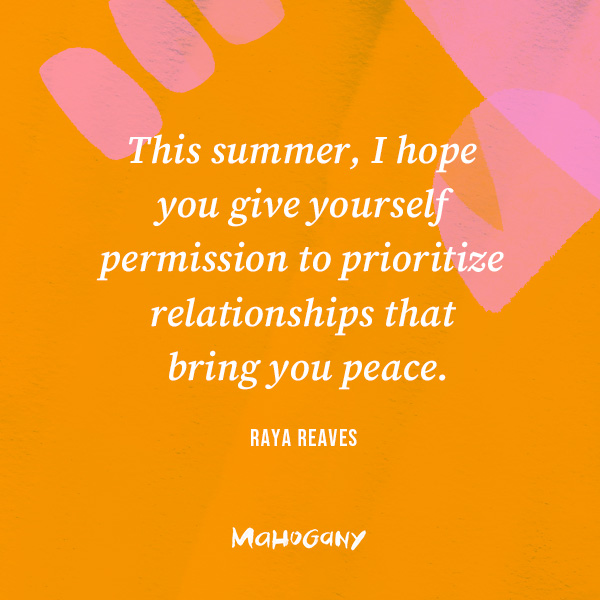
Mahogany Making new summer memories
When I think about summer and friendship together, my mind immediately goes back to one particular day in college. I ...
-
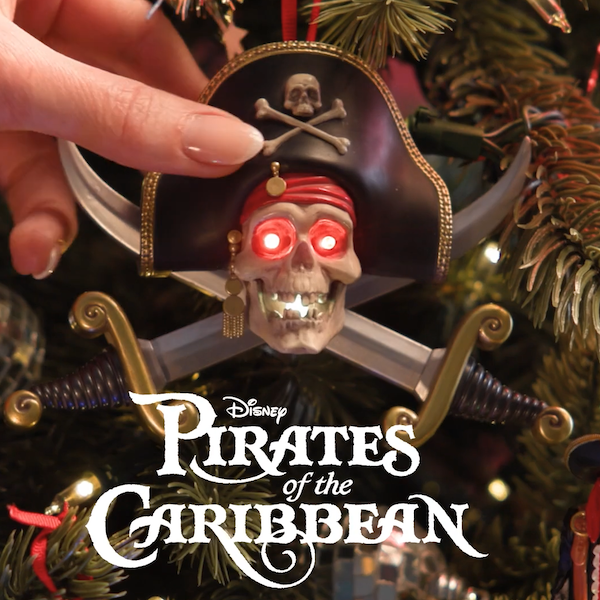
Keepsake Ornaments Avast mateys, here be pirates 🏴☠️
So it's pirates yer lookin' for, is it? Well, ye've stumbled upon a veritable treasure trove! Relive the swashbuckl...
