Make DIY Wrapping Paper Bows with Exclusive Hallmark Gift Wrap
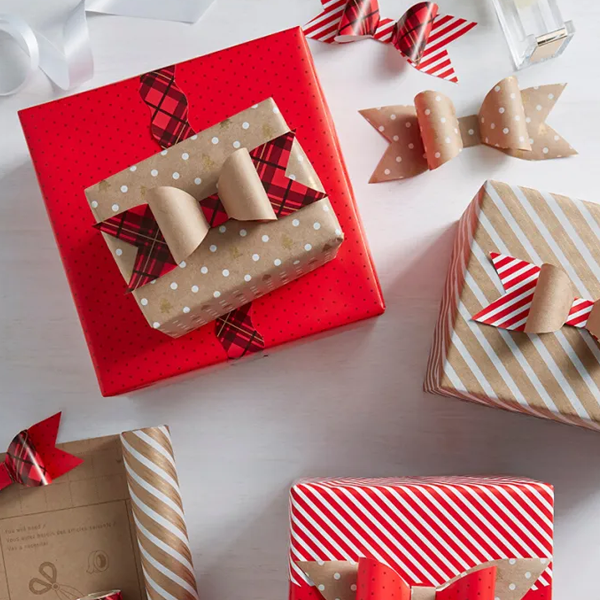
If you’re wanting to make a big impression with the tiniest bit of effort, there’s nothing like DIY wrapping paper bows. They’re fun, unique and super easy to make without looking super easy to make, which makes us love them even more.
Here are some tips for making and ideas for using DIY wrapping paper bows, from gift bling to party decor. All you need are a few supplies and your unabashed creativity…and you’ll be on a roll. (Too much?)
Inspired? Create and share by tagging @HallmarkStores.
How to make DIY Wrapping Paper Bows
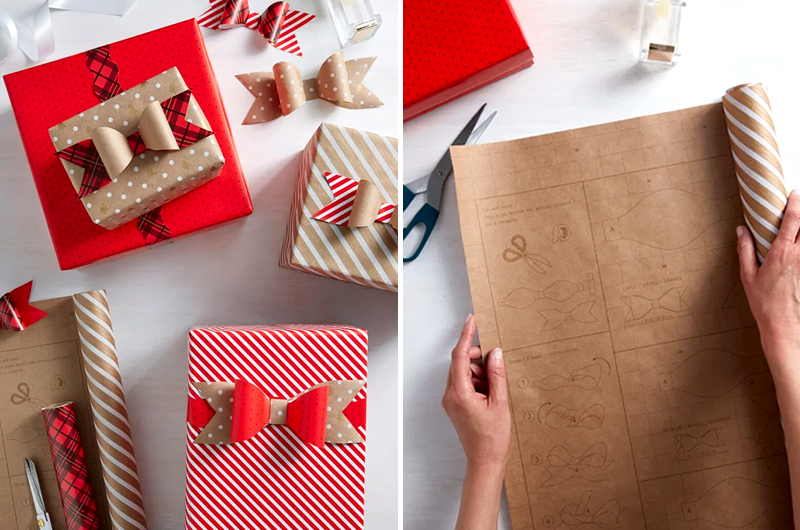
What you’ll need
- Exclusive Hallmark Gift Wrap with bow templates (patent pending!), step-by-step instructions and cut-lines (for extra fun, use more than one design)
- A wrapped present or gift bag (or someone who loves wearing bow ties)
- Scissors
- A flat, clutter-free workspace
- Clear tape
Unroll your roll
Spread out your roll wrap with the non-fancy side facing you—that’s where you’ll find the templates.
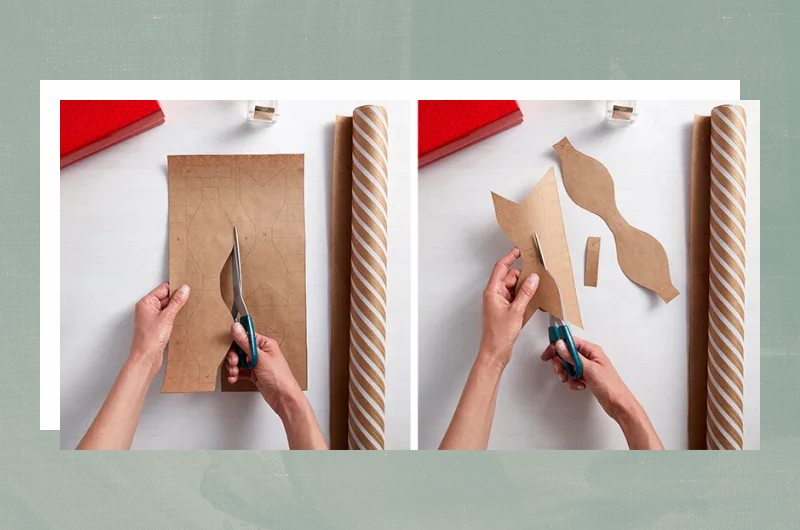
Find the template
Use scissors to cut out the rectangular section that contains the three pieces of the bows, marked A, B and C.
Cut out the bows
Follow the lines and cut out shape A (this will be the middle layer), shape B (it looks like a double fishtail) and shape C (the tab).
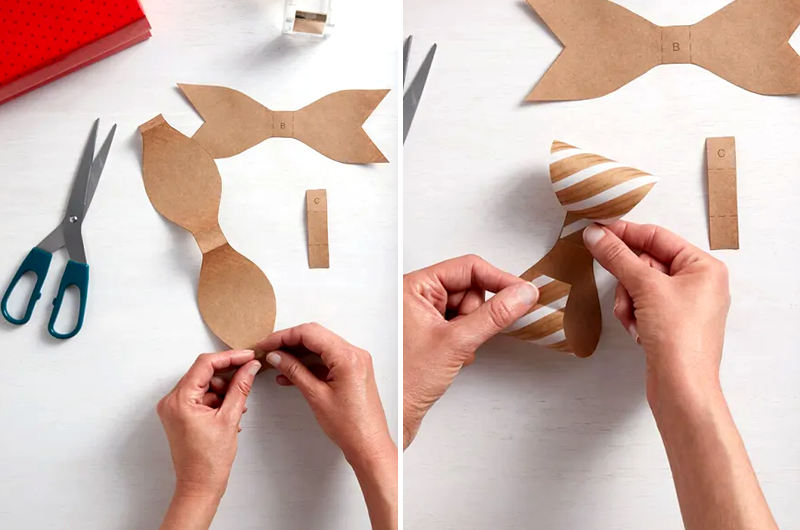
Fold the bow
Start with shape A: Following the dotted lines on the template, fold the paper on the ends and in the center.
Attach the bottom
Bring each end to the middle and tape the folded tabs down with clear tape. The designed side of the wrapping paper should be facing up now.
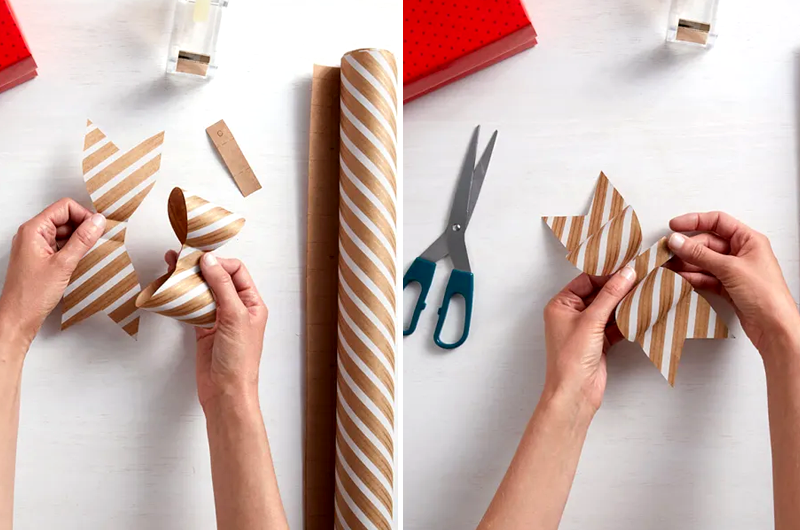
Put them together
Fold shape B on the dotted lines on the template. Flip it over to the pretty side and place shape A in the center.
Wrap it up
Wrap shape C around the middle of shapes A and B.
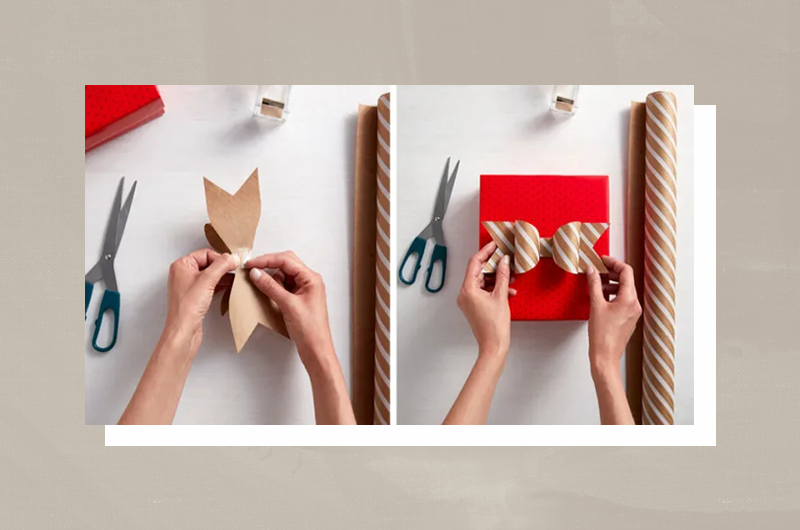
Tape it together
Tape the bow together on the bottom side.
Pop it on a present
Attach your DIY wrapping paper bow to your gift.
More ways to use DIY wrapping paper bows
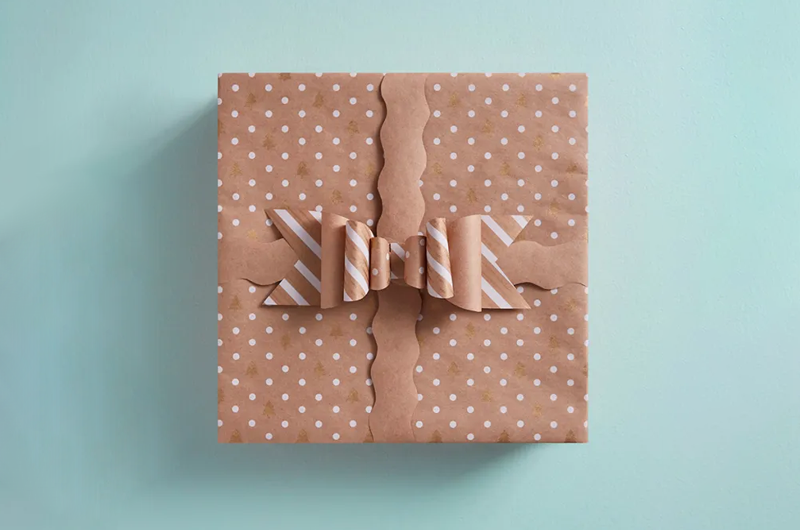
Your gorgeous paper bows are perfect for all kinds of holidays, special occasions and everyday sprucing. Try these tips…
- Make bows in different sizes, mixing and matching wrapping paper in different designs and colors.
- Tape a bunch of bows to a length of baker’s twine, yarn or jute to create a garland for your holiday party or birthday bash.
- Add them to gift bags and envelopes for that extra wow-factor.
- Dress up a hostess gift, like wine or a plate of cookies, with a paper bow…then prepare for the oohs and ahhs.
- Glue a barrette or bobby pin to the back of your paper bow to coordinate your ‘do with your party.
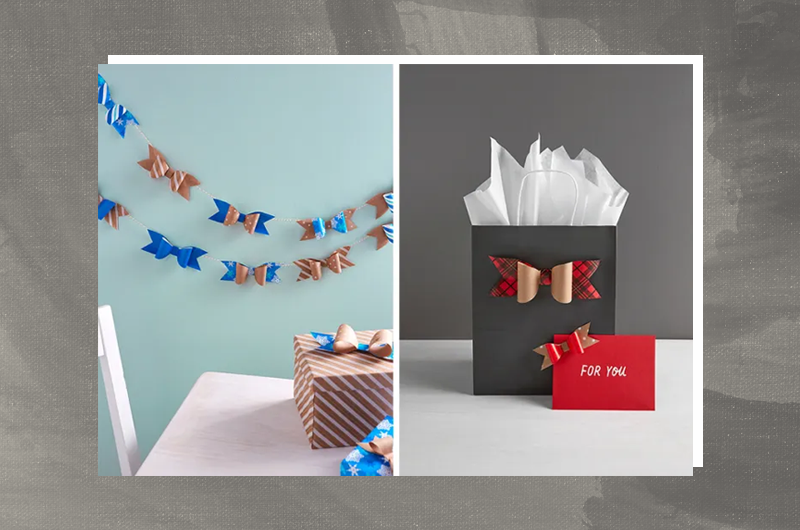
- Attach multiple bows to presents. The more bows, the better.
- Layer three different sizes of shape A to give your bow extra dimension (above).
- Tape to your dog’s collar for an impromptu photoshoot for your Insta feed.
- Make a bunch for a busy friend who’s overwhelmed with the holiday hustle-bustle. Then throw a gift-wrapping party.
Shop Gift Wrap
See allYou may also like
See more-
Christmas Sweet dreams, Santa!
Catch Santa napping on the job with this Snoring Santa Keepsake Ornament featuring sound and motion. With every snore...
-
Kwanzaa What is Kwanzaa?
What is Kwanzaa? A festival of lights rich in African symbolism, it takes place each year from December 26th through ...
-
Christmas Advent calendar activities for adventurous families
It’s time to start the countdown. Maybe it’s about being mindful…or counting your blessings…or preempting your kids a...
-
Summer Ways to celebrate Juneteenth
While Juneteenth was officially recognized as a federal holiday in 2021, this pivotal moment in history has been cele...
-
Christmas Christmas and Kwanzaa: Keeping family holiday traditions and finding your own
Whether you’re single or starting a family, religious or agnostic, someone who celebrates Christmas and Kwanzaa or ju...
-
Halloween Make ghosts and goblins feel right at home this Halloween
Light up your home with haunting Halloween seasonal decor. 🎃👻 Shop now at Hallmark Gold Crown stores or at Hallmark.com.
-
Halloween No scaredy cats around here!
When this black cat crosses your path, you know fun can't be far behind. 😻 🧙♀️ Shop the Zip-A-Long Cat in Hallmark G...
-
Halloween While you’re waiting for The Great Pumpkin this Halloween…
Fly around the pumpkin patch with Zip-a-long Snoopy! 🎃 Shop more frightening finds in Hallmark Gold Crown stores and ...
-
Halloween Light up the night with frightful fun!
Could it be? Could it be!? Yes it is! It’s the Peanuts® Snoopy and Woodstock Halloween figurine! 🎃 🐶 Find it and more...
-
Halloween Where cozy meets mischief and magic
Make some magic this Halloween with this Hocus Pocus hooded blanket. 🧙♀️👻Find more Halloween essentials in Hallmark ...
-
Gifting Relive a favorite from your childhood!
Fill your home with a few small joys inspired by Disney’s “It’s a Small World” 🩵🎎 Shop the collection at Hallmark Gol...
-
Halloween Which house will you be sorted into?
The Harry Potter™ Sorting Hat™ Mug plays sound whenever you lift the lid. Find this chatty mug in Hallmark Gold Crown...
-
Encouragement How to support caregivers
It’s often hard to know how to support a caregiver. Most caregiving checklists out there hit the major topics like me...
-
Love 50 different ways to say I love you
You don’t need to wait for a special occasion to remind that certain someone how much he or she is loved. Spice up yo...
-
Graduation 15 graduation quotes
Celebrate your favorite grad’s milestone with the wit and wisdom of Hallmark writers, fans and others. We’ve rounded ...
-
Congratulations How to congratulate someone
Congratulating others is easy and fun, right? Like when your friend worked really hard and got that awesome job makin...
-
Care & Concern Be more caring with a kindness journal
It's obvious the world could use more kindness. So this year, why not make "be more caring" your number one resolutio...
-
Fall Día de Muertos: A celebration of life and love
Día de Muertos, Day of the Dead, is a holiday originally celebrated in the southern and central parts of Mexico and i...
-
Card Ideas Card messages for kids: What to write in a kid’s holiday card and more
My 3-year-old was having a hard time at preschool drop-off. Dragging his feet. Asking to stay home. This went on a fe...
-
Christmas 6 Creative Christmas Card Display Ideas
Holiday card season is here: Our mailboxes are about to fill up with festive envelopes with pretty stamps and familia...


