Play with Your Food: Halloween Cookie Pops
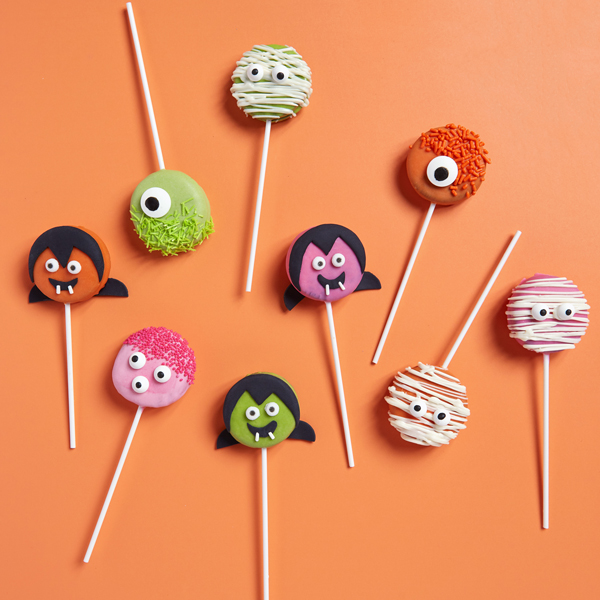
Want to give your very favorite trick-or-treaters something a little special? Try our Halloween Cookie Pops: a sweet and spooky Vampire, Mummy and…Things With Eyes. They’re easy to put together and the perfect treats to top off personalized goodie bags for your kids or grandkids.
Inspired? Create and share by tagging @HallmarkStores.
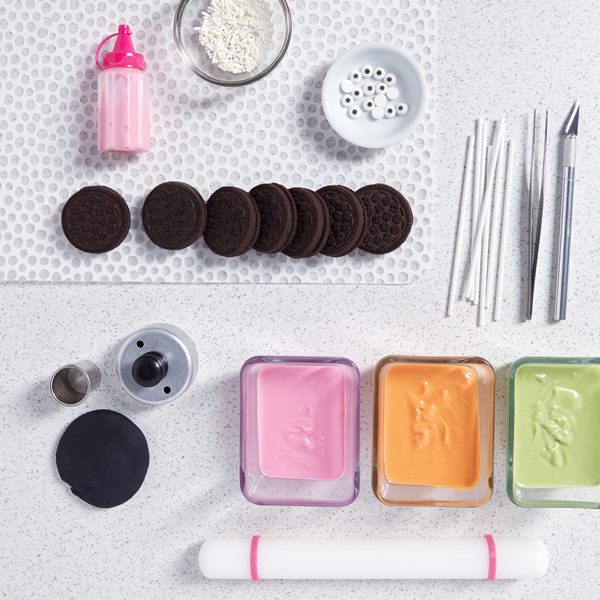
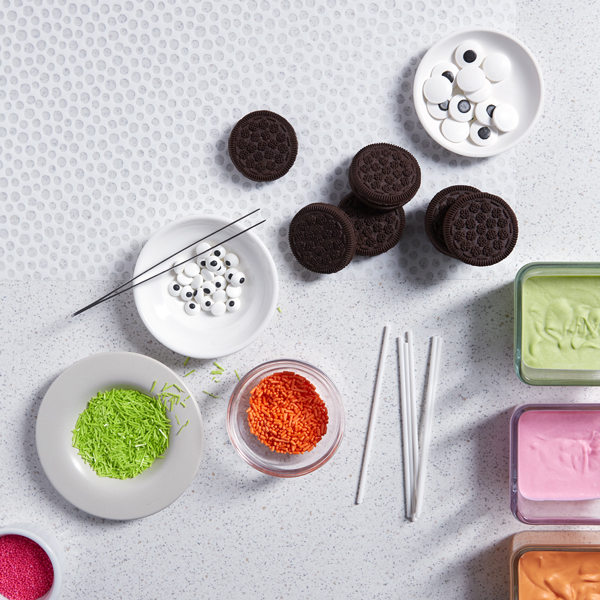
Supplies
You’ll need the same basic supplies for all three characters:
- Sandwich cookies
- White chocolate melting chips (follow the package instructions to melt)
- Food coloring
- Sprinkles
- Candy eyeballs in a variety of sizes
- Treat sticks
- Small squeeze bottles
- Tweezers
- Parchment paper or silicone baking mat
- Vampire: Black fondant or fruit leather, rolling pin, sharp knife or cookie cutters
We started with pastel sprinkles in green, pink and orange and dyed our white chocolate to match. All our Halloween Cookie Pops start with a good coating of melted white chocolate, so you can dip enough to make all the characters and then have fun making faces.
Vampire Cookie Pops
Follow these steps to make spooky Vampire cookie pops.
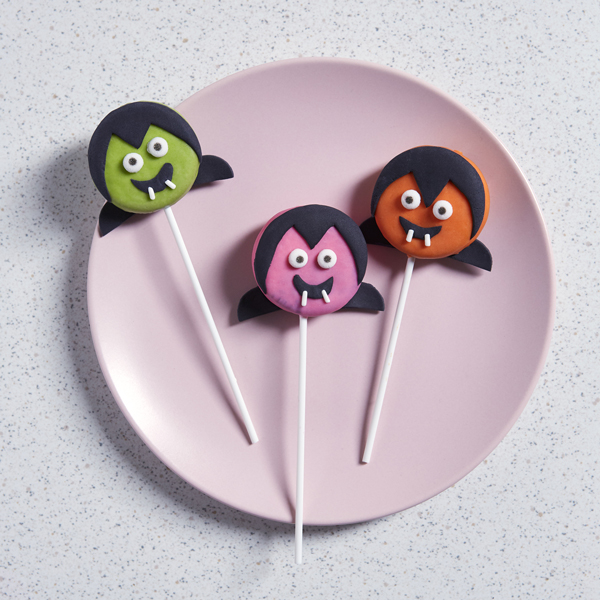
Here’s what they’ll look like when you’re finished. Silly? Spooky? You make the call.
You Will Need:
Sandwich cookies, white chocolate melting chips (follow the package instructions to melt), food coloring, white sprinkles (for the fangs), black fondant or dark fruit leather (like grape), candy eyeballs, treat sticks (you can leave these off and just make decorated cookies), tweezers
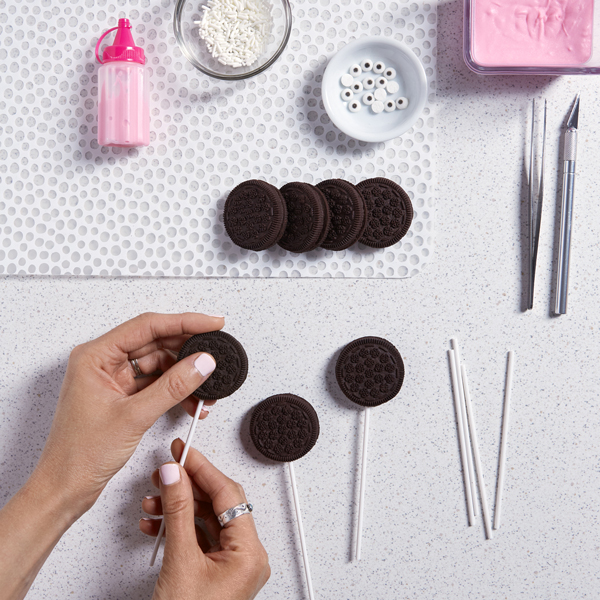
Step One:
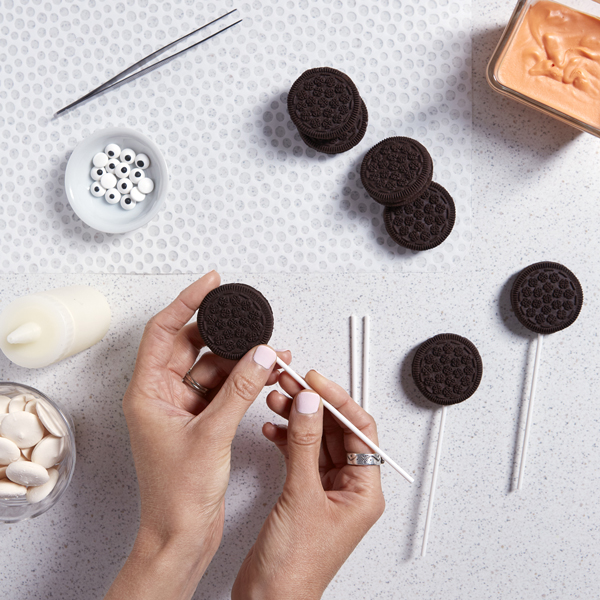
Poke a treat stick into the sandwich cookie filling. You can also carefully separate the cookie, put the stick in the filling and put the cookie back together.
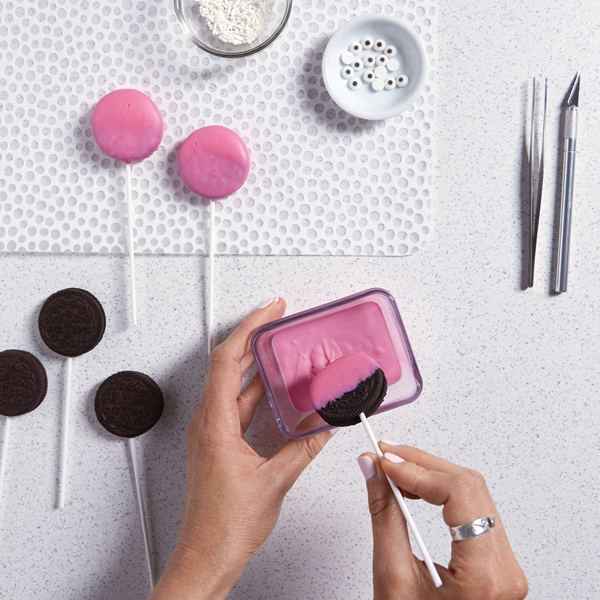
Step Two:
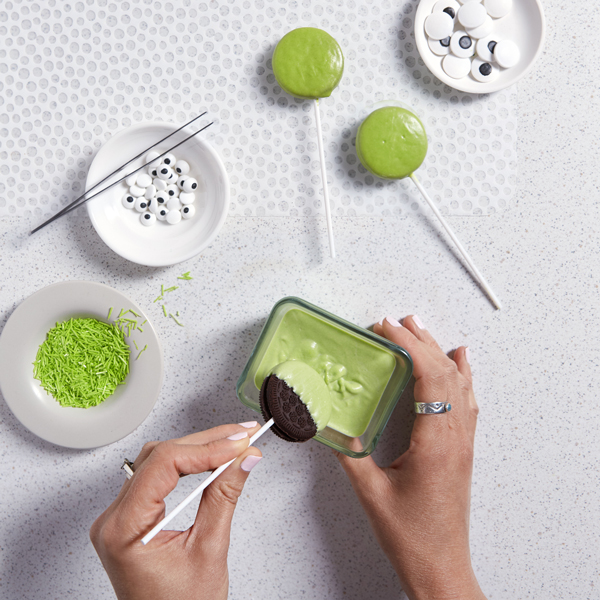
Dip the cookie in pastel-colored chocolate and cover completely. Lay it on parchment paper/silicone mat (or stick it in a foam block) to harden.
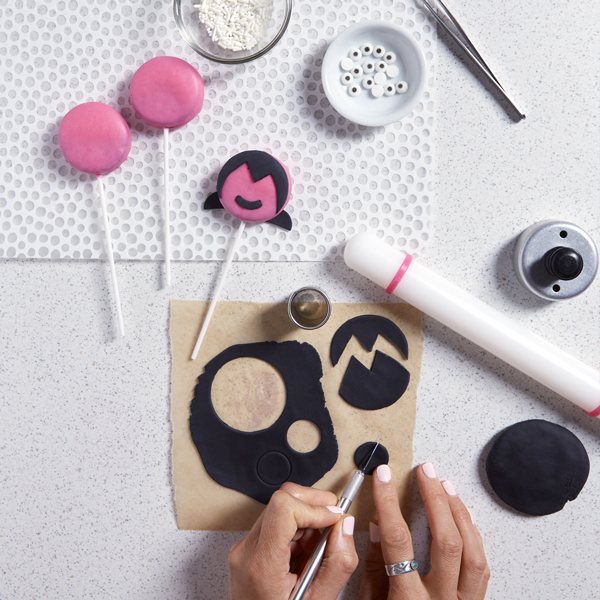
Step Three:
Roll out the fondant (or use fruit leather) and cut three pieces as shown:
—Trace a sandwich cookie with the tip of a knife to make a circle (or use a cookie cutter the same size as the cookie); cut a wide M shape at the top of the circle to make Vampire’s hair.
—Cut a second, tiny circle, and cut it in half to make his collar.
—Cut a sliver for the mouth.
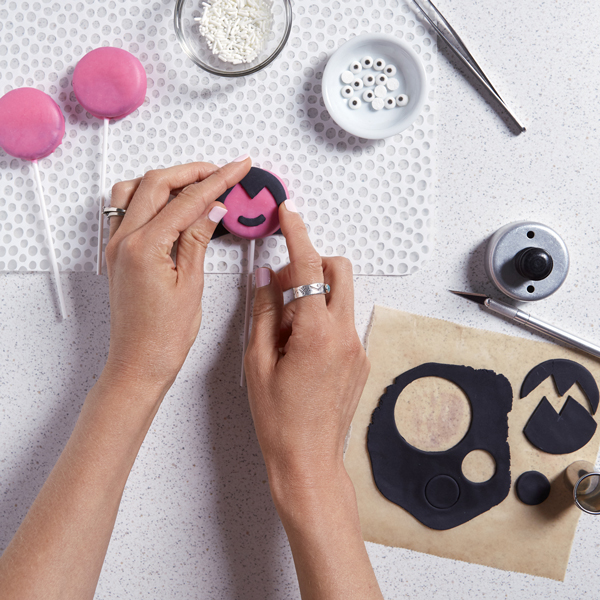
Step Four:
Use melted chocolate to attach the hair, collar and mouth as shown.
Step Five:
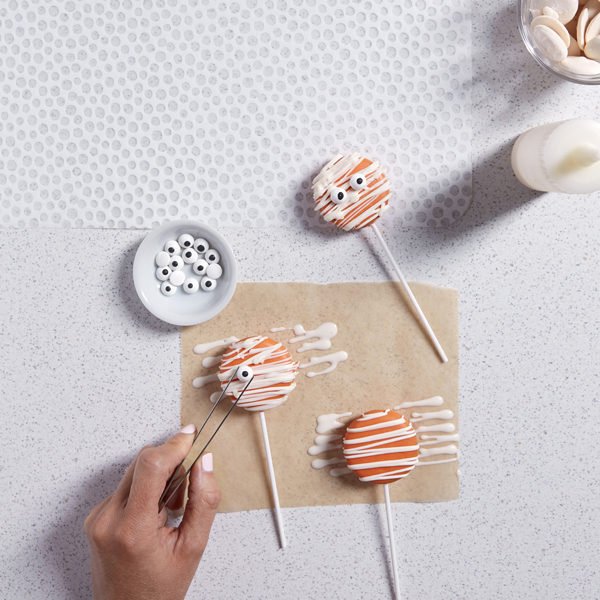
Use tweezers and melted chocolate to attach eyes.
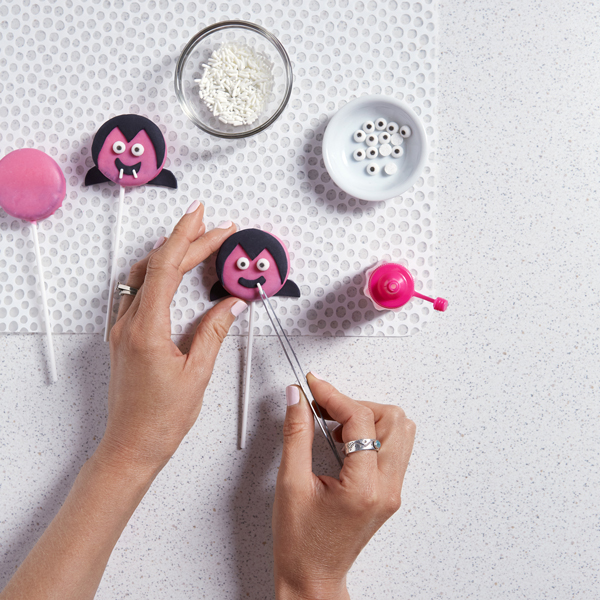
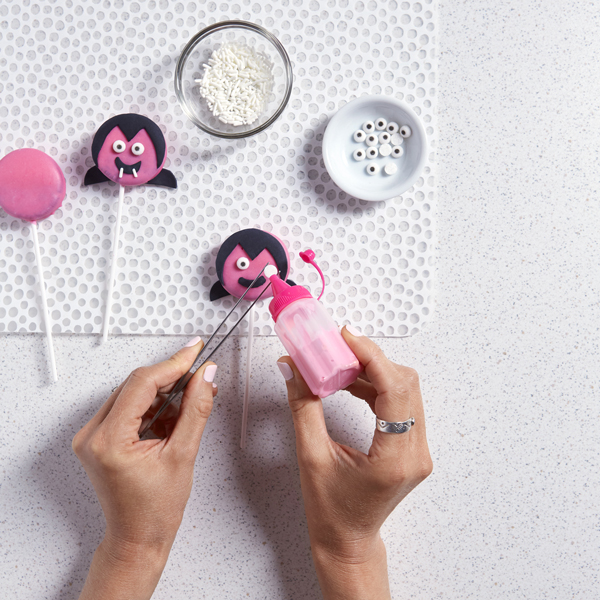
Step Six:
Use tweezers and melted chocolate to attach white sprinkles to make the fangs. Mwah-ha-ha!
Mummy Cookie Pops
Follow these steps to make Mummy cookie pops.
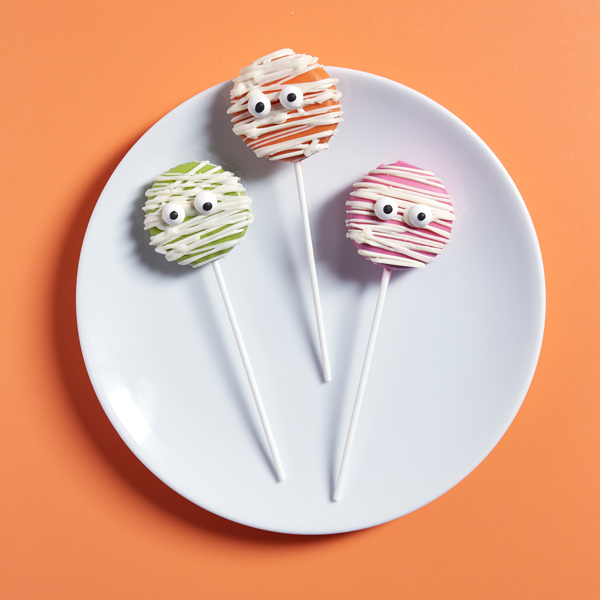
Here’s what they’ll look like when you’re all wrapped up. (Get it?)

You Will Need:
Sandwich cookies, white chocolate melting chips (follow the package instructions to melt), food coloring (for the Mummy, you’ll need some colored chocolate for dipping and some left plain white in a squeeze bottle), candy eyeballs, treat sticks (you can leave these off and just make decorated cookies), tweezers
Step One:
Poke a treat stick into the sandwich cookie filling. You can also carefully separate the cookie, put the stick in the filling and put the cookie back together.
Dip the cookie in pastel-colored chocolate and cover completely. Lay it on parchment paper/silicone mat (or stick it in a foam block) to harden.
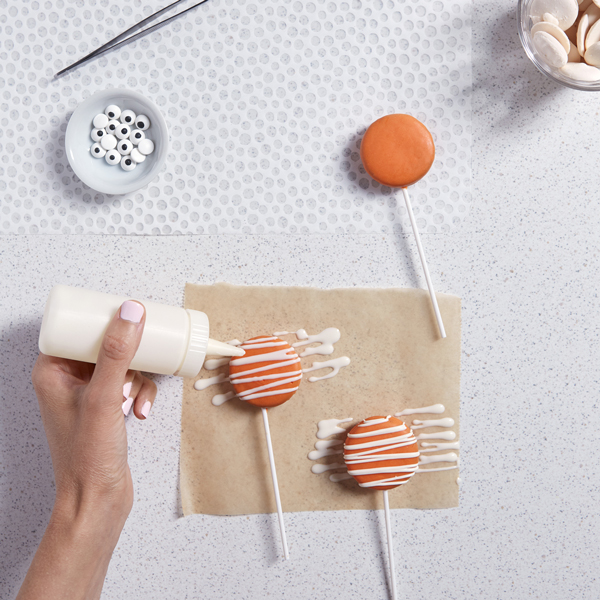
Step Two:
Use a squeeze bottle to drizzle plain white chocolate back and forth over the cookies to make bandages. (You may have to heat the chocolate a little more to make it super-melty.)
Step Three:
Before the bandages harden, use tweezers to add two eyes.
Things with Eyes Cookie Pops
Follow these steps to make these Things with Eyes cookie pops.

Here’s what they’ll look like when you’re finished. See how cute they are?
You Will Need:
Sandwich cookies, white chocolate melting chips (follow the package instructions to melt), food coloring, pastel sprinkles, candy eyeballs in different sizes, treat sticks (you can leave these off and just make decorated cookies), tweezers
Step One:
Poke a treat stick into the sandwich cookie filling. You can also carefully separate the cookie, put the stick in the filling and put the cookie back together.
Step Two:
Dip the cookie in pastel-colored chocolate and cover completely. Lay it on a piece of parchment or silicone baking mat.
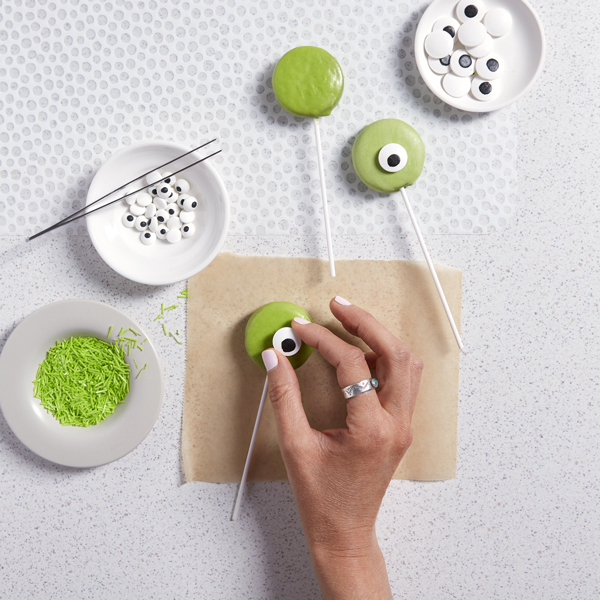
Step Three:
Before it hardens completely, add an eye—or three. (If it doesn’t stick, use a little extra melted chocolate.)
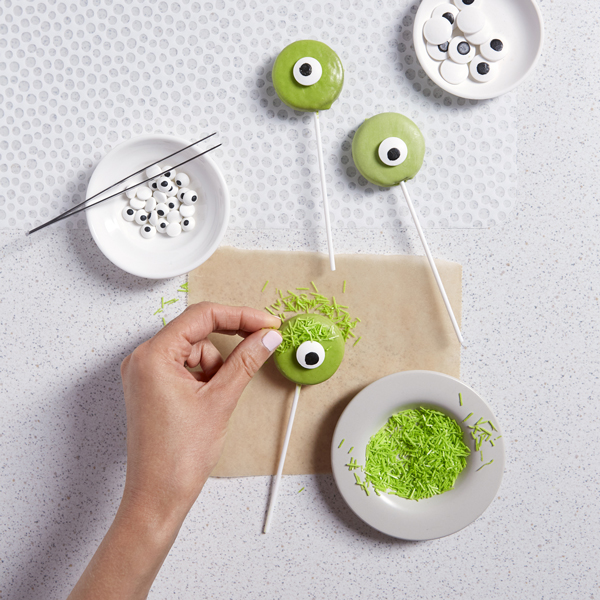
Step Four:
Add sprinkles for hair? Fur? Get creative with placement. (If they don’t stick, you can add a little more melted chocolate.) (TBH, you can reverse the steps for adding the hair/fur and eyes.)
Make a Halloween Care Package
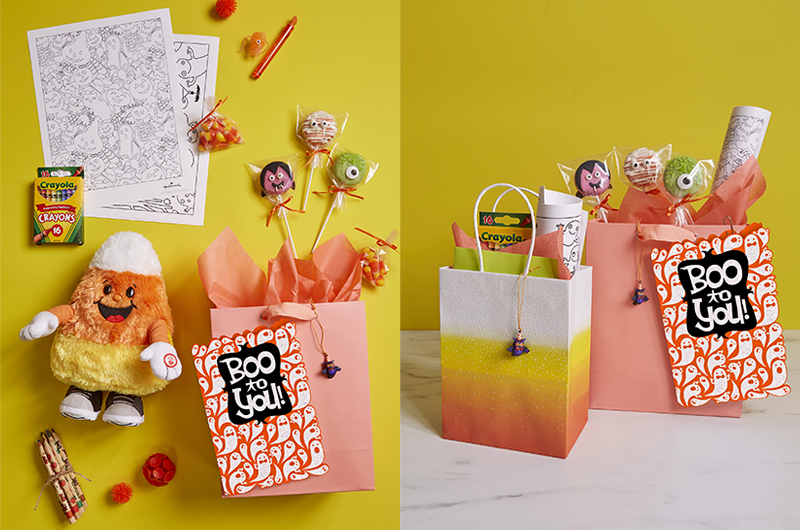
What to put in a personalized trick-or-treat care package? Whether the kiddos are going trick-or-treating or not, they’ll love to get a sack full of goodies from someone who loves them. Start with a cute gift bag and add surprises like:
- A Halloween card
- Halloween coloring pages
- Halloween socks, stuffed toys or other little gifts
- Crayola crayons, markers or pencils
And remember, you can always turn it into an adult goodie bag with a Halloween drink tumbler and the grown-up beverage of your choice.
Shop Halloween
See allYou may also like
See more-
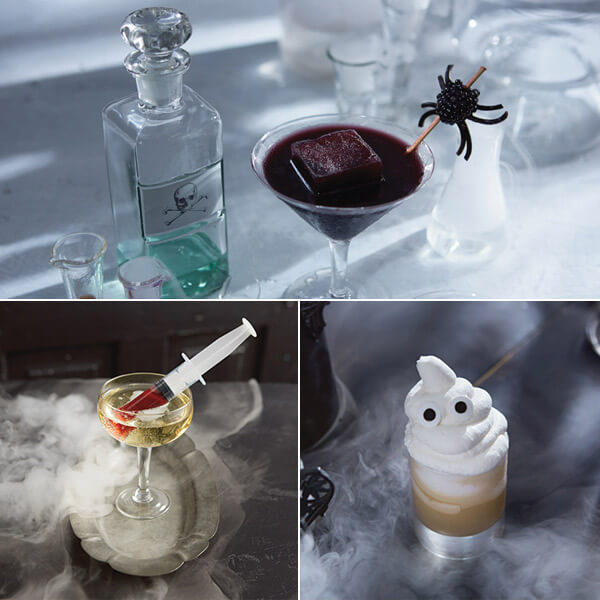
Halloween Creep out your Halloween cocktails
Time to gather together for some frightfully good fun this Halloween. And while you’re greeting your ghosts and guest...
-
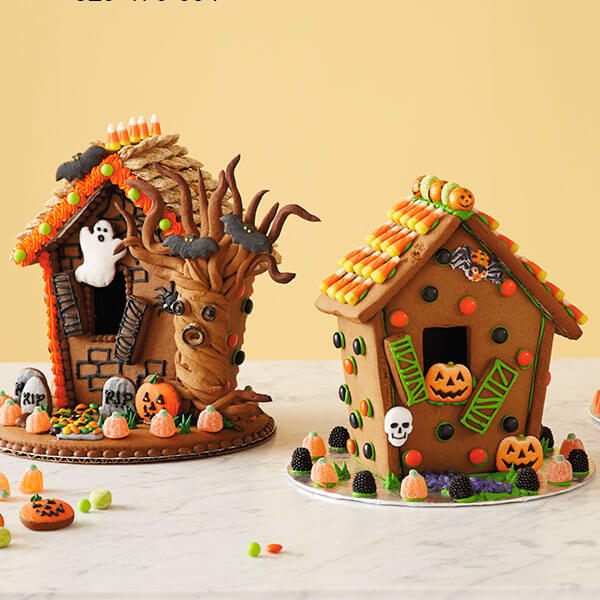
Halloween Bake a scary-good Halloween gingerbread house...if you dare!
With a few ingredients and easy-to-follow instructions, your crew can construct this goose bumps–worthy Halloween gin...
-
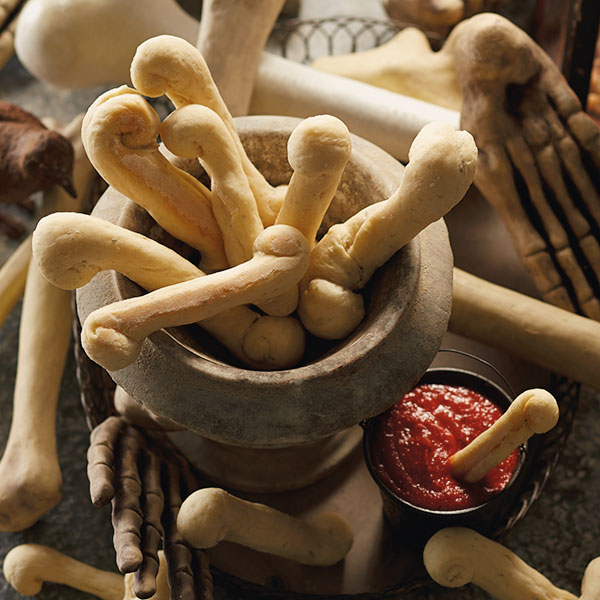
Appetizer & Snacks Halloween bone breadsticks
These Halloween bone breadsticks are a great example of taking an everyday favorite and reimagining it as a creepy Ha...
-
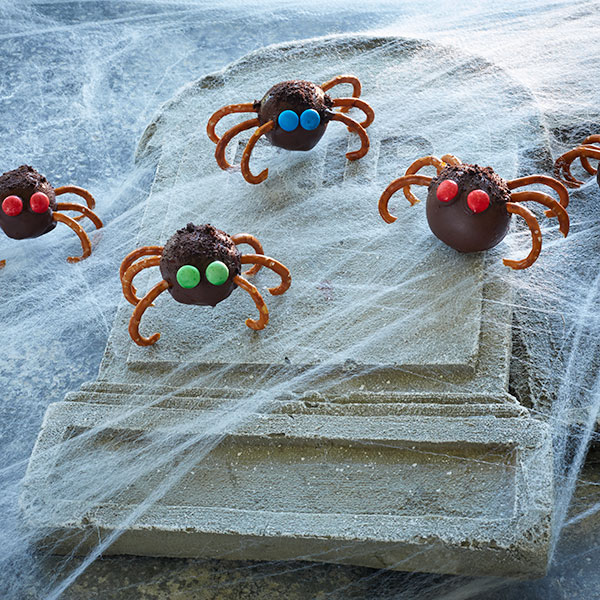
Dessert Peanut butter spiders
Looking for a fun, creative and creepy treat for your loved ones this Halloween? Look no further. Our peanut butter s...
-
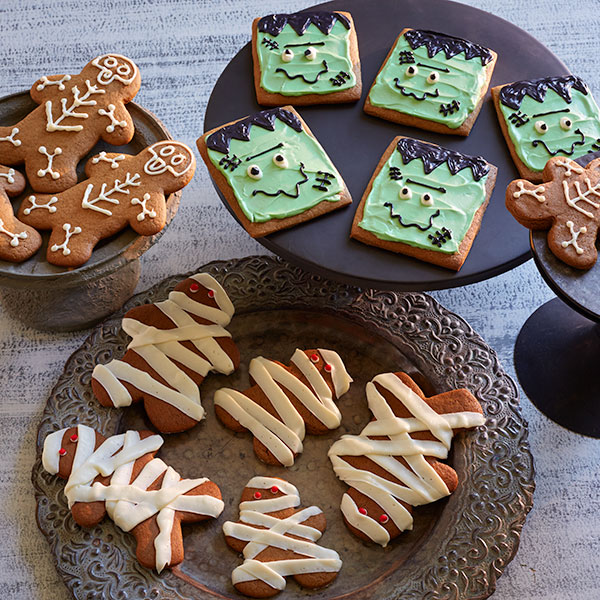
Dessert Halloween gingerbread cookies
Gingerbread cookie dough from the grocery store can make all three of these monster-themed Halloween gingerbread cook...
-
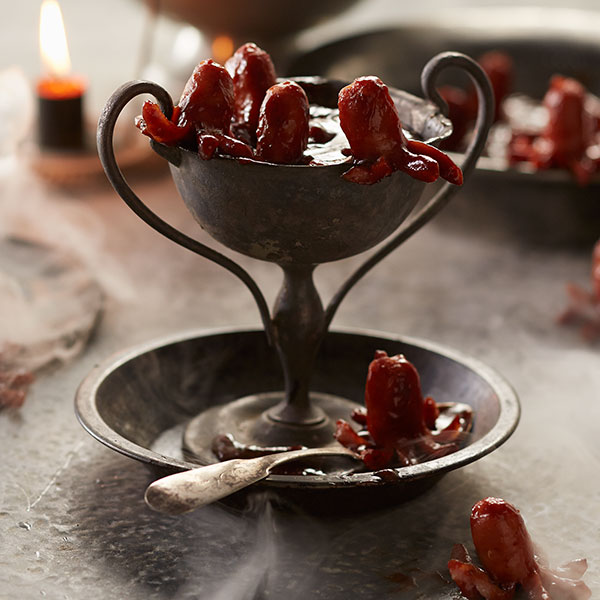
Appetizer & Snacks Halloween little smokies
Little smokies in barbecue sauce are a hit at any party, and these Halloween little smokies are perfect for Halloween...
-
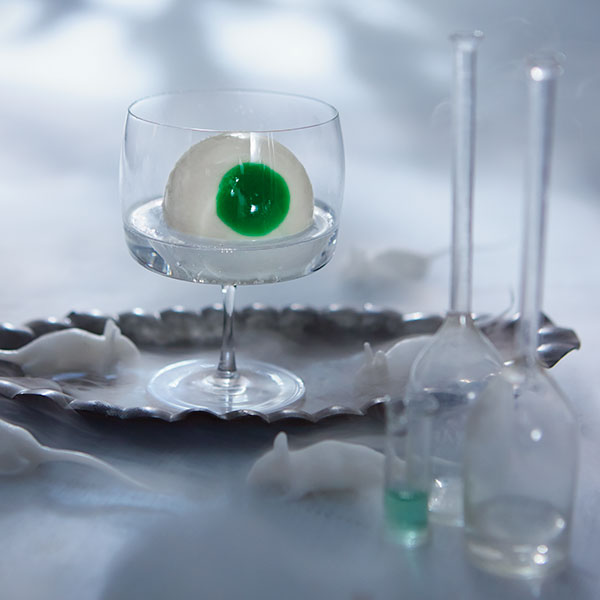
Drinks Vodka eyeball highball
This vodka eyeball highball is the drink that watches your every move. The squishy garnish is made with gelatin disso...
-
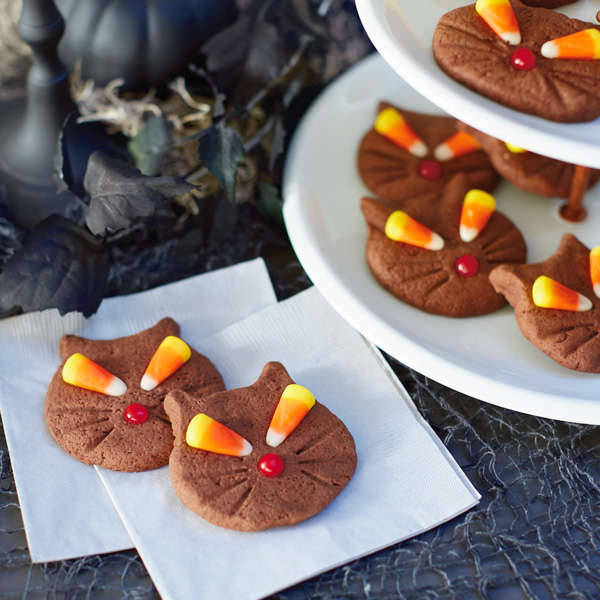
Dessert Cat cookies
Cat cookies are just like their feline counterparts: sweet and cute with a little bit of attitude. Bring these cute b...
-
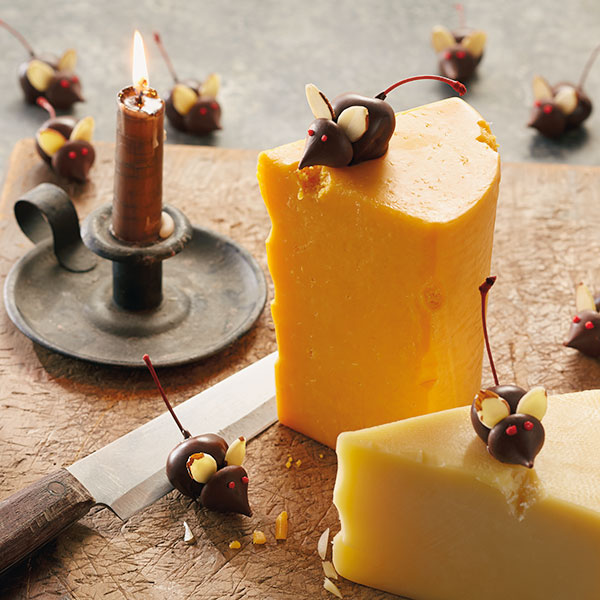
Dessert Halloween chocolate-covered cherry mice
Don't judge Halloween desserts by their size. These Halloween chocolate-covered cherry mice may quickly become your f...
-
Halloween DIY witch broom Halloween treat bag
Nothing beats an elevated but easy Halloween treat bag—especially if you can make it as cute as this one! Inspired by...
-

Recipes “Cookies and Scream” Halloween popcorn
If there’s one holiday that begs for themed food, it’s Halloween. Think about it—we’re all running around, dressed as...
-
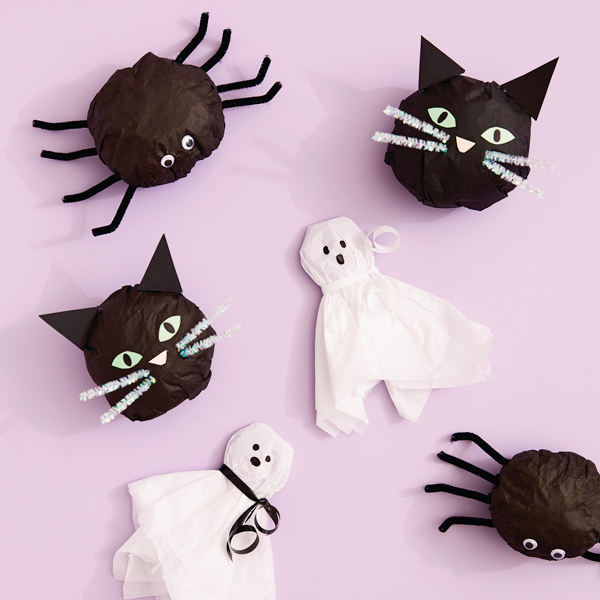
Halloween Scary easy tissue paper treat bags for Halloween
Ghosts, spiders and cats, oh my! Most of us wouldn’t want to come across any of these any day, let alone Halloween. B...
-
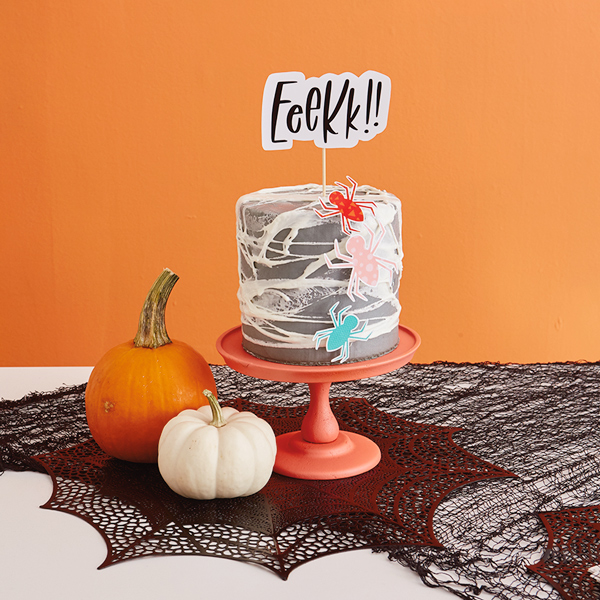
Halloween Itsy-Bitsy Spiderweb Cake
The kids get candy. But you—the fabulous passer-outer of treats—deserve something more grown up. Something fancier. S...
-
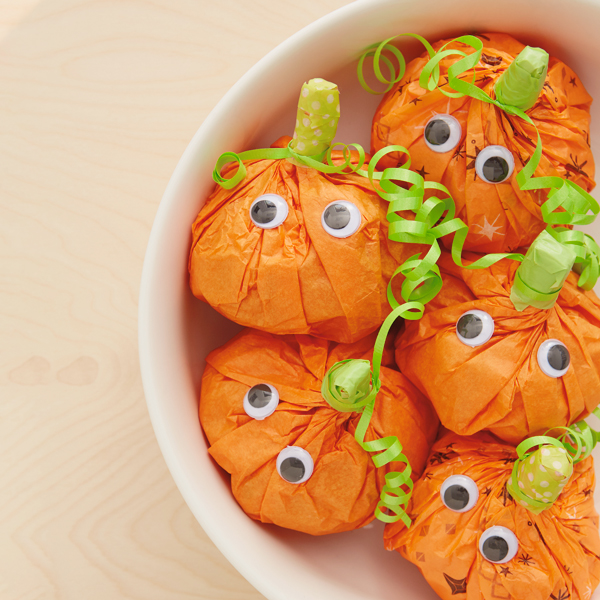
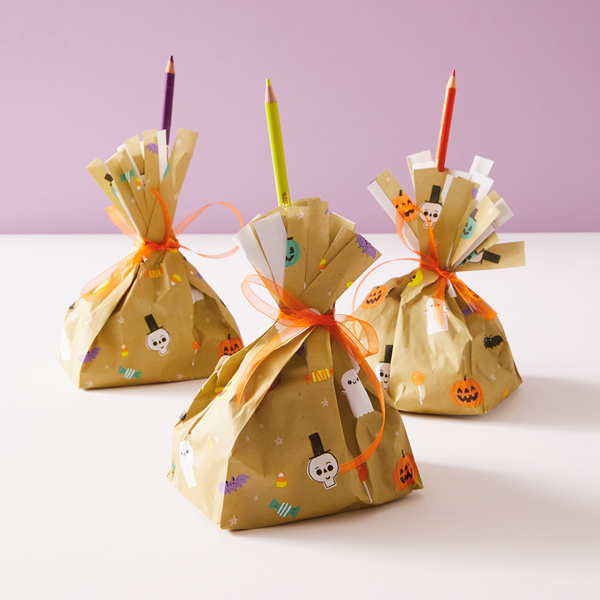
Halloween Sweet and easy DIY pumpkin surprise treat bags
This sweet Halloween project is all treats, no tricks. With just a few simple craft supplies, you can m...
-
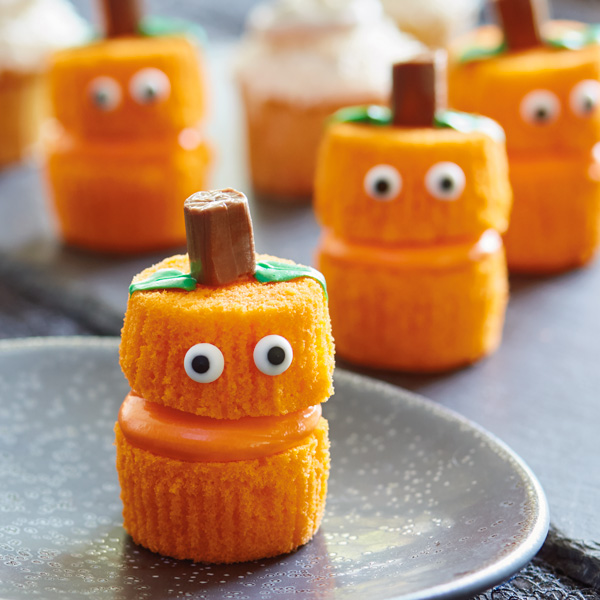
Dessert Jack O’Lantern Cupcakes
Jack O’Lantern Cupcakes will get your kiddos giggling with their funny faces. This easy Halloween cupcake decorati...
-
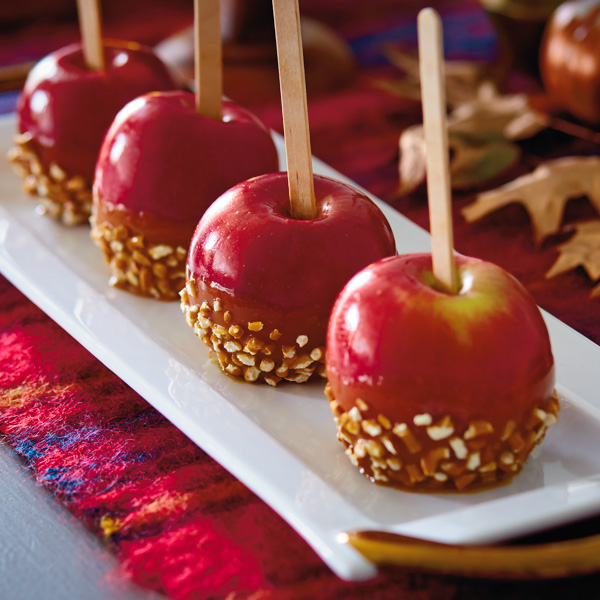
Dessert Sweet and Salty Caramel Apples with Pretzel Bottoms
Sweet and Salty Caramel Apples with Pretzel Bottoms add a satisfying crunch to a favorite fall recipe. It just tak...
-
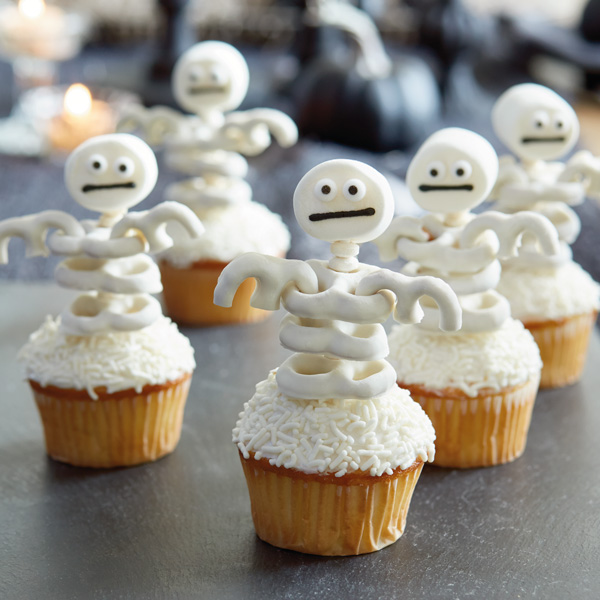
Dessert Skeleton Cupcakes
Skeleton Cupcakes pair easy DIY toppers with home-baked or store-bought cupcakes. The skeletons are made of yogurt...
-
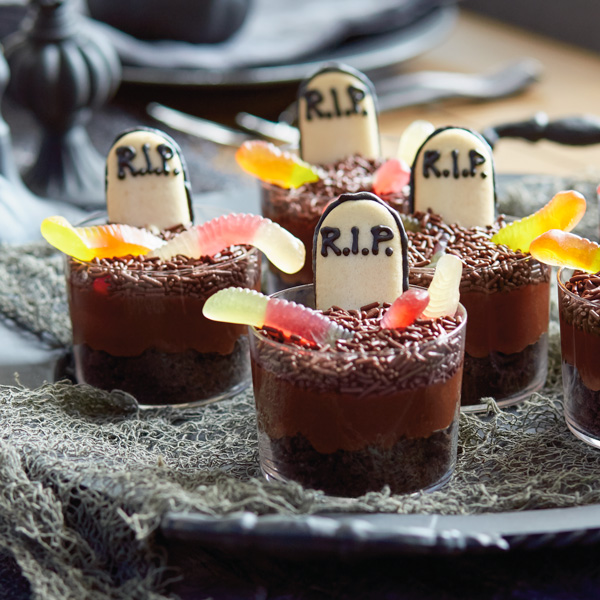
Dessert Graveyard Pudding Cups
Graveyard Pudding Cups put a Halloween-y spin on the classic kids’ “dirt and worms” treat. This Halloween dessert ...
-
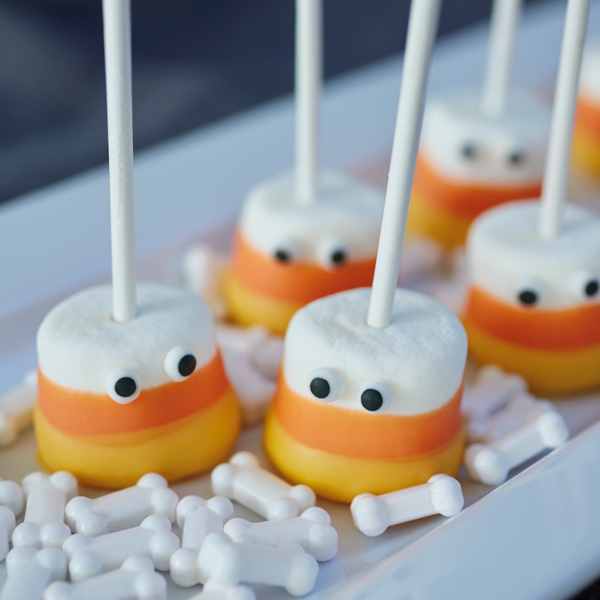
Dessert Candy Corn Marshmallows
Candy Corn Marshmallows are significantly less divisive than their namesake—because who doesn’t like candy-covered...
-
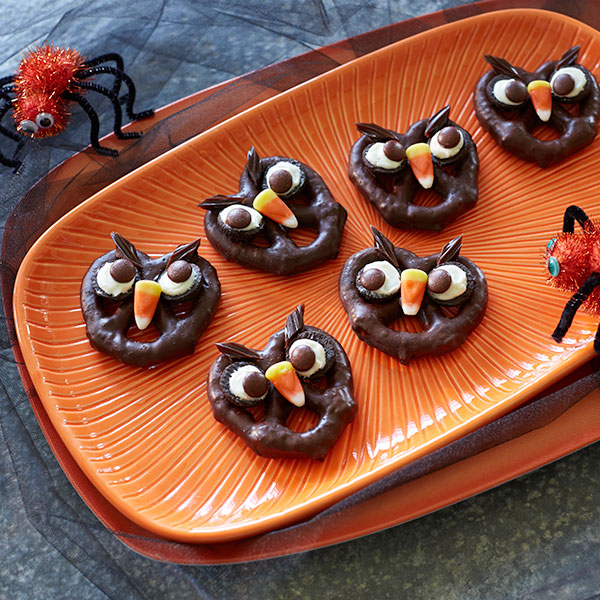
Appetizer & Snacks Pretzowls chocolate-covered pretzels
Our Pretzowls Halloween treat recipe will have everyone hooting with delight! You can't go wrong with a recipe tha...
