We found
suggestions
Inspired? Create and share by tagging @hallmarkstores.
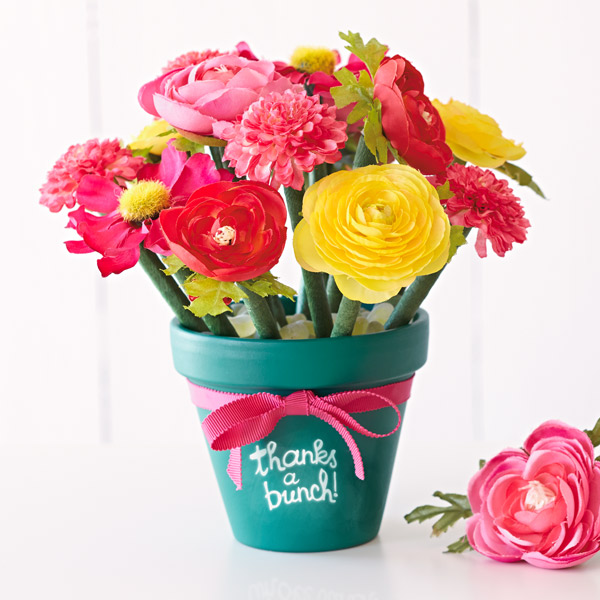
Paint a clay pot with chalkboard paint and set aside to dry. Apply 2 to 3 coats as necessary. Brainstorm with your kids to come up with a "thank-you" message to write on the pot later. Here are a few ideas to get you started: Thanks a bunch, thanks for helping me learn and grow, thanks a latte (fill the clay pot with coffee beans to hold the pens), you're my #1 pick!
Remove the little caps on the non-writing ends of the pens. If they don’t just pop off, use your craft knife to cut off the plastic tops.
Cut the stem of each flower bloom to about ½ to 1 inch—enough that you’ll be able to insert the stem inside the pen cylinder easily.
Add some glue to the stem and insert it into the pen cylinder. Let dry.
Wrap the pen with floral tape, starting at the writing end of the pen. Stretch the tape gently as you wrap and overlap your wrapping so none of the pen shows through the tape. Wrap all the way up the pen, secure with a few tight wraps and cut off the end of the tape. You can use a bit of glue to secure the end of the tape to prevent future unraveling (optional).
Create more pens following steps 3 through 5 until you’ve created your bouquet. (We made about a dozen with smallish flowers for a 4-inch pot.)
To add a little greenery to some of the pens (optional), cut several leaves off the silk flower stems and glue the leaf stems to the pens slightly below the flower blooms. Let dry. Wrap around the base of each leaf stem with extra floral tape to further secure it to the pen.
Wrap your ribbon around the rim of the pot and tie in a bow; secure ribbon to pot with glue.
Write the message to your teacher on the outside of the pot with chalk. Use hair spray to adhere the chalk (optional).
Fill your pot with coffee beans or other filler to hold the pens in place.
Arrange your flower pens into a bouquet in the pot and give it to your teacher.

As a Black woman, I sometimes feel like society wants us to be forlorn and sad, as if we aren't deserving of letting ...
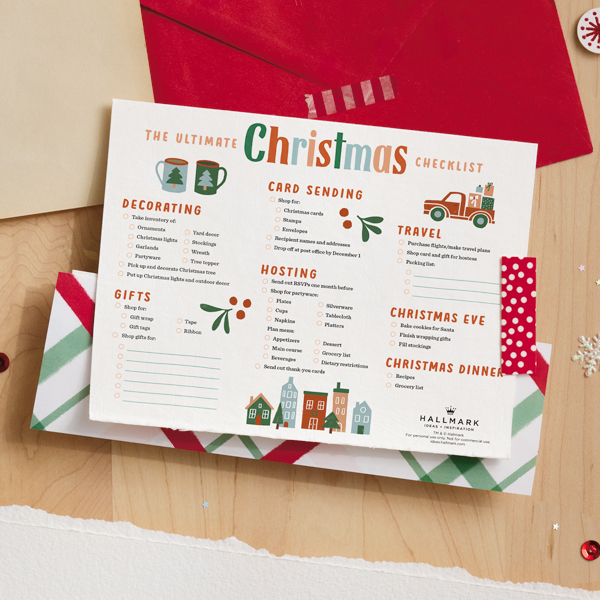
It's easy to make a Christmas card list, choose your cards, and sign, seal and mail them on time with our very best t...

Ever wanted to step inside of a picture-perfect Hallmark Christmas movie? Or travel to a place where you could immers...

Kids LOVE getting to express themselves—especially when it comes to their rooms. And when it comes to Christmas-lovin...
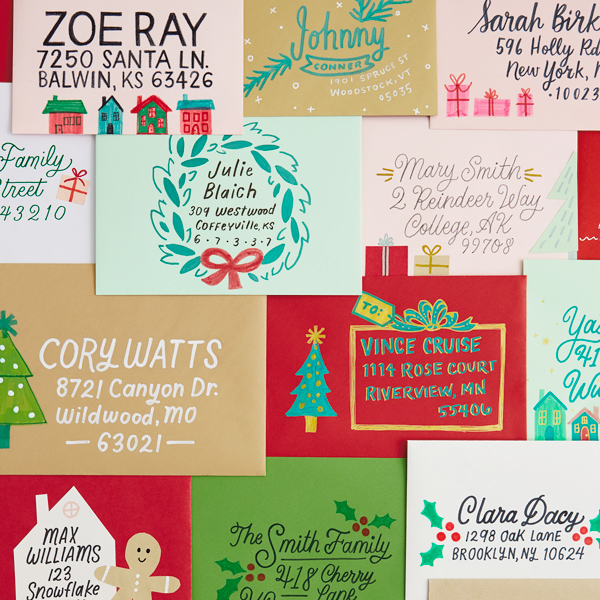
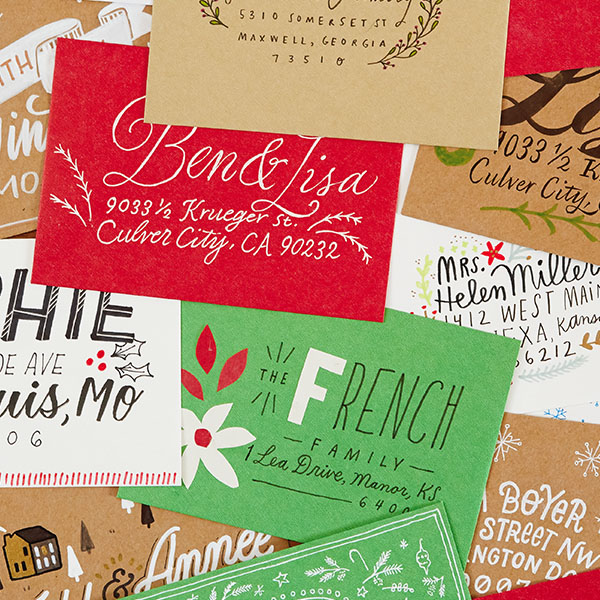
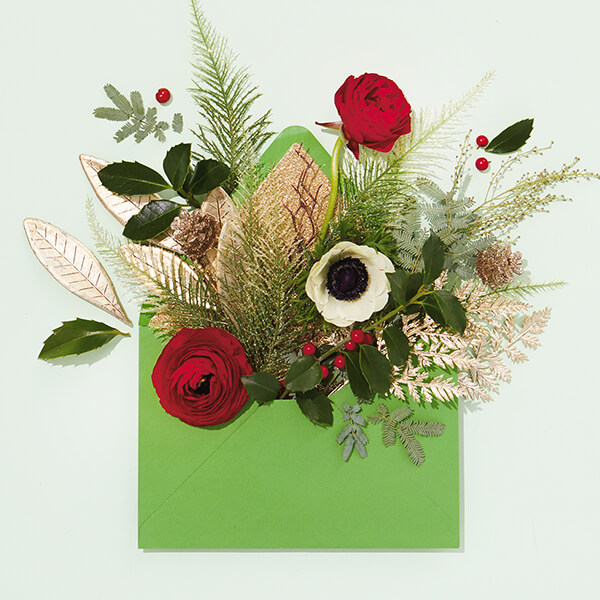
Part of the fun of sending Christmas cards is making pretty envelopes. That’s why our creative team came up with an e...

The stocking stuffer struggle is real. By the time you’ve bought your main presents, you feel like you’re all out of ...

If you're looking for new white elephant ideas, you've come to the right place. Whether you're hosting a party or loo...

On an ordinary December day, on what would’ve been our oldest daughter’s 29th birthday, our pipes backed up, flooding...
Giving gifts is one of my favorite things to do. And during the holidays, there are lots of opportunities to give! Th...
Get sample messages, tips and watch our new video guide to write the perfect Christmas card.


What do scavenger hunts have to do with the holidays? More than you might think. A lot of the best things about the s...
Gathering to share joy with the people we care about is one of the best things about Christmas. And while sitting dow...

It’s time to make your tree show up and show out! You’ve scouted out your space, decided on the size and nature (or f...

I’m known for quite a few things in my friend group, including random outbursts, spontaneous solo karaoke sessions an...
For some of us, the Christmas spirit is a year-round lifestyle. Whether it’s decorating the tree with pretty lights ...

Tis the season for taking Christmas card photos. Capturing the perfect family photo for your Christmas card—especiall...

I was a Christmas-gift-giving cautionary tale. It was the last day I could hand off a gift in time for the holiday. I...
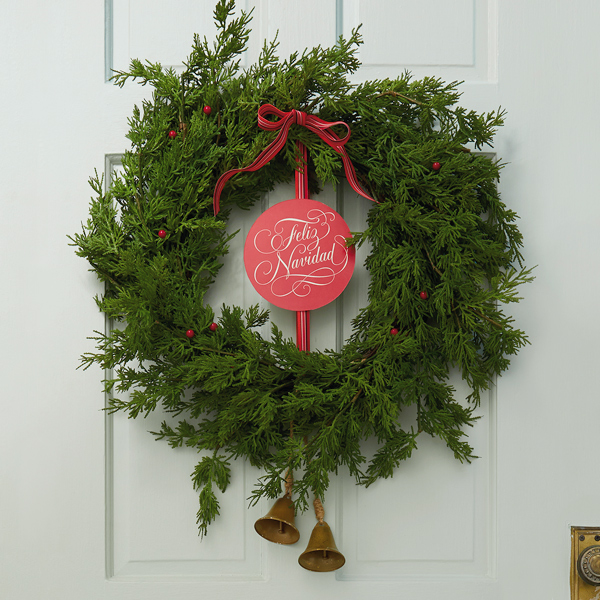
When holiday visitors come knocking, your front door is the first thing they see. Now, that’s not to say that all the...
As far as sweet Christmas traditions go, we think that baking (and nibbling) cookies is right up there with opening p...
