

3 nostalgic kids’ crafts that would make perfect Mother’s Day or Father’s Day gifts
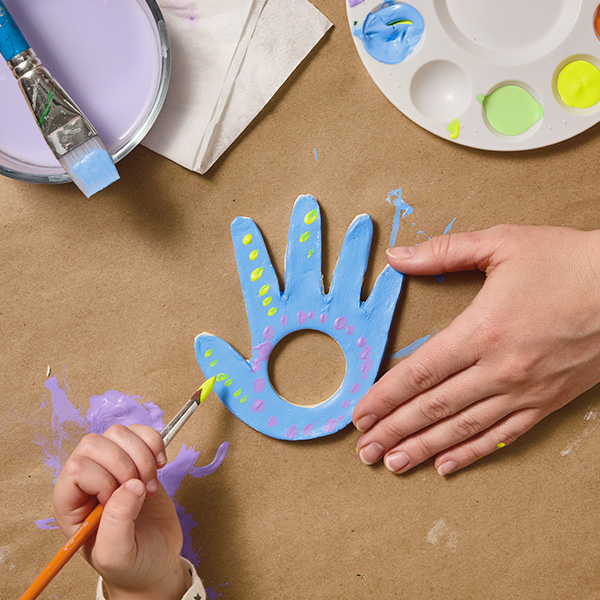
From dandelions picked out of the yard to bites out of their chocolate chip cookie, little kids understand how good it feels to give someone a gift. And these Mother’s Day and Father’s Day kids’ crafts are a perfect way to provide them an opportunity to get creative and share some love with Mom or Dad!
So gather up some supplies, a snack or two and a little one who loves to make things. We’ve got three adorable, nostalgia-filled ideas ready to give Mom and Dad all the feels.
Inspired? Create and share by tagging @HallmarkStores.
Craft #1: Felt Gift Envelope
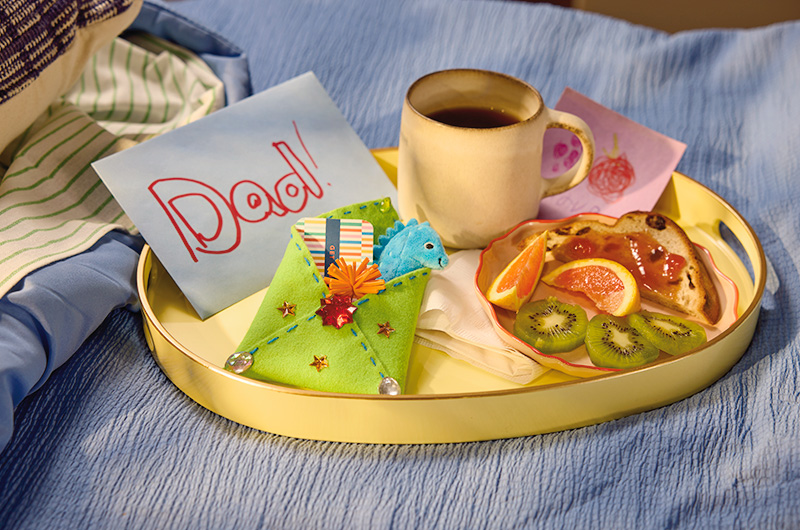
This cute craft is perfect for presenting Mom or Dad with a bunch of little gifts, like a special rock, a pretty flower, a gift card to their favorite shop and a heartfelt, crayon-written note. 🥰
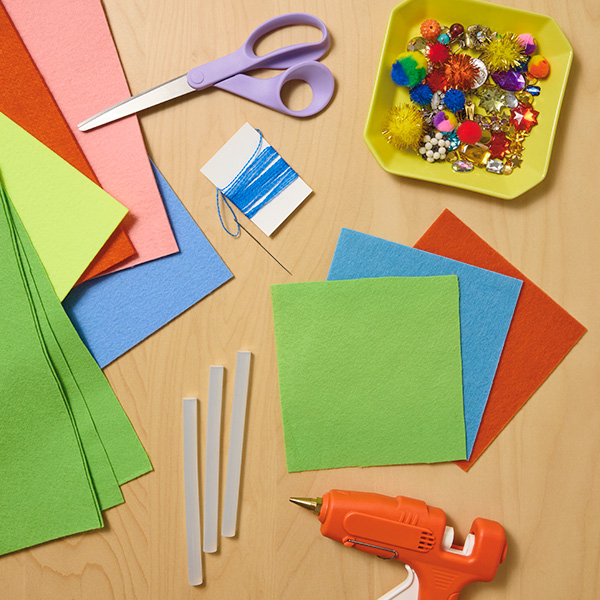
You’ll need:
• A sheet of felt fabric (aka crafting felt), any color
• Scissors
• Embroidery floss
• Needle
• Hot glue gun
• Embellishments like gems, buttons, mini pom-poms, etc.
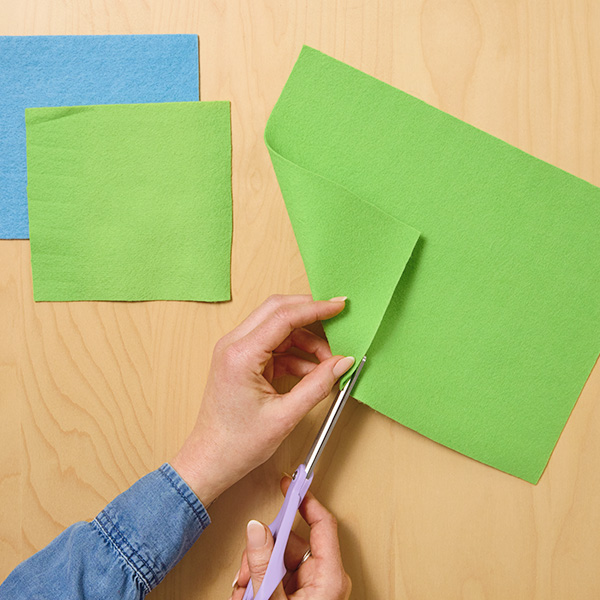
Step 1: Cut a square out of the felt sheet. Fold one corner of the felt sheet down into a triangle, so that the bottom edge of the triangle is parallel to the bottom edge of the overall sheet. Cut around the triangle. You should now have a square of felt. (Save the rest of the felt sheet for another craft!)
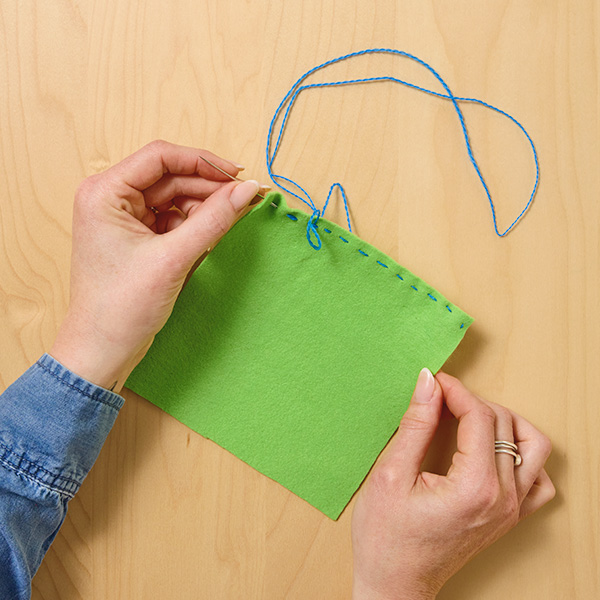
Step 2: Add the stitched border. Thread your needle with some embroidery floss and make large stitches all around the outside edge of the square of felt.
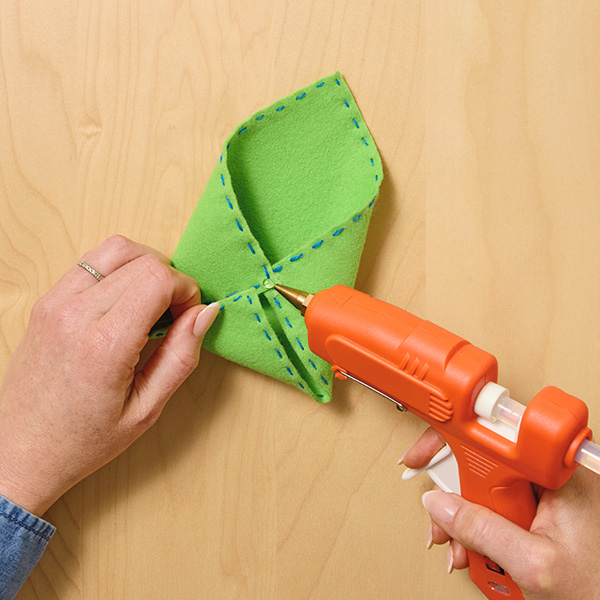
Step 3: Make the envelope. Turn one corner of the square toward you—we’ll call this the “bottom corner.” Fold the right corner into the center of the square and place a small dot of hot glue on it, then fold the left corner into the center and press it onto the glue dot until it’s cooled. Then put another dot of hot glue on top of the left corner you just glued down, bring the bottom corner (the one facing you) up into the center and press it down until the glue has cooled.
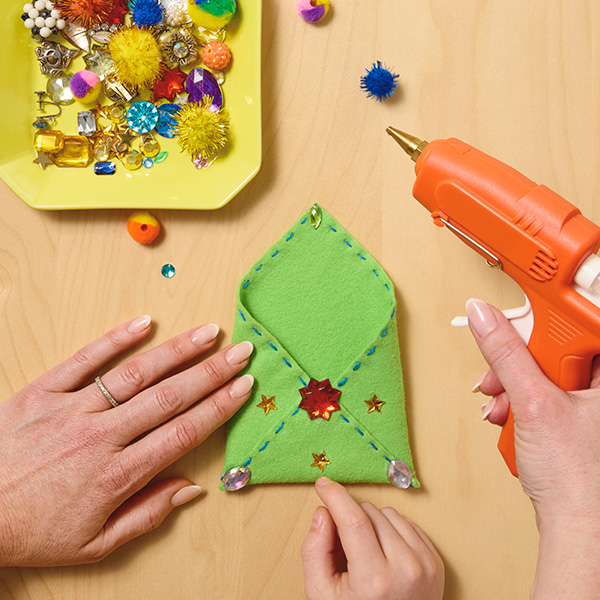
Step 4: Decorate! This is where the kiddo gets to shine. Have them pick out all the little embellishments they want to add. They pick out where they want the embellishments to go, you add the glue dots. Have them carefully press the embellishments on—remind them, the glue is hot!
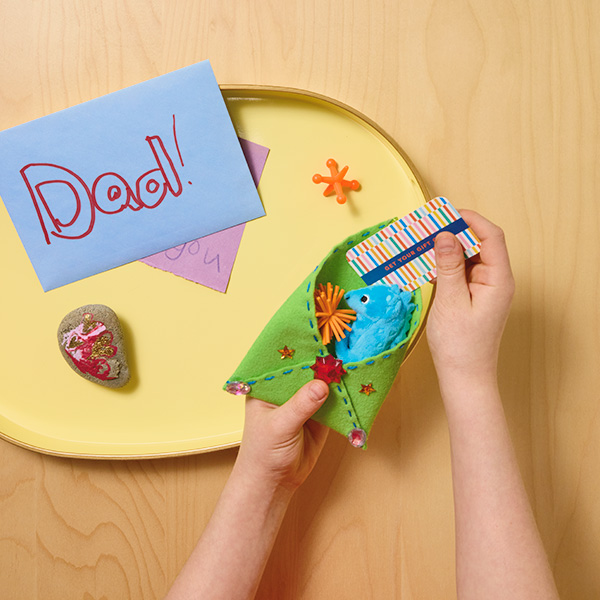
Step 5: Add gifts. Let your little add whatever gifts they want! They could be toys, fun things they’ve found, a special note they’ve written or gifts you’ve helped them purchase. Then let them give their gift envelope to Mom or Dad on the big day.
Craft #2: Melted Crayon Suncatchers
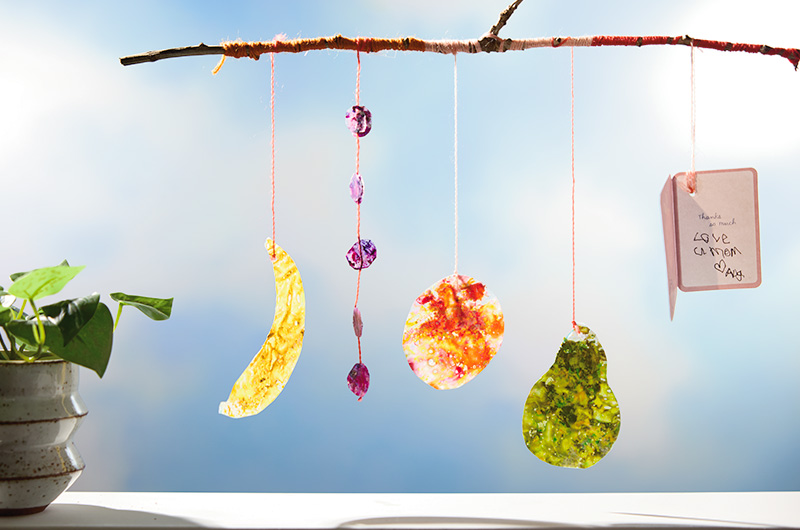
If you’ve got a kid, you’ve probably got more than a few crayons laying around. And a lot of them are probably broken. But that’s actually perfect for this colorful craft idea! 🌈
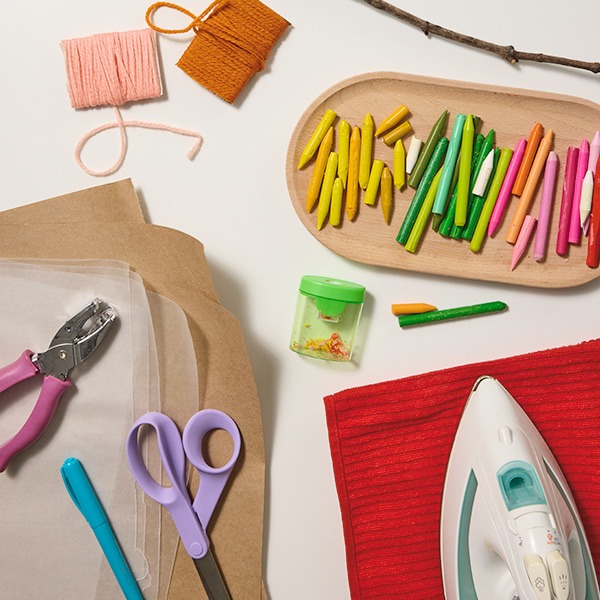
You’ll need:
• Crayons in different colors
• A pencil sharpener (to make crayon shavings)
• Wax paper
• Kraft paper
• Scissors
• Hole punch
• Marker
• Clothing iron
• Dish towel
• Sturdy stick or small branch
• String or craft cording
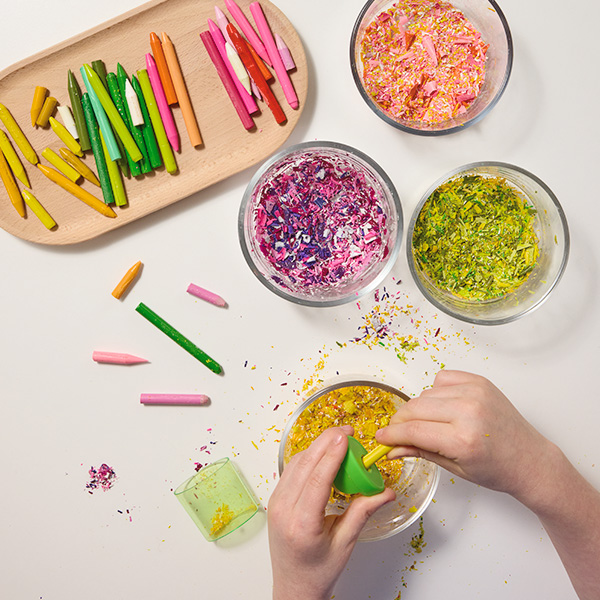
Step 1: Make crayon shavings. Take the receptacle off the bottom of the pencil sharpener and let the shavings fall into a bowl. We used different colors in the same color palette to create an ombre effect with the shavings, but you can use your kiddo’s or Mom’s and Dad’s favorite colors, too. We suggest having a 4-5 tablespoons total of crayon shavings. Definitely something you can do together…it’ll go much faster!
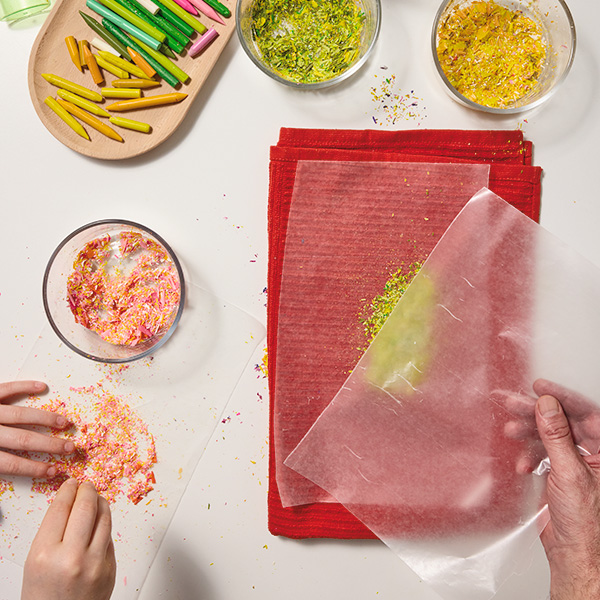
Step 2: Start making your suncatchers. Lay a folded dish towel onto a hard, flat surface, ideally a kitchen counter. (The dish towel is needed to protect the surface from the heat of your clothing iron.) Place a piece of wax paper on top of the dish towel. Have your kiddo sprinkle the crayon shavings in the colors they choose on top of the wax paper. Help them spread the shavings out in an even layer.
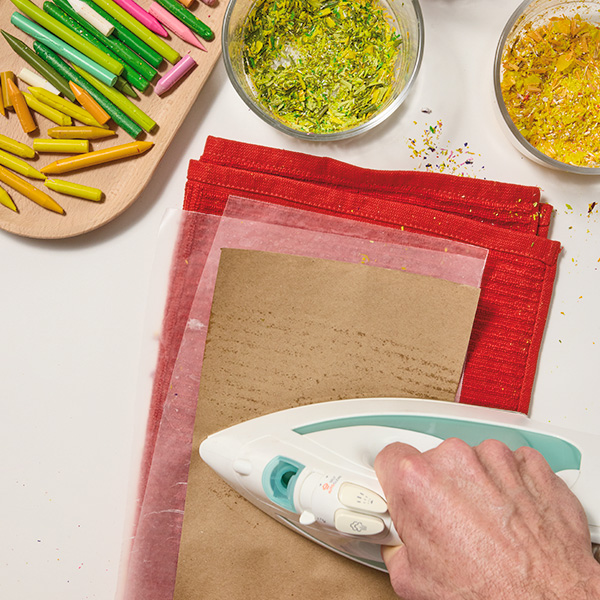
Step 3: Melt your crayon shavings. Plug in your clothing iron and set it on medium-low. While you’re letting it warm up, place another piece of wax paper on top of the crayon shavings, then a piece of craft paper. Once the clothing iron is hot, apply it to the kraft paper and smooth it around until the crayon shavings are melted.
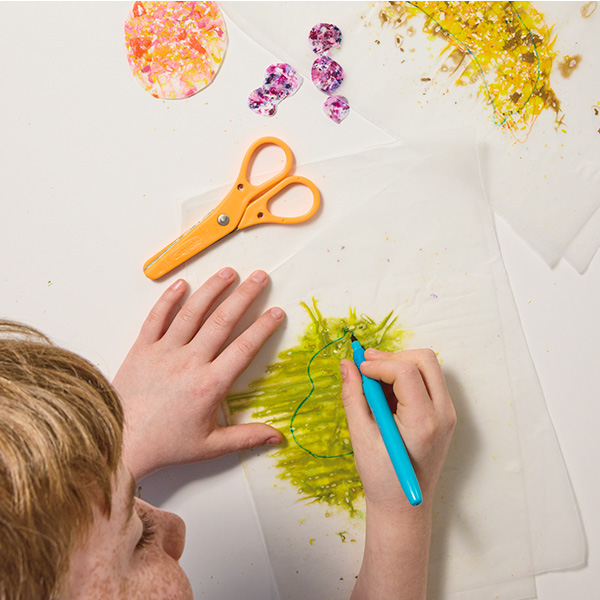
Step 4: Create some fun shapes. Leaving the layers of wax paper stuck to one another, remove them from the towel and let them cool until the wax has rehardened. (This should only take a few minutes.) After it’s hardened, help your kiddo use a marker to draw some shapes on the wax paper where you’ve melted the crayon shavings. Simple shapes like stars, moons, hearts, diamonds and circles work great. We used fruit shapes for ours!
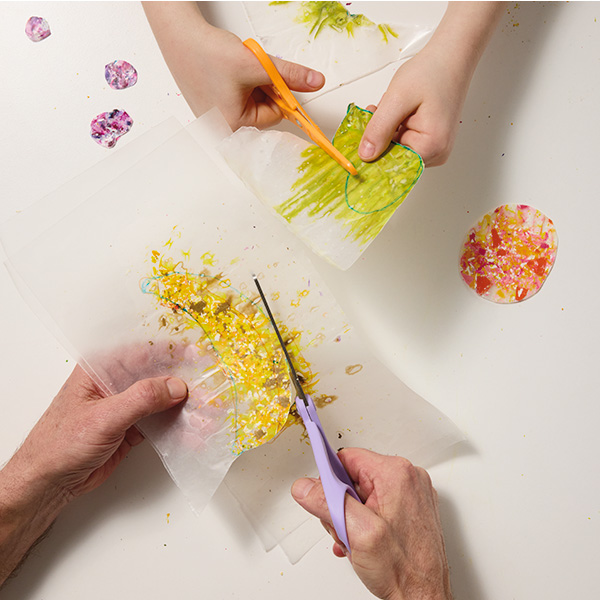
Step 5: Cut out your shapes. Using a pair of scissors, have your child cut out the shapes they drew in the last step, using the marker lines as guides. Now you have cool little suncatchers!
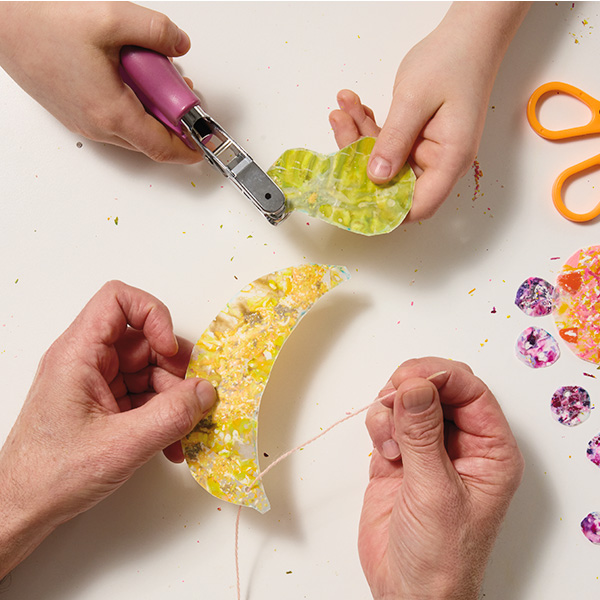
Step 6: Add string. Punch a hole near the top of each suncatcher. Then peel off just ONE side of the wax paper, leaving the other side attached to the melted crayon shavings. (This will help hold everything together.) Cut different lengths of string and tie them to the suncatchers using the holes you punched.
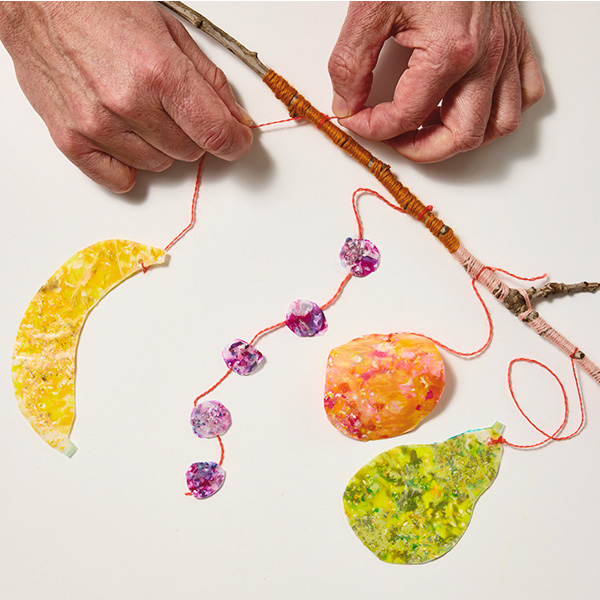
Step 7: Attach your suncatchers to the hanger. Tie your wax suncatchers to the stick you’ll use to hang them up. They look best hanging in a window, where they can do their job of catching the sunlight. ☀️
Craft #3: Handprint Photo Frame Magnet
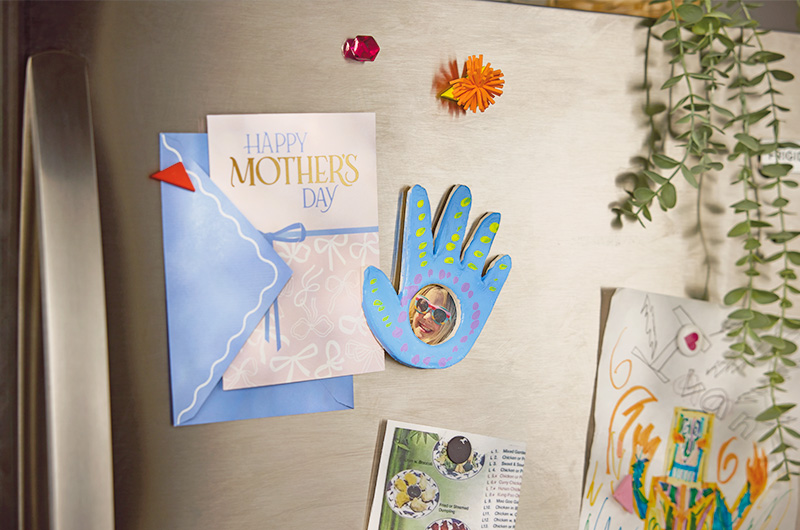
Is there anything more precious than a child’s chubby little hands? Okay, yes…tiny toes and baby cheeks and the little curls in their hair. But handprints are the easiest to capture in craft form. 😂
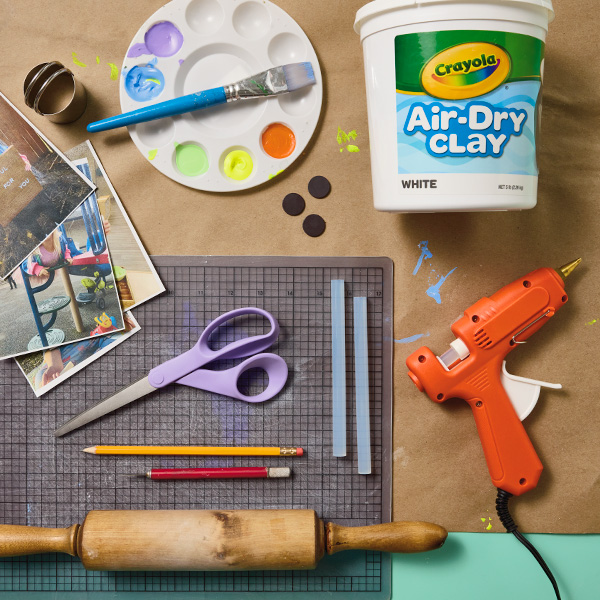
You’ll need:
• Air-dry modeling clay
• Acrylic craft paint
• Paint brush
• Crafting mat
• Scissors
• Rolling pin
• Pencil
• Crafting knife
• Hot glue
• Cookie or biscuit cutter (1″ to 1 1/2″ diameter)
• Magnet dots
• Copy of a fave photo
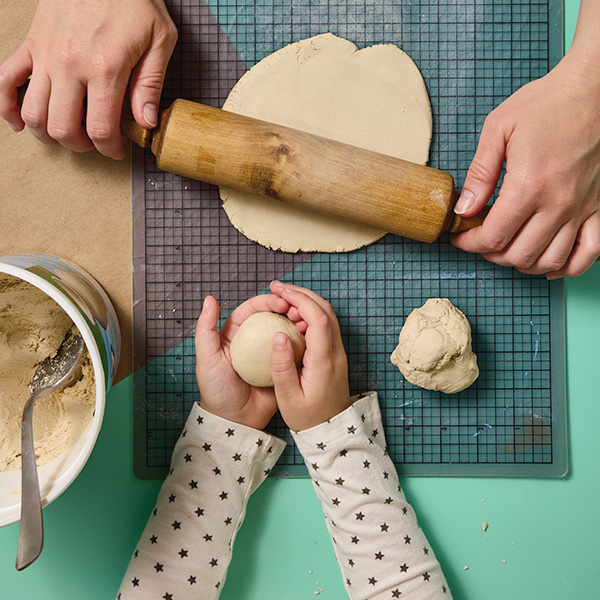
Step 1: Roll out your clay. Help your little use the rolling pin to roll the air-dry clay out on a crafting mat. The clay should be rolled out to about 1/4″ thick and be large enough for your child to fit their hand on, with their fingers spread wide.
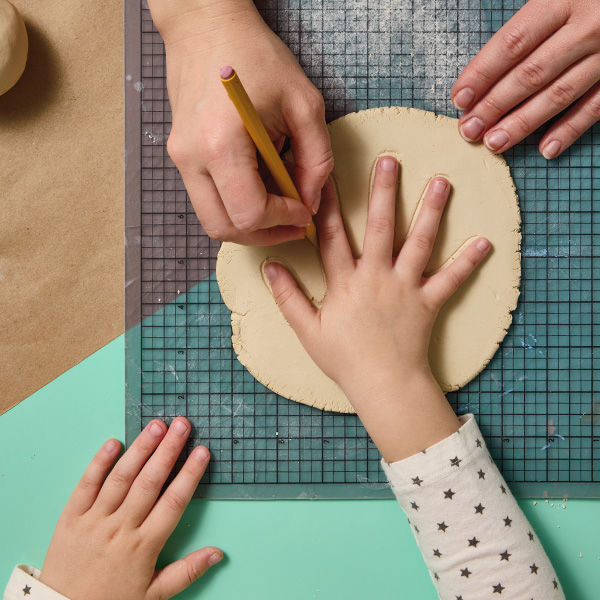
Step 2: Trace your child’s hand. Using a pencil, trace around your child’s hand. Then use a craft knife to cut away the excess clay. (Definitely a grown-up task.)
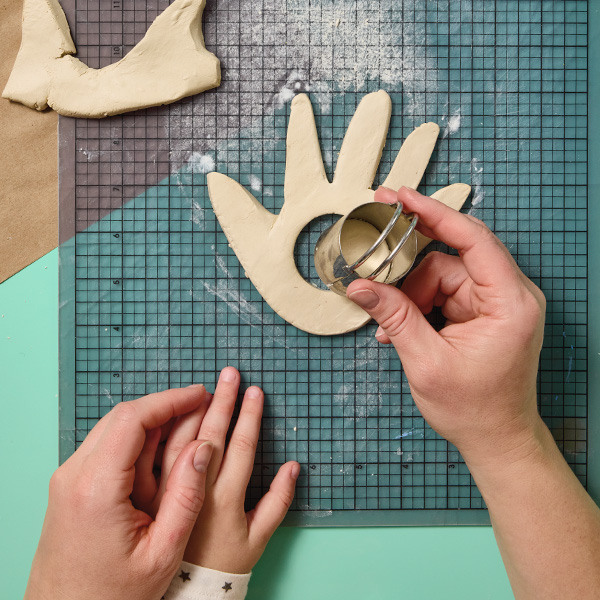
Step 3: Cut out the space for the photo. Help your kiddo press the cookie or biscuit cutter into the center of the hand cutout. This is where your photo will go! Let the clay dry overnight.
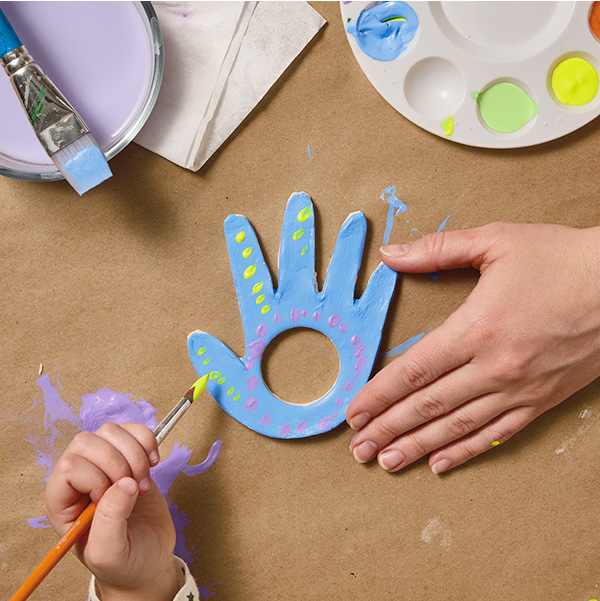
Step 4: Paint the frame. Once the clay handprint frame is dry, help your kiddo paint it with whatever colors and designs they like. Allow the paint to dry for at least an hour.
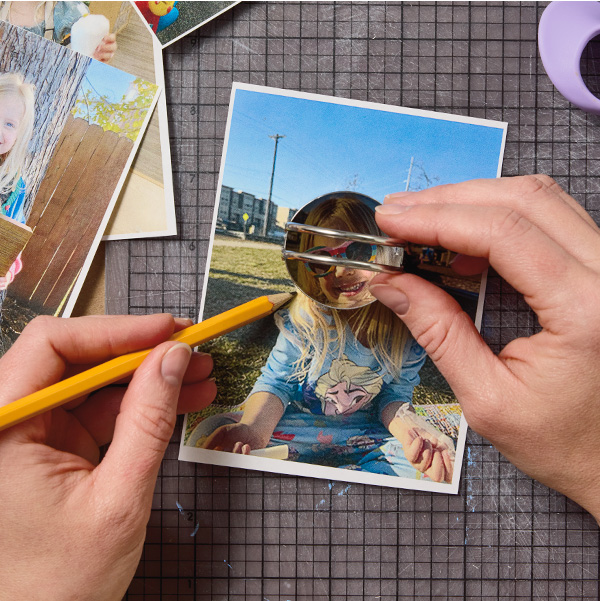
Step 5: Trace your photo. Use a slightly larger cookie or biscuit cutter than you used in step 3 to trace a cutting guide on a favorite photo to go in the handprint frame. It needs to be a little bit bigger so you have room to glue it onto the back!
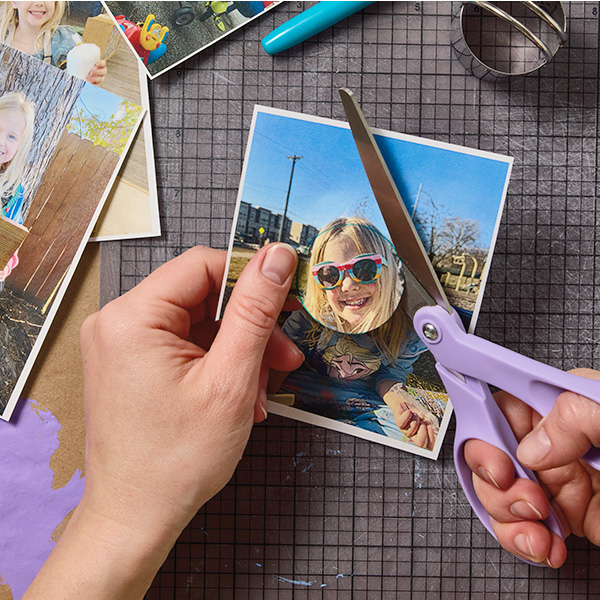
Step 6: Cut out your photo. Use scissors to carefully cut out your photo. It’s okay if it’s not perfectly round…the frame will hide any uneven parts.
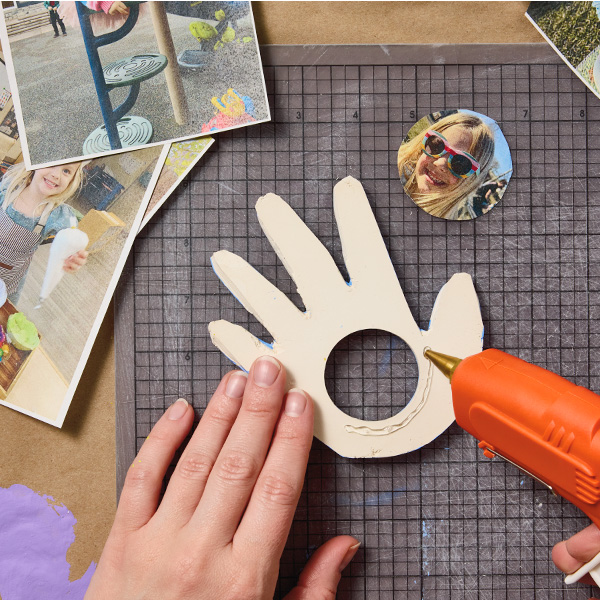
Step 7: Glue your photo onto the back of the frame. Add a thin line of hot glue to the back of the handprint frame, around the hole you cut out. Then gently press the photo onto it. (The back of the photo should be facing up, toward you.)
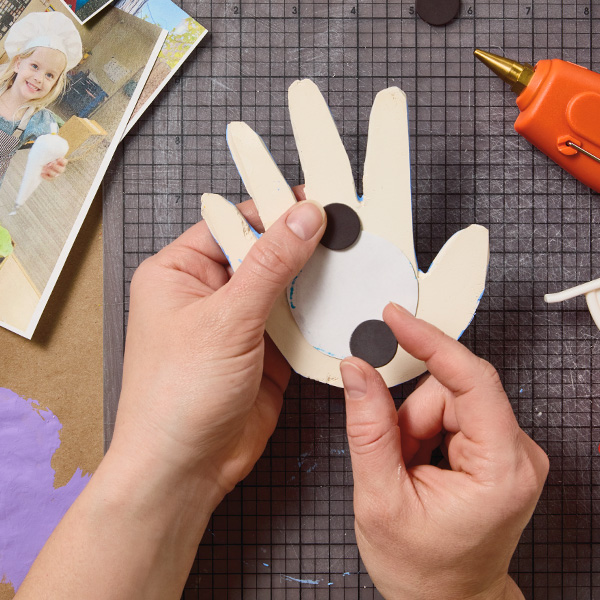
Step 7: Add the magnets. Place a bead of hot glue at the top of the photo and one at the bottom. Then have your little gently press the magnet buttons onto the glue. Let the glue cool.
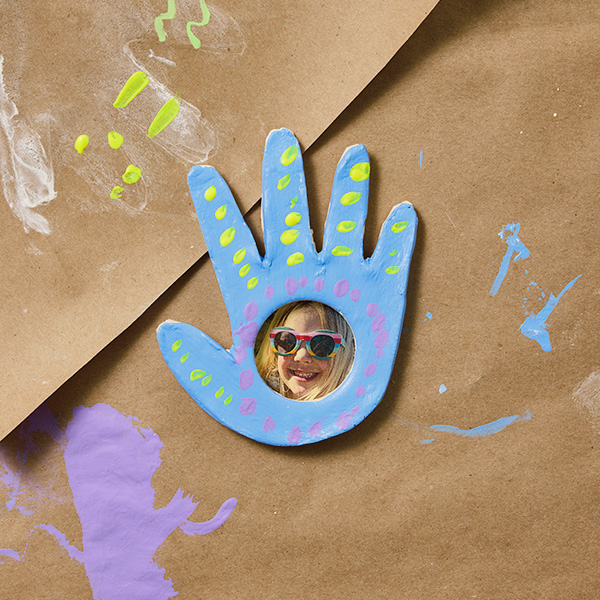
Step 8: Ta-da! All done. Now you have a photo frame that captures their sweet little hand. And since it’s magnetized, Mom or Dad can put it about anywhere! On a fridge, a file cabinet, a tool chest…anywhere they want to be reminded of that little light in their life.
We hope you have SO much fun bringing these crafts to life with your kids this Mother’s Day and Father’s Day! Who knows…creating something together might become a yearly tradition! 😊
Want some more kid-friendly Mother’s Day and Father’s Day ideas? We’ve got ’em!:
- DIY gift for Mom: block print tea towels and bandanas
- 9 DIY memory box ideas to keep special days close at heart
- How to make an indoor picnic for Mom this Mother’s Day
- 14 DIY Father’s Day gift basket ideas to make Dad’s day
- Free, printable Mother’s Day coloring pages to make Mom’s heart melt
- Free, printable Father’s Day coloring pages for Dad’s #1 fans
Shop Mother's Day
See allYou may also like
See more-
Calendar Flip Woo-Hoo—summer’s here! June 2027 holidays and celebrations
Summer is here in all her glory and we are ready. Warm days and cool drinks lay ahead. So it’s time to flip the ca...
-

Calendar Flip Spring Forward: March 2027 Holidays and Observances
Color us excited! From the wearin’ of the green and more sunny fun to colorful Holi festivals and celebrating crayons...
-
Calendar Flip Yay for May! May 2027 holidays and celebrations
Flowers are blooming, students are graduating and moms are getting some well-deserved appreciation. What a fabulou...
-

Calendar Flip Hello, Love: February 2027 Holidays and Observances
Let’s warm up this cold month with love and connections. From valentine cards to dressing up your pet, this month has...
-
Calendar Flip Welcome a New Year: January 2027 Holidays and Observances
HAPPY NEW YEAR! If that hurt your head, you might have celebrated a little too much. When you’re feeling better, we h...
-
Calendar Flip Welcome back, spring! April 2027 holidays and celebrations
Oh, spring, we’ve missed you most of all. We don’t even care that you bring showers—we’re just excited to be outsi...
-

Mahogany There’s nothing like an HBCU homecoming
There are homecomings, and then there are HBCU homecomings. If you have ever experienced an HBCU homecoming, you unde...
-

DaySpring Room at the table
Every year, as Hispanic Heritage Month arrives, I find myself holding two things at once: celebration and grief. I ce...
-
Christmas Christmas village display ideas: Creative ways to make miniature magic
Peeking at warm glows in tiny windows, touching the intricate details on mini village structures and playing with the...
-
Christmas Stocking stuffer ideas for literally everyone on your list
The stocking stuffer struggle is real. By the time you’ve bought your main presents, you feel like you’re all out of ...
-

Keepsake Ornaments Snow much fun with these penguin pals! 🐧
Remember being a kid and trying to build a snow fort? These little penguins have accomplished your childhood dreams o...
-
Christmas All aboard the Santa Express for a happy holiday trip with the beloved Peanuts Gang!
This delightful tabletop decoration features Charlie Brown, Lucy, Linus and Sally each riding on festive, snow-covere...
-

DaySpring The epidemic of lost joy
Have you noticed that people have become unjoyful at an alarming rate? The lack of joy seems to be an epidemic in our...
-

Christmas 2026 Christmas Trends: the decorating, gifting and celebration trends shaping Christmas this year
I bought my first Christmas tree not long after I started writing for Hallmark. The rest, as they say, is holiday his...
-
Keepsake Ornaments Relive the most iconic dogfight in the galaxy 💫
Moments after escaping the Death Star space station aboard the Millennium Falcon, the band of Rebel heroes encountere...
-
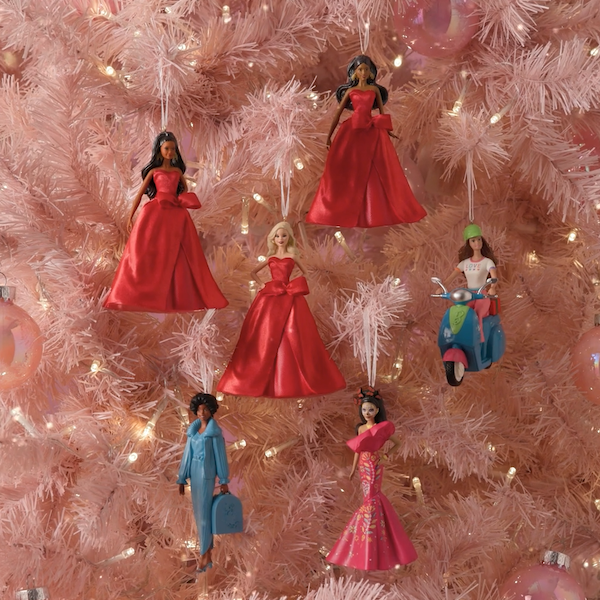
Keepsake Ornaments It’s the most fabulous time of the year! 🎀✨
She's elegant, she's adventurous, she's chic...when it comes to glitzing up your Christmas tree, is there anything be...
-
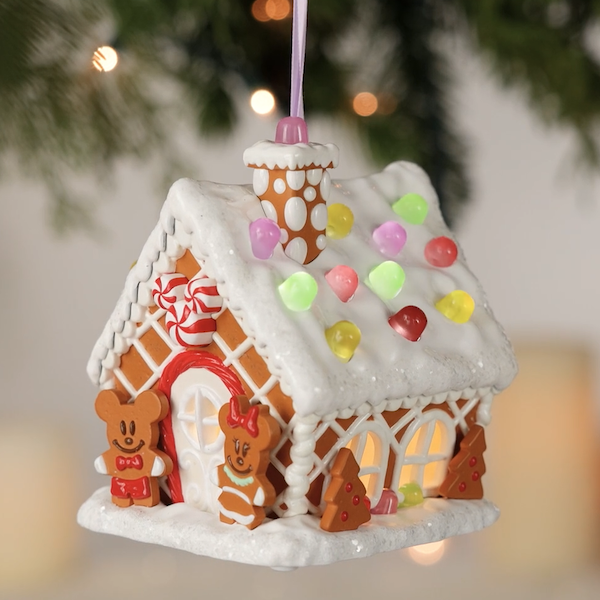
Keepsake Ornaments It’s official…this is the sweetest gingerbread house ever. 🍬
We know, there are a LOT of gingerbread houses out there. But this one might just top them all. The icing so shiny it...
-
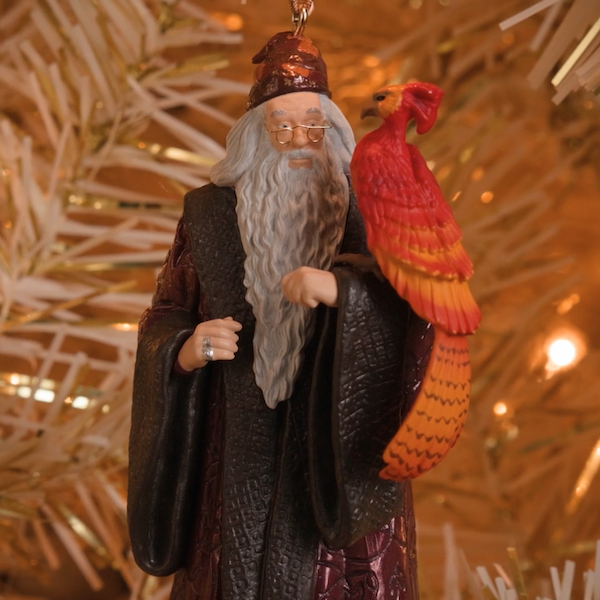
Keepsake Ornaments The final two ornaments in the collection are here! 🤩
The wait is over! The final ornaments in the Harry Potter and the Chamber of Secrets™ Collection are here! You can fi...
-
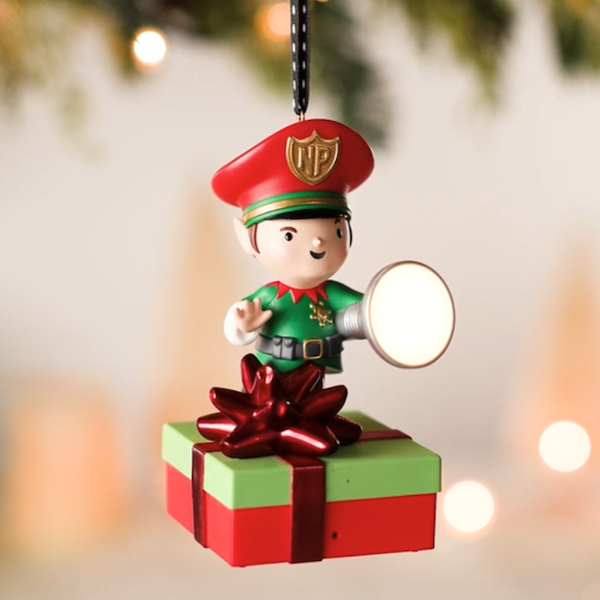
Keepsake Ornaments Busted! 🤭 The North Pole Peek Patrol is on the watch…
We all know the rules...no presents until Christmas. But a little peek won't hurt, right? Wrong! The Peek Patrol is h...
-

DaySpring When you don’t feel like it’s all good
When I start to worry, these familiar words often come to mind: “And we know that in all things God works for the goo...